Tuesday, August 29, 2017

Sizzix Maker's Challenge with Eileen Hull

Hello! All month long the Inspiration Team has been sharing unusual ways to use Eileen's Heartfelt Collection dies as well as taking part in the Sizzix Maker's Challenge for Eileen.

https://www.sizzix.com/makerchallenge17

You have only one day left (ACK!) to enter your own House Pocket project on the Maker Challenge Page. Eileen will announce the winner on Facebook Live Thursday, August 31st, so be sure to tune in. Not only does the winner get Eileen Hull's Heartfelt Journal die (which is currently sold out in a lot of places) but they also get a stash of felt from National Nonwovens!

I was inspired by Anne Redfern's darling little log cabin to make my own 3-D house project. I'm still a bit eclipse enamored so I wanted to make a souvenir decoration to commemorate the great event!

The moon is on a turning layer so you can make it "eclipse" the sun!

Totality!!! lol

I had a lot of fun with this make! The House/Pocket Die is a Thinlits die so it can't cut thick material like mat board. To create house parts that would be sturdy enough to make 3-D, I cut several thinner layers out of chipboard and adhered them together to form the front and back. Our house is grey with white trim so I chose my color scheme to match that. To make the siding, I sprayed Distress Wood Grain Cardstock with Hickory Smoke and cut it into "siding" strips. I glued those down (overlapping slightly) onto a piece of cardstock and then used the House die to cut it all out as my front layer.


I also cut out two of the multi-segmented Make It 3-D Die pieces out of matboard (it's a steel-rule die). (The Make It 3-D Die is very useful because it has three different shapes you can use to customize your other "flat" dies into dimensional projects. See HERE and HERE for some other projects I used this die for.) You can trim the 3-D segment pieces to fit your needs.

Trim to fit!

I glued one side down all around with a glue gun. I waited to glue the house front on until after I had installed all the wheel parts.


To pop up the background "sky" part, I cut a strip of foam core to fit into the peak of the roof and extend down into the house base. I glued the sky part onto that.


I made a washer out of a piece of foam core and a circle punched out of the same background paper. I used a blue brad as an axle to go through the moon layer, washer and poke into the foam core support underneath. I fixed it in place with a bit of glue, making sure that my moon layer didn't get glued so it would still turn.

After that, all I had to do was glue the front of the house on and then glue the whole thing onto the foam core base I had prepared.

Thanks for stopping by! Be sure to check out all the posts from the month on Eileen's blog – you'll be inspired!

Dies Used:
Sizzix:
House/Pocket
Make It 3-D
Grass
Stitchy Flowers
Layered Flower

Stamps Used:
Tim Holtz Halftone Halloween

Other Supplies Used:
Distress Ink - Hickory Smoke, Black Soot
Spray Distress Stain - Hickory Smoke
Archival Ink - Jet Black
Distress Wood Grain Cardstock
Tim Holtz Letterpress
Tim Holtz Mirrored Stars
Tim Holtz Memo Pin

Simon Says Stamp and Sizzix links in this post are affiliate links which do not affect the price you pay but allow me to earn a small percentage of a sale. Thanks! 

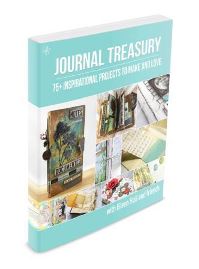
ALSO, the 31st is the last day you can order Eileen's new e-Book, Journal Treasury by Eileen Hull & Friends, for only $11.87. See this post of mine for all the book details. If you love journals, you won't want to miss it!


Journal Treasury
Click on the image to go to the order page!

Thursday, August 10, 2017

Journal Die Inspiration Galore!

It's finally here! It's the release of Eileen Hull's new e-book,
Journal Treasury by Eileen Hull & Friends!


Journal Treasury
Click on the image to go to the order page!

After many months of work, you can finally get your hands on this book full inspiration. (I have a few projects included!) If you like junk journals, planners, art journals, bullet journals, Traveler’s Notebooks or notebooks of any kind, you will love this book! In this ebook, you will find 85 inspirational projects from top notch industry designers. All have used her Sizzix Journal die to create their projects, yet every one is unique and special. This sought after die has proven exceptionally popular, and when you see the sheer variety of projects made with it you will see why.

Click on the book photo above to purchase the e-book! Scroll on for a book description and a new Journal project!

From Eileen:

What is in the book?

164 pages of mouth-watering inspiration! You will find tips, tricks and techniques for Journal assembly, supplies to gather, how to make inserts for the book and interesting embellishing ideas. As you look through the book, you may want additional details on a specific project. Just click on the highlighted designer’s name and it will take you to the designer’s blog post listing the supplies and techniques used to create it- so easy!  If you want to buy the die to make your own Journal, simply click on the highlighted links to order.

How does it work?

If you have never gotten an ebook before, it’s pretty amazing! Click on the link- it will bring you to a landing page where you can purchase the book through Paypal. Soon after you buy it, check the email account associated with your Paypal account. In the email is a link where you can download the book. Save it to your device and open it up. Get in your comfy chair, settle in with your favorite beverage and prepare to be inspired!


What does it cost?

For the month of August, the price is $11.87- that’s 30% off the regular price!

Who made all these projects?

Leading designers from all around the world were invited to add their magic touch to the Sizzix Journal. Check out the talented makers who have contributed to this treasury – visit their blogs to get to know them. They are truly inspirational and I am so lucky they agreed to share their work. We would not have a book if it weren’t for these amazingly gifted artists. (round of applause!)

Warning: these Journals are addicting. Seriously.

And once you have the die, you can make as many as you want! Use the examples in this book for inspiration and take it any direction you fancy.

In honor of Eileen's new book (and because I will need it very soon) I made a new Journal cover!

Front Cover

Back Cover
This is just the cover, I haven't added the elastic binding or any inserts yet. I'll fill it full of photos, eclipse ephemera, observations and other goodies after we experience the total eclipse in one week! (I'm so excited!!!! Praying for clear skies on the 21st!)

The base layer is Distress Inks and lots of stenciling…

I actually used regular Distress Inks instead of Oxides lol.

I added various diecuts to the front and back and some more stenciling with Paper Artsy Metallic Glaze. The Tim Holtz Globe die I cut out of heavy cardstock, lightly inked and then embossed with Emerald Creek Fractured Ice embossing powder. The underlying layer is inked with Distress Oxides. I used an embossing folder to stamp the gold stars, you can find a tutorial for that HERE.

Thanks for stopping by! I hope you check out Eileen's book. If you purchase it through my link above, I do receive a small commission which I will hoard and use to buy more craft supplies so you will have more eye candy. So do support my habit hobby please lol. 

Click on the book photo above to purchase the e-book!

I am also entering this journal into the Emerald Creek Dares challenge Anything Goes.

Dies Used: 
Sizzix:
Journal    (Sizzix / SSS)
Tree Line (Sizzix / SSS)
Inside Out (Sizzix / SSS)
Artful Arrows  (Sizzix / SSS)
Globe (Sizzix / SSS)
Stencils Used:
Tim Holtz – Numbered, Dot Fade, Rays, Chevron
StencilGirl – Sphere's Small
Wendy Vecchi – Sunburst
The Crafters Workshop – TCW274S
Other supplies:
Sizzles Matboard – (SSS / Sizzix)
Distress Ink – Chipped Sapphire, Faded Jeans, Blueprint
Distress Ink Oxides – Peeled Paint, Vintage Photo, Antique Linen, Broken China, Salty Ocean
Versamark ink
gold embossing powder
Emerald Creek Fractured Ice embossing powder

Simon Says Stamp and Sizzix links in this post are affiliate links which do not affect the price you pay but allow me to earn a small percentage of a sale. Thanks!

Monday, August 7, 2017

Vintage Trailer Pincushion


Hello! This month on her blog Eileen Hull is featuring unique ways to use her dies. The team is getting pretty creative for this one! Be sure to check out what they are doing all month long. For one of my projects, I converted the Trailer Box die into a pincushion.


Unfortunately all my step photos went AWOL, but this wasn't hard to do. I constructed my trailer normally but I cut the flat top section out before I assembled it. I cut a small rectangle of fabric a bit bigger than the opening in the top and hot glued it in place (from the inside). I padded it with a bit of batting and then filled the whole trailer with rice. The trailer doesn't normally have a bottom so I cut a piece of scrap matboard to fit and hot glued it in place to seal it all up.

Stay tuned for another unique die use project later in the month. In the meantime, be sure to check out what the rest of the Inspiration Team is up to. You won't be sorry! ;-)

Dies Used: 
Sizzix:
Other supplies:
Tim Holtz Sizzix embossing folder set – Harlequin & Stripes
Sizzles Matboard – (SSS / Sizzix)
Deco Sheets

Simon Says Stamp links in this post are affiliate links which do not affect the price you pay but allow me to earn a small percentage of a sale. Thanks!

Tuesday, August 1, 2017

Mixed Media Monthly - August Challenge!

https://mixedmediamc.blogspot.com/2017/08/mixed-media-monthly-challenge-39.html 


Hello, the summer is really zipping by. I can't believe it's already August! This month at the Mixed Media Monthly Challenge Blog we have an Inspiration Photo challenge going. Base your project off of the above photo and don't forget to tell us how it inspired you. Also, our sponsor this month is IndigoBlu! They make the most fabulous rubber stamps and they very generously sent some stamps to everyone on the Design Team to use for their August projects.

For my project, I played off of the colors in the challenge photo and also the theme of garden and architecture.


I had more fun with my Distress Oxide Inks and tried a water stamping technique on the front that Jennifer McGuire shared in a post on her blog.

Thanks for stopping by and be sure to check out our challenge post over at MMM! Join in and you could have a chance to win a $25 gift certificate to spend in the IndigoBlu online store.

Stamps Used:
IndigoBlu - Floral Fantasy, Country House

Other supplies:
Distress Oxide Inks


Simon Says Stamp links in this post are affiliate links which do not affect the price you pay but allow me to earn a small percentage of a sale. Thanks!