This month Eileen Hull's project theme is "Unconventional Materials". Her design Teams have been hard at work and stretching their creativity by using 'not so normal' supplies and her Sizzix dies to create some really cool makes! Check out her blog if you've missed any posts.
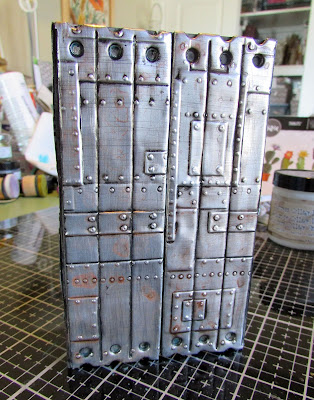
For me, this is Part 1 of my project – the cover. (You will have to tune in next week to see what the insides are!)
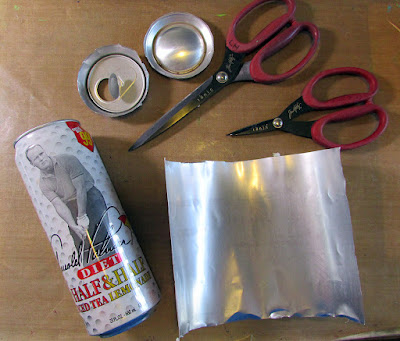
I used the Folio Journal for the cover and the metal is from embossed aluminum cans! My hubby very kindly drank several cans of Arnold Palmer Iced Tea for me so I could have some tall cans to cut up lol.
Detail of the closure:
So, what do you think will be inside? ;-) Guesses are welcome but in the meantime, let's see how I made the cover.
Step 1 – Preparing the aluminum to emboss
As I mentioned, I found some extra tall drink cans (about 7.5" tall) to cut up. This gave me a useable piece of metal that was about 6.25" tall, plenty of width to span the Folio cover which is 5.25" tall. I used sturdy scissors to cut away the top and bottom. Be careful, the edges can be a bit jaggedy and sharp. I trimmed them a little to smooth out the edges once I freed the main part of the can from the top and bottom.
Step 2 – Embossing the metal
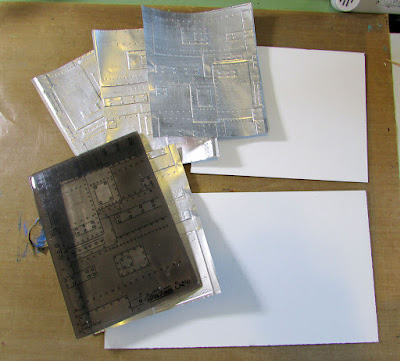
The Sizzix 3-D Foundry embossing folder worked beautifully to emboss the can material. I did have to cut my can metal into sections to emboss because the folder is a bit too long to run sideways through my Big Shot. It didn't quite fit! TIP: The inside of the can had a coating on it. I used a metal dish scrubbie to sand the metal before I embossed it so paint would better stick to it. It also added to the distressed look in its final form. Sandpaper or steel wool would work too I imagine.
In rough cutting the mat board for the cover bases, I knew I wasn't going to be using the Folio flaps so I didn't want to waste material. One piece I cut 7.5" long ('front') and the other 10" long ('back').
Step 3 – Gluing the embossed metal
I used a strong liquid tacky glue (Crafter's Pick - The Ultimate! is my favorite) to glue the pieces of embossed metal onto the mat board. I weighted them down with books and let them dry for a few hours before cutting the covers out with the Folio Die.
After I cut the covers out, I distressed them with Black Soot Distress Paint. I painted it on, let it dry for a few minutes and then wiped most of it off with a slightly damp paper towel. I love how the paint stays in the nooks and crannies.
Step 4 – Assembly
I wanted to make my book as wide as possible and have a smooth spine so I did not overlap any of the spine portions of the front and back covers. I butted the edges up and glued them to a separate piece of mat board I cut to place on the inside (3" x 5.25").
For the closure, I attached a Hitch Fastener to the side and added some eyelets in the overhanging flap. I ran a piece of elastic cord through the eyelets and tied it off so it made a loop to hook over the Hitch Fastener. Also, I later added a starfish charm I had in my stash that I had covered with Salvaged Patina Distress Glaze.
Thanks for stopping by! Next week will be Part 2 with the insides reveal! Be sure to keep an eye on Eileen's blog for some super inspiration.
aluminum cans
Distress Ink, Distress Oxide Ink - various colors
Distress Glaze - Salvaged Patina


Holy cow this is cool Lisa! I feel like I might be in an aquarium! How fun to emboss aluminum cans- love recycling them. Can't wait for next week :-)
ReplyDeleteWow! So fabulous and Steampunky. Can't wait to see the final reveal.
ReplyDeleteThis looks so wonderful already Lisa! Such a clever idea to use the porthole dome at the front to set the scene and adding the hitch fastener to the side for the closure makes it feel like it will be really secure. Looking forward to seeing what goes inside x
ReplyDelete