
All during the month of March Eileen Hull's design teams have been playing with using felt, fibers and fabric with her dies to create projects to inspire you! Here I am finally at the very end of March with my contribution. I used the Book Box Die to make a journal cover. The die cut easily through thick felt to form the base and I appliqued wool shapes to it.


So far this is only the cover so it's officially a work in progress. Hopefully the WIP doesn't become a UFO and I get it finished sooner rather than later!


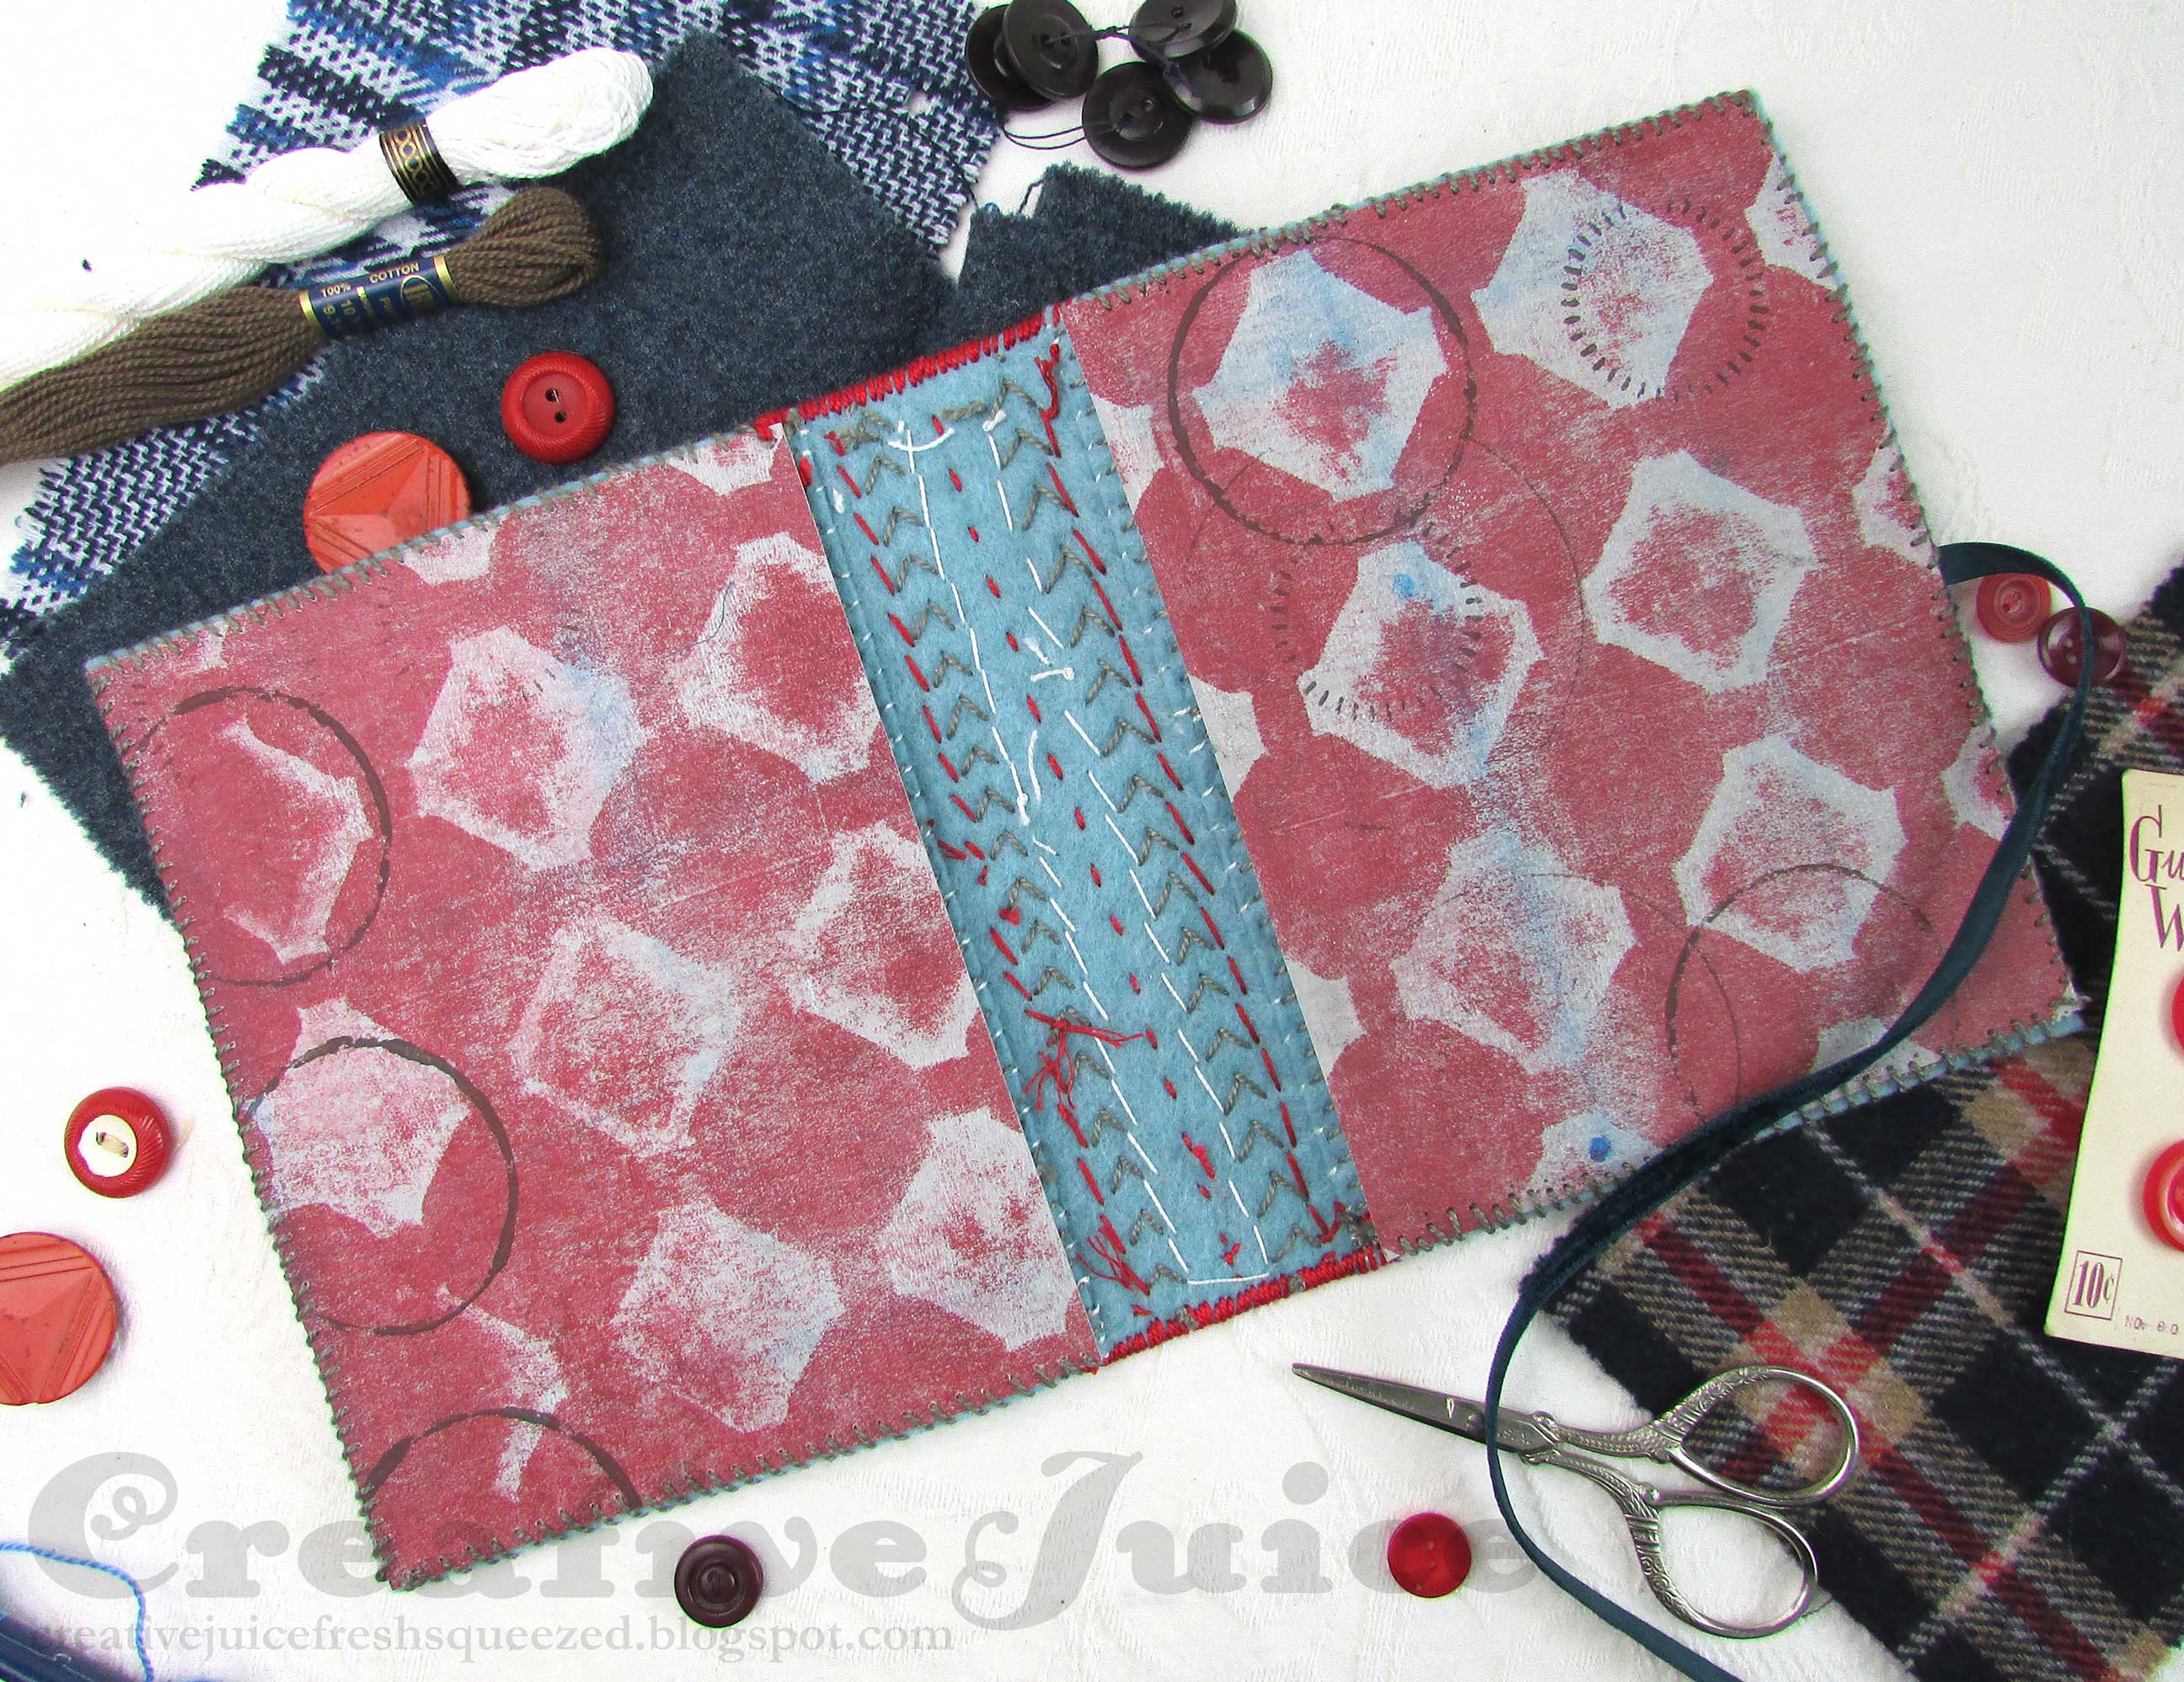
I lined the inside covers with grey Sizzix Texture Roll that I had printed on with my Gel Press.
When I make the insides I'll add a piece of mat board for the spine and bind the pages to it.
Let's take a look at some of the how-to…
Step 1 - I cut the base pieces out of a thick felt and played around with circle shapes until I was happy with the pattern. I also chose the wool plaid fabrics I thought would work together.

Step 2 - I ironed Pellon Fusible Featherweight Interfacing onto the backs of the wool fabric before I cut out the circle shapes. It helped to stabilize the fabric and keep the edges from fraying.

Step 3 - It's so much fun to pick fabrics. =)

Step 4 - I basted the sections in place to keep them all sorted and where they were supposed to be. Then the real fun began and got stitching!


After many long happy hours of embroidery I had completed the stitching and was ready to assemble the cover.
Step 6 - On the inside of the cover I whip stitched the edges of the spine piece to the front and back covers (there is about a quarter inch of overlap). This was to help reinforce the join and hold it in place while I sewed the "fancy" stitches from the front.

Step 7 - I stitched along the edges of the spine part with a blanket stitch for decoration and to further join the cover pieces together. The last step was to stitch the Texture Roll pieces into the inside covers. I whip stitched them into place which also finished off the edges nicely.

Thanks for stopping by! Hopefully I'll be back soonish with the interior done. ;-)
Supplies used:
Sizzix Die - Circle 3" Fraction 1/2 - retired
Sizzix Die - Circle 3" Fraction 1/4 - retired
Sizzix Surfacez Texture Roll, Grey
various wool plaid fabric scraps
vintage button
various embroidery floss/fibers
lightweight fusible interfacing
ribbon
Some links in this post are affiliate links which do not affect the price you pay but allow me to earn a small percentage of a sale. Thanks! (My husband also thanks you!)
Just amazing . You have outdone yourself my friend...
ReplyDelete