Hello Funkie Junkie fans! Our latest theme is "By the Numbers" so the task is to include numbers (and more than one) into our projects. It was fun to pull out my various numerical stencils, die sets and stamps to play around.
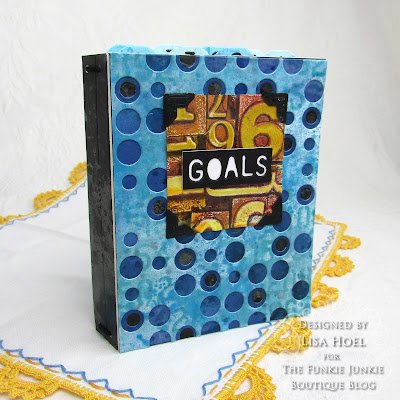
I used Eileen Hull's Scoreboards Skinny Mini Book Box Die along with the new Tim Holtz Layered Dots Die Set to create a mini "Goals" journal with numbered tabs inside for recording your various goals. Numbers everywhere lol! For the last challenge I also used the Skinny Mini Book Box Die and made it up in its box form. For this project I just used it to make a journal cover. As you can see, it's a versatile die you can use several different ways! (instructions below)
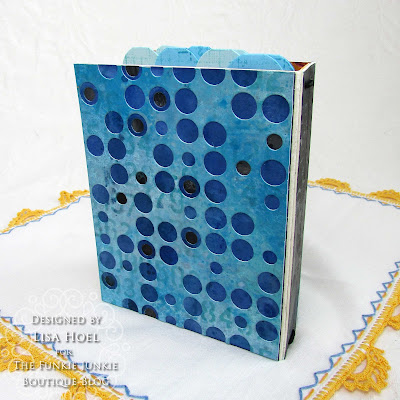
I added Layered Dots panels to the back too:
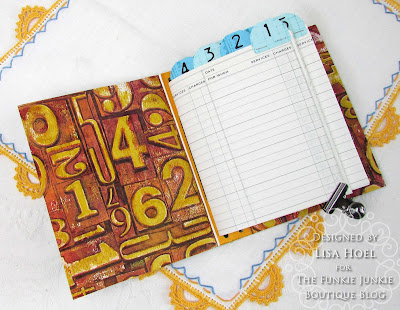
On the cover and inside I included embossed panels created with the 'Numbered' 3-D Texture Fade Folder.
I cut up an old appointment book to make the pages and added tabs cut with the Library Pocket, ATC Card & Tabs Die Set.
Here is how it came together…
Step 1 - I had so much fun playing with Distress Paint for the last challenge that I used it again for my backgrounds to die cut. Such great colors!
 |
| I added a mist of Winter Frost Mica Stain to this page to give it some glam! |
 |
| Mat board base that I cut the covers from. |
Step 2 - For the embossed parts, I also started off with a "painty" background.
One of my favorite techniques to use with the 3-D folders is to ink the front side with Archival Ink so the ink is transferred into the nooks and crannies when you emboss the paper. It really helps make the texture pop!
I used a brayer to add white and Mustard Seed paint to the high points of the embossed paper. After the paint was dry, I lightly rubbed the high spots with an embossing ink pad and then embossed it with Fossilized Amber Distress Glaze.
Step 3 - Assembling the journal cover: The Layered Dots Die cut panels that were the perfect width for the Skinny Mini Book Box Die cover. (Love it when stuff like that happens.) I cut the cover's height down to match the height of the Layered Dots panel. I also cut one section of the cover spine off to make a thinner journal.
TIP: If you want to reduce the bulk in your journal spine, peel off the top layer of the matboard that is getting glued behind the front cover spine section.
You can use strong dry adhesive (like red line tape) or wet adhesive to glue your journal covers together. I usually use wet adhesive. Distress Collage Medium works well.
Thanks for stopping by. Keep an eye on the Funkie Junkie Boutique Blog, Inspiration Ave. because you are now getting regular doses of expanded (and inspiring) content each week. Don't miss it…
Supplies used:
Eileen Hull Scoreboards Skinny Mini Book Box Die
Eileen Hull Die Set - Library Pocket, ATC Card & Tabs
Tim Holtz Thinlits Die Set - Layered Dots
Tim Holtz Thinlits Die Set - Alphanumeric Label
Tim Holtz 3-D Texture Fades - Numbered
Tim Holtz Stamp Set - Glitch 1
Tim Holtz Layering Stencil - Digits
Distress Paint - Wild Honey, Spiced Marmalade, Mustard Seed, Black Soot, Hickory Smoke, Unchared Mariner, Peacock Feathers, Speckled Egg, Mermaid Lagoon, Prize Ribbon, Chipped Sapphire
Distress Mica Stain - Winter Frost
Distress Glaze - Fossilized Amber
Ranger Embossing Pad
Ranger Distress Heavystock - White
Sizzix Mat Board


No comments:
Post a Comment
Thank you so much for leaving a comment. I appreciate it!