Showing posts with label Geometric Box Die. Show all posts

Tuesday, November 8, 2022

Funkie Junkie Focus - Tim Holtz Christmas Distress

Hello friends! If you are into making for the holiday season, it is definitely time to think about Christmas crafting! I know for me personally, if I wait until December there is no way I can have all my creative plans come to fruition. So let's get going! 

Our Funkie Junkie product focus this time around is on Tim Holt'z Seasonal Distress release from Ranger. Mica Stains, Crayons, Snowfall Grit Paste and the Grey Woodgrain Cardstock make for some stellar creative playtime!


I decided to use Eileen Hull's new Geometric Box Die to create some Christmas treat gift boxes in two different color ways. 

Lisa Hoel for The Funkie Junkie Blog - Christmas treat boxes #creativejuicefreshsqueezed #eileenhull #tim_holtz #sizzix #mysizzixstory #mymakingstory #thefunkiejunkie #thefunkiejunkieboutique #frillyandfunkie

I thought the triangular panels of the box sides would be perfect for showcasing different Distress techniques and colors.

Lisa Hoel for The Funkie Junkie Blog - Christmas treat boxes #creativejuicefreshsqueezed #eileenhull #tim_holtz #sizzix #mysizzixstory #mymakingstory #thefunkiejunkie #thefunkiejunkieboutique #frillyandfunkie

In my personal decorating I don't do much with pink/pastel type color combinations but I do appreciate the retro palette! The Holiday Mica Spray Set #4 that contains Merrymint, Cocktail Party and Shiny Bauble is perfect for it. (More details on techniques below, scroll on…)

Lisa Hoel for The Funkie Junkie Blog - Christmas treat boxes #creativejuicefreshsqueezed #eileenhull #tim_holtz #sizzix #mysizzixstory #mymakingstory #thefunkiejunkie #thefunkiejunkieboutique #frillyandfunkie

Here is the more "woodsy" traditionally colored box. The lid lifts off to reveal whatever treats you decide to pack inside:

Lisa Hoel for The Funkie Junkie Blog - Christmas treat boxes #creativejuicefreshsqueezed #eileenhull #tim_holtz #sizzix #mysizzixstory #mymakingstory #thefunkiejunkie #thefunkiejunkieboutique #frillyandfunkie

Let's take a look at some of the how to! (If you missed Tim Holtz's live where he discusses the 2022 Seasonal Distress release and shares demos, check it out. SO much good info.)

1) I started out playing with the new Pine Branches 3D Embossing Folder, trying different papers and color combinations.


The pearlescent Crayons are perfect for blending over the embossed areas. I just colored directly onto the paper and then blended with my finger.

I ended up going with the green cardstock with Fresh Balsam Crayon.

2) Next I moved on to various pastes and sprays.

Transparent Texture Paste on Distress Watercolor Paper.

Love it!

Texture Paste Opaque (Holiday Knit Stencil) and Crackle Paste Opaque (Festive Stencil)

The Tart Cranberry Mica Stain adds a wonderful glimmer!


3) The Mica Stains are perfect for coloring the Woodland Trees too! Next time I spray trees, I need to remember to wrap tape around the wooden base. The Distress sprays react with the Snowfall Grit Paste. oops!


4) Geometric Box assembly! I cut the base pieces out of white mat board.


I cut triangles out of my Distress papers to fit onto the sides of the boxes.


I added Rock Candy Glitter to the stars. Nice sparkle!


5) I made some little houses for the lids using the Paper Village 2 Die Set. For the pink house, I cut it out of the Holiday Gray Woodgrain Cardstock and tinted with the Cocktail Party Crayon.


6) I glued the trees and houses onto the box tops and then added some Snowfall Grit Paste snow all around it and on the house roofs.


For a final touch, while the paste was wet I added some Rock Candy Glitter using a Glitter Duster. Extra sparkle is good!


Thanks for reading and keep an eye on the Funkie Junkie Inspiration Ave blog for loads of eye candy and techniques!


Tuesday, October 25, 2022

Eileen Hull Sizzix Chapter 4 Release - Halloween Geometric Box Tutorial!

Hello Eileen Hull fans! Did you catch the Sizzix Chapter 4 Release Party at the beginning of the month? We also had a blog hop full of inspirational makes from the Teams! The designers have been sharing tutorials for their projects throughout the month and today it's my turn. 

Lisa Hoel for Eileen Hull - Sizzix 2022 Chapter 4 Release! Tutorial time! #creativejuicefreshsqueezed #EileenHull  #eileenhulldesigns  #sizzix #mymakingstory #TeamEileen #mysizzixstory

Lisa Hoel for Eileen Hull - Sizzix 2022 Chapter 4 Release! Tutorial time! #creativejuicefreshsqueezed #EileenHull  #eileenhulldesigns  #sizzix #mymakingstory #TeamEileen #mysizzixstory

First a reminder of this awesome new release from Eileen:


Chapter 4 Tutorial Time…

My first project uses the Geometric Box and Sunflower Dies. I went with a Halloween theme (hey, it's October!) Let's see how it came together.

Lisa Hoel for Eileen Hull - Sizzix 2022 Chapter 4 Release! Tutorial time! #creativejuicefreshsqueezed #EileenHull  #eileenhulldesigns  #sizzix #mymakingstory #TeamEileen #mysizzixstory

Lisa Hoel for Eileen Hull - Sizzix 2022 Chapter 4 Release! Tutorial time! #creativejuicefreshsqueezed #EileenHull  #eileenhulldesigns  #sizzix #mymakingstory #TeamEileen #mysizzixstory

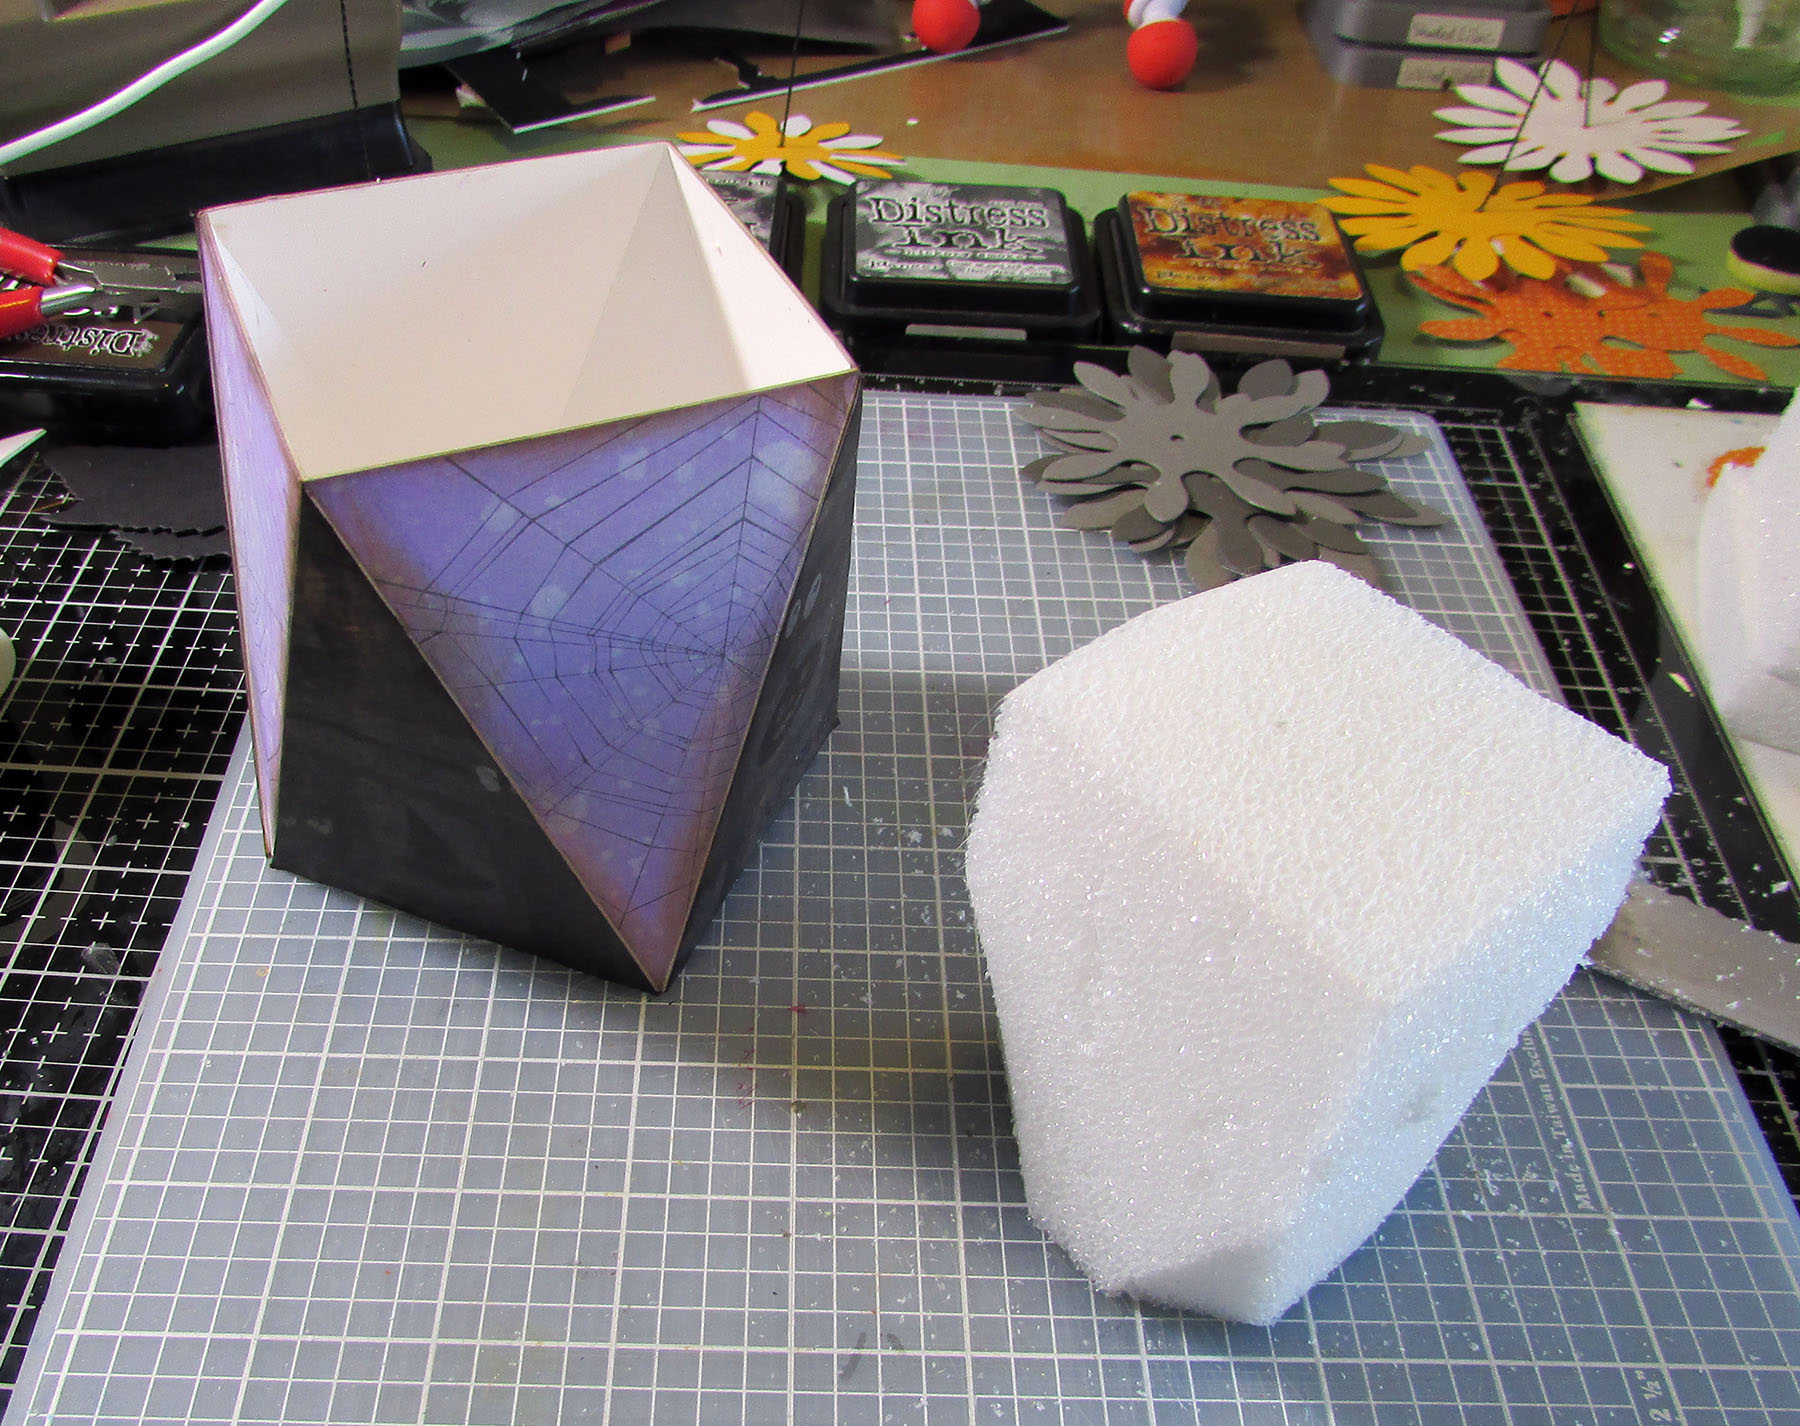
Step 1 – I cut all the pieces out of Sizzix mat board. (I ended up not using top triangle pieces.) I really like how the Sizzix brand takes various inks and media - it has a great surface.


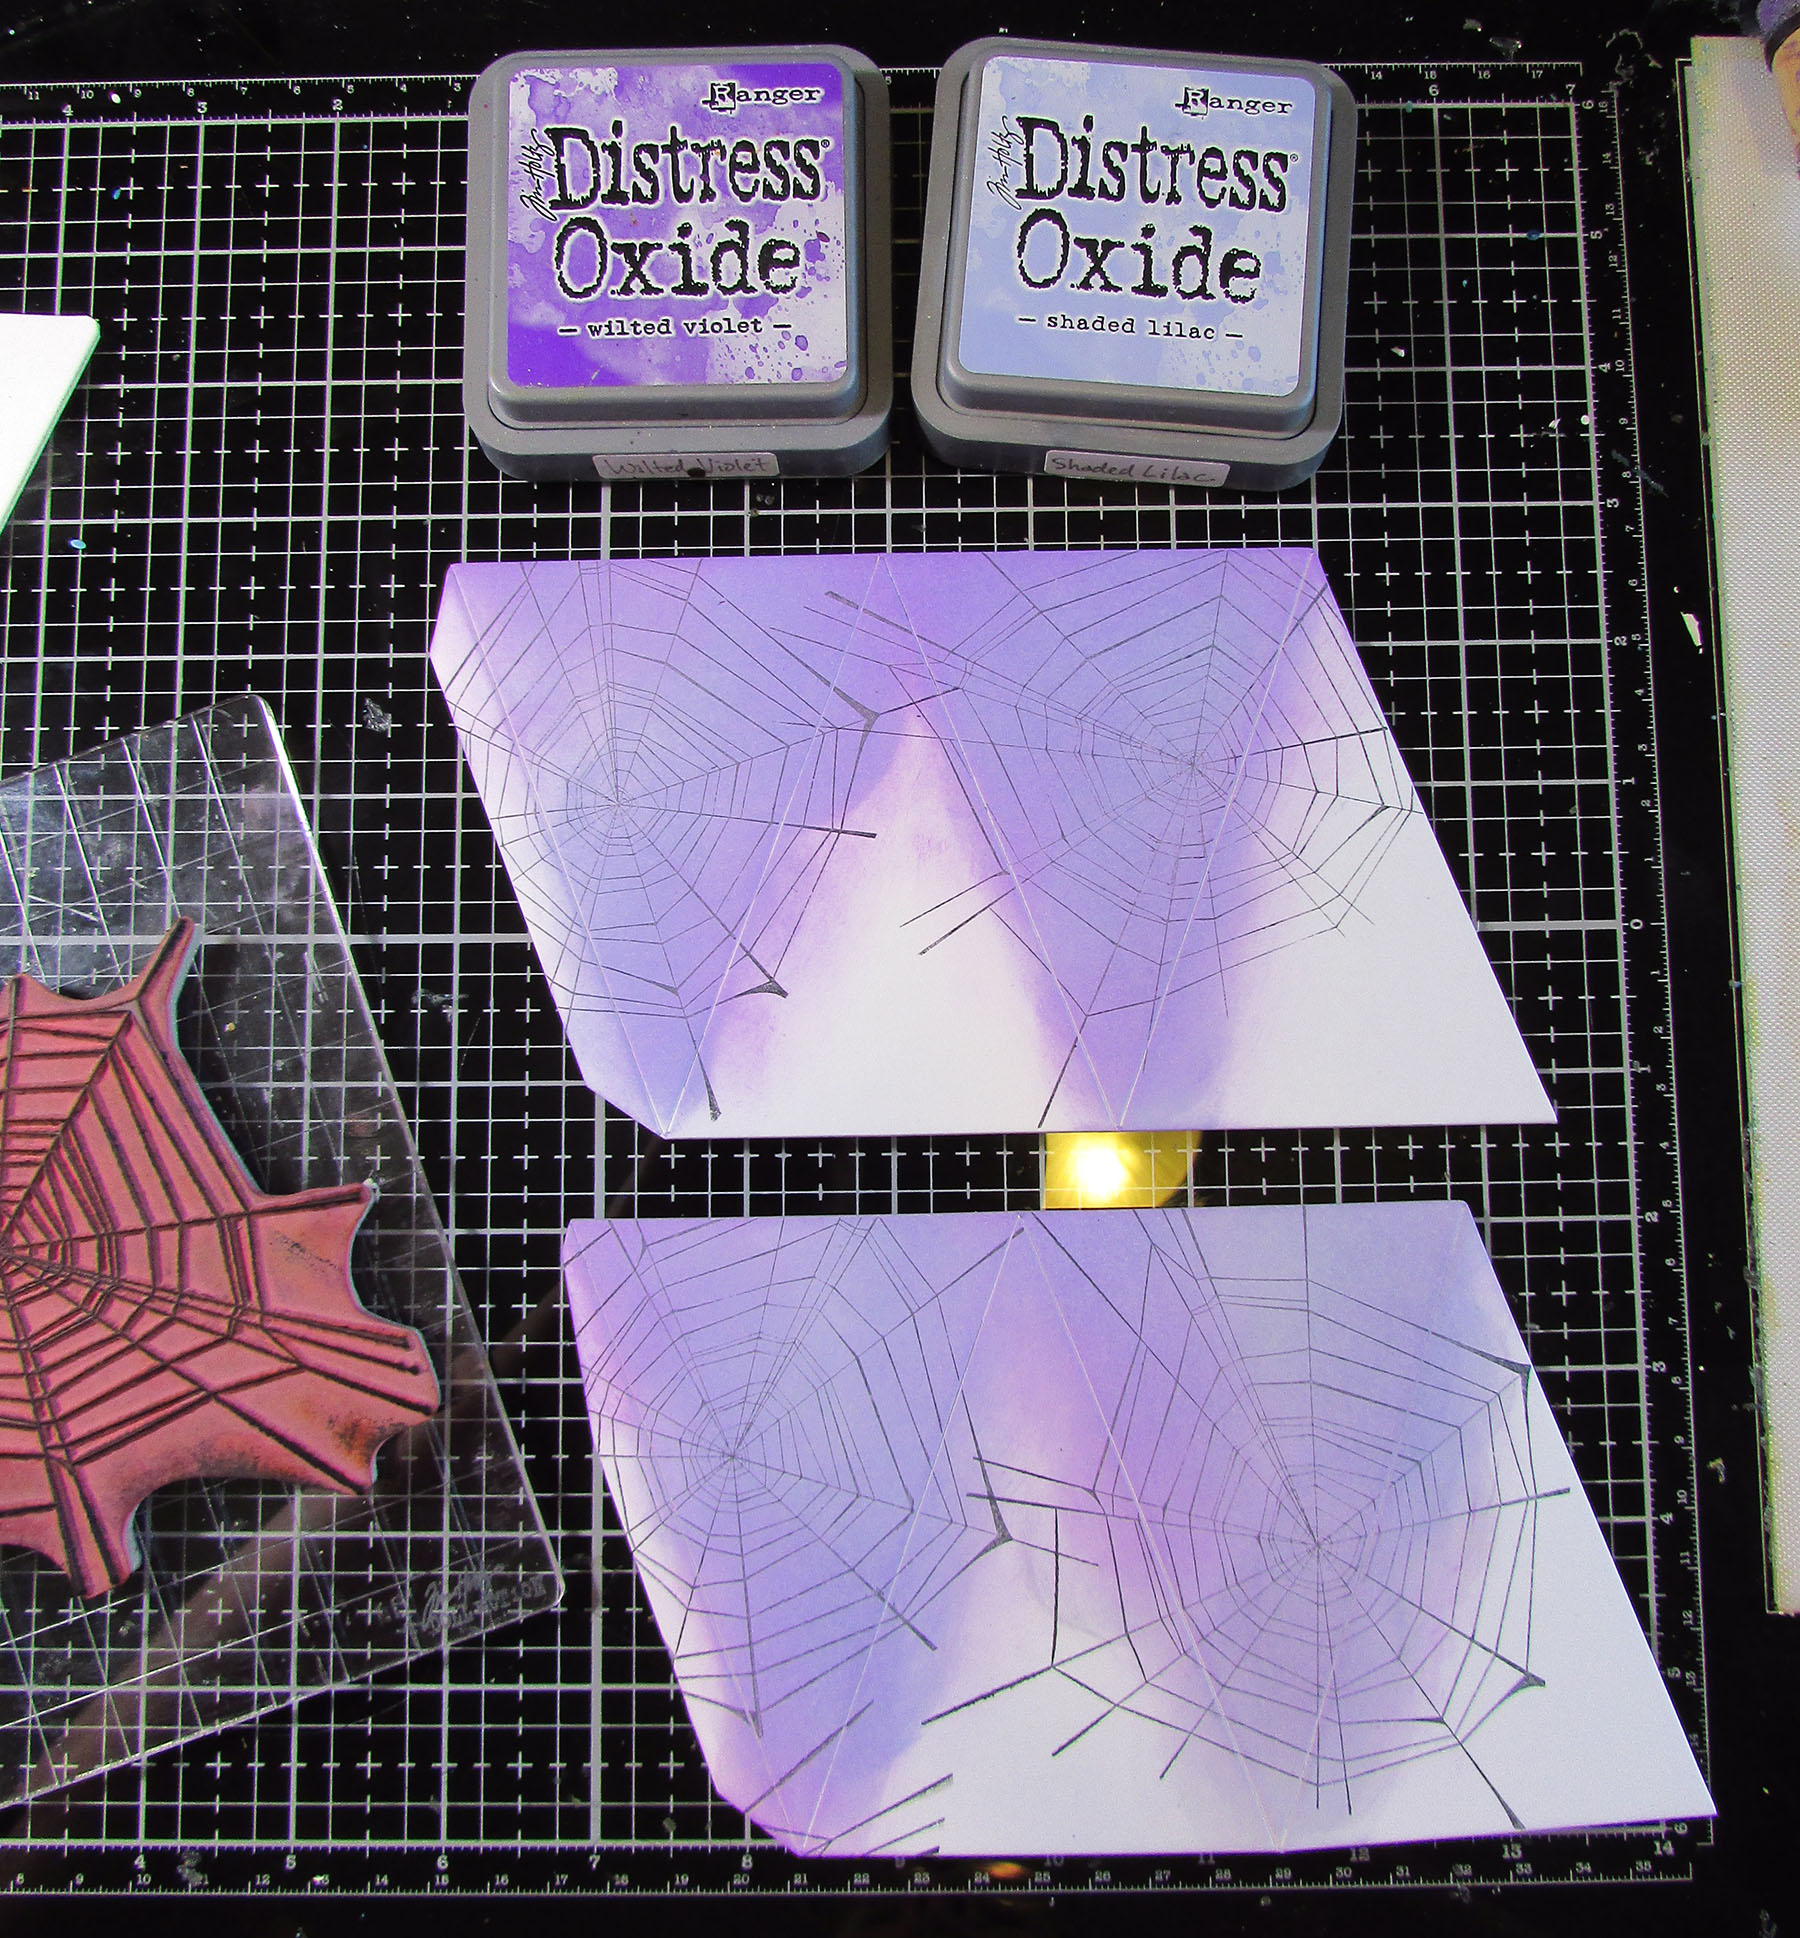
Step 2 – I inked and stamped alternating sections of the Geometric Box side pieces. After that, I glued pieces of patterned Halloween paper on the other sections.


Step 3 – I turned the smaller triangles into "candy corn" pieces. Using Eileen's Blends embossing ink (retired), I first dabbed the tops of the pieces with the ink and then embossed with yellow embossing powder. I repeated by inking the middle section and embossing with orange. Lastly I embossed the tip with white powder.


I used Archival Ink to distress the edges of the pieces.


Step 4 – Box assembly is easy! You can use wet or dry adhesive. (I recommend a very strong dry adhesive like red line tape or Eileen's Red Liner Tape.) Glue the sides together and then pop the base piece into place.


Step 5 – Next part, flowers! I used the Sunflower Die and cut parts out of various colors of cardstock and patterned paper. This die isn't just for 'sunflowers'. You can make all sorts of flower types!


Step 6 – Eileen's Twist & Style Tool is a tried and true way to make flower stems. Eileen just demoed this in her Live from last Thursday. You can see that here.


I used vintage black buttons for the flower centers.


Step 7 – I cut a piece of styrofoam to fit inside the box base and glued it in. I covered the surface with a bit of cotton batting to hide the styrofoam. It was easy to poke the flower stems through the batting into the foam.


Project #2

Eileen Hull's new Silverware 3-D Embossing Folder has amazing detail! I used it to create the background for this 'invitation to tea' card.

Lisa Hoel for Eileen Hull - Sizzix 2022 Chapter 4 Release! Tutorial time! #creativejuicefreshsqueezed #EileenHull  #eileenhulldesigns  #sizzix #mymakingstory #TeamEileen #mysizzixstory

Step 1 – I used a favorite (and simple) technique for embossing the background. All you have to do is rub the front half of the folder with Archival ink and then emboss! The ink transfers from the folder to the debossed areas of the paper and really makes the embossing detail pop. I used a piece of silver metallic kraft paper for my substrate.


Take a look at that detail!


Step 2 – For the teacup, I decoupaged a section of a decorative napkin to the mat board before cutting.


  Step 3 – After cutting out the cup, I coated it with a gloss varnish to give it the look of china.


Thanks for stopping by and be sure to keep an eye on Eileen's blog for more inspiration from the Educator and Inspiration Teams!

Some links in this post are affiliate links which do not affect the price you pay but allow me to earn a small percentage of a sale. Thanks! (My husband also thanks you!)