Well the art explosion that happened in my art room turned into a pretty nice project if I do say so myself. ;-) I made a mixed media canvas using this darling photo of my grandma when she was a little girl. I'm entering this into two challenges, Finnabair's Sparkle & Shine Challenge and The Mixed Media Monthly Think Pink Challenge (I think all the pink I used is quite apparent lol).
I started with an 8 x 10 blank canvas as the base and glued a sheet of patterned paper onto it with Multi Medium Matte. I then sealed it with a thin layer of Gloss Gel. Once that was dry I added another layer of Gloss Gel through the Lace stencil and let it dry. Misting with various (pink!) mists added another layer and caught in the nooks and crannies of the stenciled parts. I added some stamping with Archival Ink at this point too (after the mist dried). Next came the fun part of layering all sorts of goodies. I had vintage lace, doilies, buttons, flowers, and embellishments spread all over my work table not to mention every pink hued paint, mist and glitter I have too. (Hence the "explosion"!) I glued everything down with the 3D Gloss Gel. That stuff works GREAT! I love how it works as an adhesive – all the bits stuck right down and they weren't going anywhere. It dries clear and isn't tacky at all.
Once everything was glued down I mixed up a custom Silks Acrylic Glaze color and layered it over all the embellishments. I love the subtle shimmer it gives. I also highlighted some parts with the gold Silks color. For even more sparkle I added Stickles Tattered Rose and the super fine light pink Art Sugar glitter. The photos just don't show all the glimmer and sparkle like how it is in person. Here are a few details:
Thanks for visiting and checking out my artwork! I hope you have found inspiration in it for your own crafty fun. Most of the supplies I used for this project can be found at Inspiration Emporium. Follow the links below and use my code JUICE there to save 10% if you go shopping. I will also point out that US shipping
is always $5 and international shipping is just $10. ;-)
Friday, February 6, 2015
Tuesday, February 3, 2015
Art with Heart Challenge – Projects to Love
Hello there. Wow, January sure sped by – I can't believe it is now February! I'm here today to share a cute Valentine's Day gift idea with you. I used Eileen Hull's 3-D Oven die from the Vintage Kitchen line to create these fun candy holders. (I'm giving them to my sons!)
They are super easy to make. I used everything from my stash (I love stash busting projects!) The oven door windows are cut from scrap plastic packaging, coated with Glue 'n Seal*, and then a layer of Rock Candy Crackle Paint. Feel free to use my sentiments if you want to make your own. I also thought of "Hey there Hottie" for a sentiment but I already made my hubby's Valentine. ;-)
* When applying Rock Candy Crackle Paint to a slick surface like plastic or glass, coat it first with Glue 'n Seal, let it dry, and then apply the Crackle Paint. It keeps the crackle from flaking off.
Be sure to come and check out the February Art with Heart Challenge over on Eileen's blog! The theme this month is "Projects to Love" and you can win a Cookie Box Die for participating. Keep your eye on the art served up by the rest of the Inspiration Team to get your mojo going. ;-)
Also up and running now is the Inspiration Journal February Challenge "Love is in the Air"! (Hmm… you could enter both challenges with one project, just sayin'!) Check that out and join for a chance to win $50 to spend at Inspiration Emporium.
The supplies I used for this project can be found at Sizzix or Simon Says Stamp. Follow the links below and a shopping you may go!
Friday, January 30, 2015
Guest Post on AJVD
Hello! Today I have a guest post over on the AJVD blog and I'm showing you how to stretch your die collection by using them to make stamps! I hope you will hop on over there and check it out. =)
Thursday, January 29, 2015
Alice in Wonderland ATB
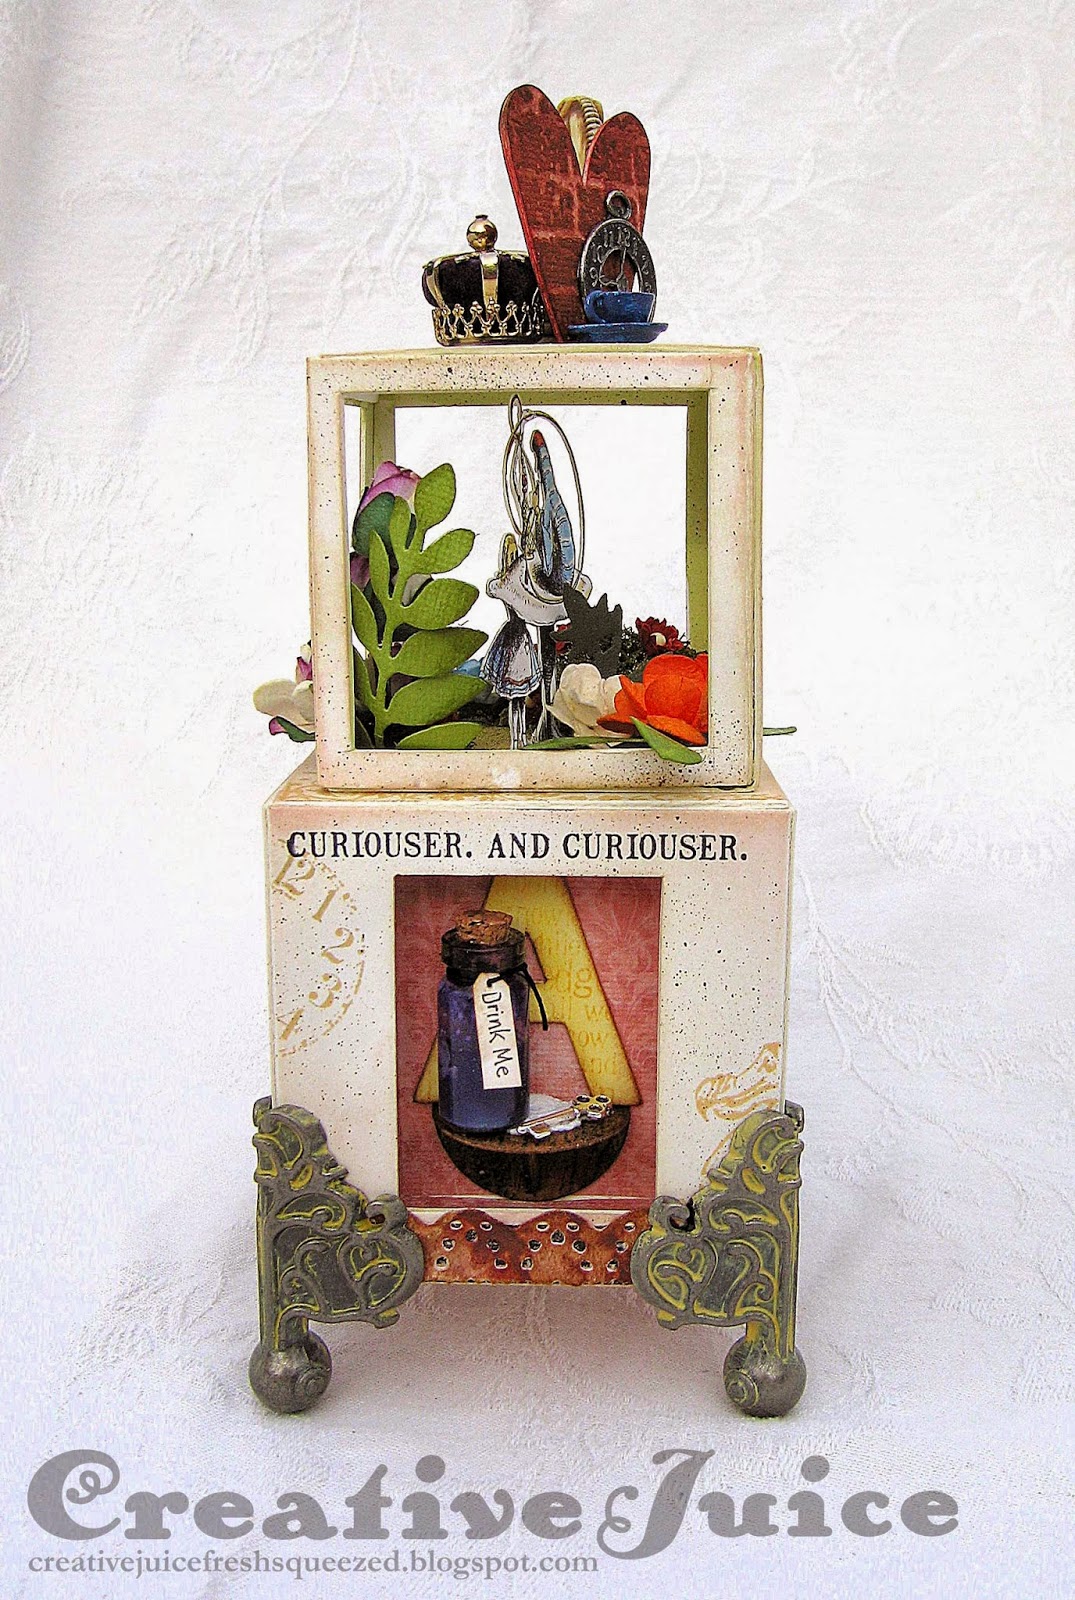
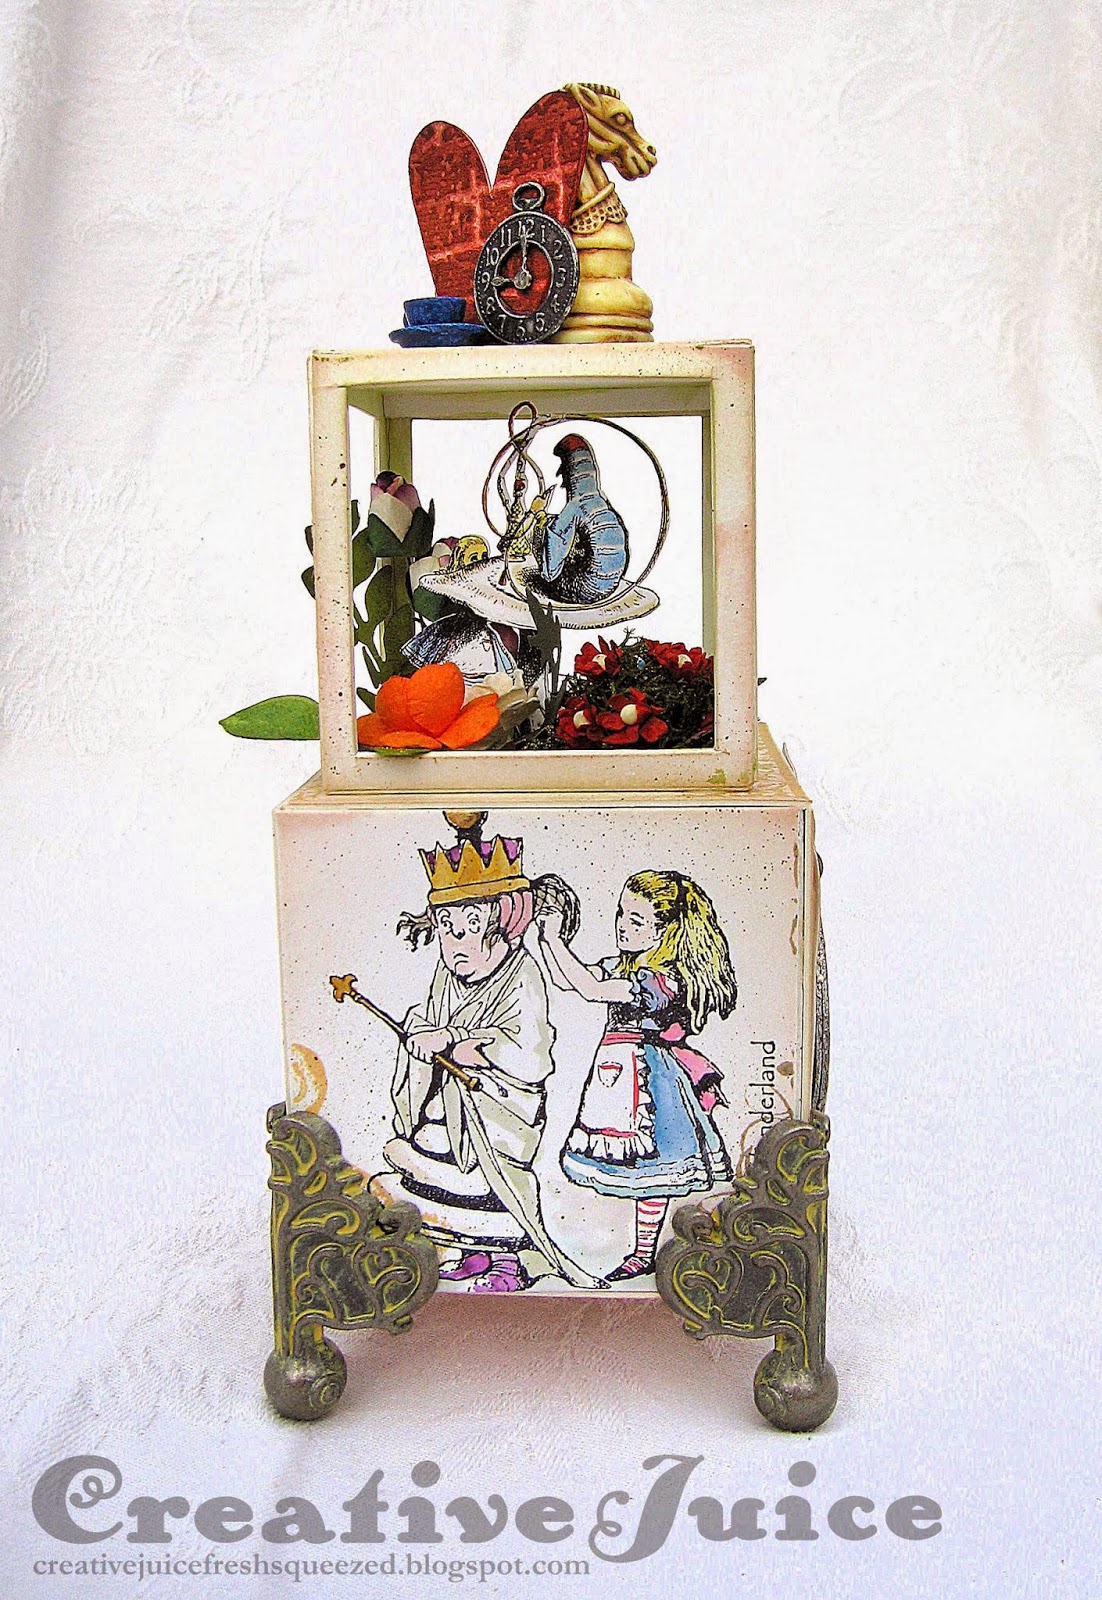
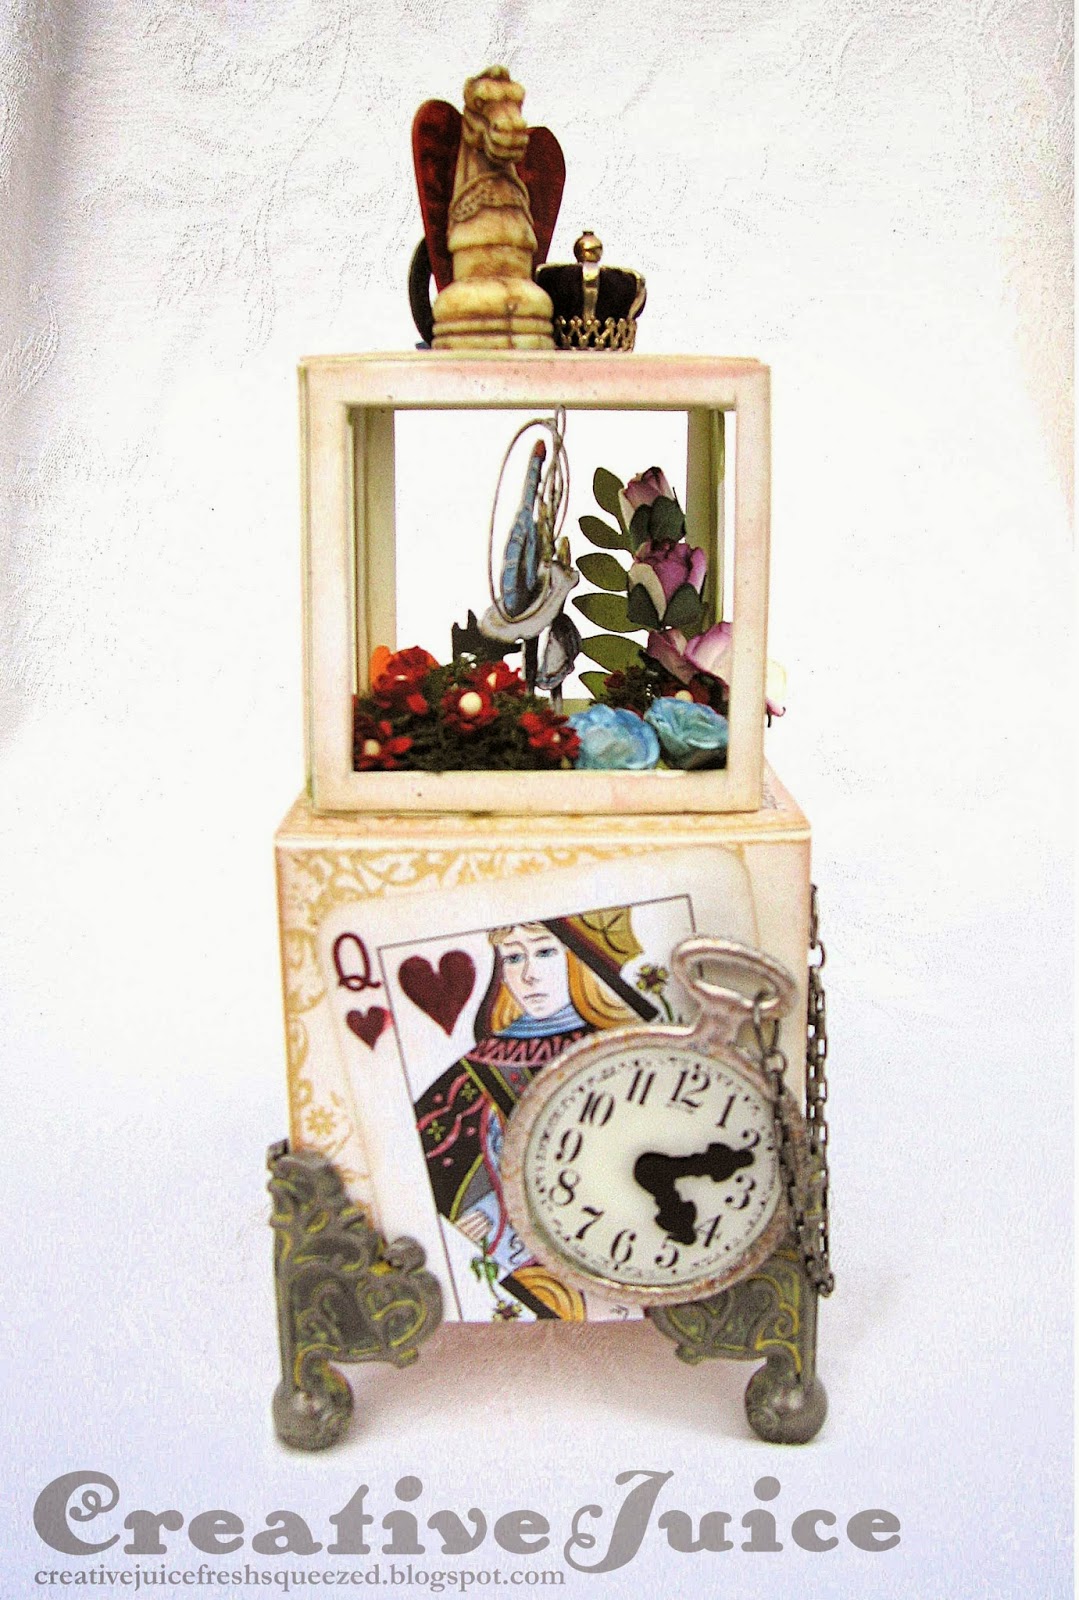
If you are a fan of Alice in Wonderland, I think this project is going to be your cup of tea! I created a whimsical Artist Trading Block tower using the fabulous Artistic Outpost stamp set Wonderland Collage. This is also a project for the ongoing Compendium of Curiosities 3 challenges over at the Studio L3 blog. On page 40 of Tim Holtz's book A Compendium of Curiosities Vol. 3 he outlines the Distress Watercoloring technique that is the focus of Challenge 20. Now, let's get on with the photos! (Lots of them! You have been warned. ;-) )
On the table is the mysterious potion Alice drank to get herself small enough to get through the tiny door into Wonderland. If only she hadn't left the key on the table before she drank it!
The playing card here is actually a scan of a real card printed out in black and white on cardstock. I then used the watercoloring technique to add color back in. I tried using a real card but it just looked too "slick" and didn't match the feel of the rest of the project. Also, by happy coincidence, the clock face stamp from the AO set fits the pocketwatch die perfectly!
Top detail:
I wanted to pick things that were symbolic of the stories to put on the top. I had everything in my stash! On the other side is a chess piece and a crown.
To make the garden in the top cube, I carefully cut out the sides of the flat panels with a craft knife. I had to be very careful when assembling the cube so I didn't bend the thin side pieces. I really wanted Alice talking to the caterpillar in there so I scanned the original illustration from my book and sized it to fit the space. I then flipped a copy of it so I would have a mirror image. That way I could glue the printouts back to back and then fussy cut it out. I'm glad I have a light table! It was tricky lining them up.
You might be wondering how I made the shadowbox in side 2. It is really easy! I used a rectangle die from the Movers & Shapers Rectangle set to cut a window in the cube. The shadowbox is cut using the Matchbox die. It makes it really easy to assemble. I glued the box behind the window cut out. Details (pardon the photo quality please ack!):
Thanks for sticking with me this far! I encourage you to check out The Artists on the Block for more ATB inspiration. Also be sure to go take a look at the Studio L3 blog - there is a ton of inspiration there too! And thanks to The Funkie Junkie Boutique for sponsoring Challenge #20!
For yet MORE inspiration, head on over to the Mixed Media Monthly "New to You Challenge". I'm entering this in the challenge because I used my brand spanking new Wonderland Collage stamp set all over this project. =)
Hold the phone, there is more fun to be had! The Artistic Outpost blog is also having a Show Us Your AO Art challenge. Good thing this project is covered in AO stamps lol.
Most of the supplies I used for this ATB can be found at Inspiration Emporium. Follow the links below and use my code JUICE to save 10% if you go shopping. I will also point out that US shipping is always $5 and international shipping is just $10. ;-)
![]() |
| side 1 |
![]() |
| side 2 (more details on inset shadowbox later) |
![]() |
| side 3 |
![]() |
| side 4 |
Top detail:
I wanted to pick things that were symbolic of the stories to put on the top. I had everything in my stash! On the other side is a chess piece and a crown.
To make the garden in the top cube, I carefully cut out the sides of the flat panels with a craft knife. I had to be very careful when assembling the cube so I didn't bend the thin side pieces. I really wanted Alice talking to the caterpillar in there so I scanned the original illustration from my book and sized it to fit the space. I then flipped a copy of it so I would have a mirror image. That way I could glue the printouts back to back and then fussy cut it out. I'm glad I have a light table! It was tricky lining them up.
You might be wondering how I made the shadowbox in side 2. It is really easy! I used a rectangle die from the Movers & Shapers Rectangle set to cut a window in the cube. The shadowbox is cut using the Matchbox die. It makes it really easy to assemble. I glued the box behind the window cut out. Details (pardon the photo quality please ack!):
![]() |
| Matchbox glued to the back of the cube panel |
![]() |
| It fits just right! |
Thanks for sticking with me this far! I encourage you to check out The Artists on the Block for more ATB inspiration. Also be sure to go take a look at the Studio L3 blog - there is a ton of inspiration there too! And thanks to The Funkie Junkie Boutique for sponsoring Challenge #20!
For yet MORE inspiration, head on over to the Mixed Media Monthly "New to You Challenge". I'm entering this in the challenge because I used my brand spanking new Wonderland Collage stamp set all over this project. =)
Hold the phone, there is more fun to be had! The Artistic Outpost blog is also having a Show Us Your AO Art challenge. Good thing this project is covered in AO stamps lol.
Most of the supplies I used for this ATB can be found at Inspiration Emporium. Follow the links below and use my code JUICE to save 10% if you go shopping. I will also point out that US shipping is always $5 and international shipping is just $10. ;-)
Subscribe to:
Posts (Atom)