Tuesday, January 5, 2016

It's CHA Time! New Product from Eileen Hull.


Hello everyone! It's time for Eileen Hull's Art With Heart Challenge and we're changing things up a bit this month. With CHA right around the corner (actually I see it right down block now), the design team is focusing on Eileen Hull's re-releases for 2016. These are dies that are being re-released because they are so popular – Sizzix simply had to bring them back! You will see why throughout the month as we share projects made with them. We don't have an official challenge this month but we want to see your projects using Eileen's dies and you can link them up HERE. There is also a prize for one randomly drawn winner – comment to enter. There are also 6 new 3D flowers and leaf dies being released, one of which I included in my project below. Also the new Twist and Style Tool that can be used to make really cool flower stems, jewelry pieces and home decor... Stay tuned for more info on new and re-released dies from Eileen. The CHA excitement is just getting started!


The Suitcase Die is such a versatile one. You could make it a case for a mini book or to hold trip souvenirs. I used it as a stage for fussy cut figures from the Graphic 45 Once Upon A Springtime Classic Collection. I love the imagery of Graphic 45 papers and they are perfect for projects like this. It helps to have a sharp craft knife though! ;-) Be sure to check out the team post on Eileen's blog. My teammates have created so many fabulous Suitcase projects!


Thanks for stopping by! Be sure to check back in here for other news and you can follow Eileen on Facebook for the latest news as she makes her way to CHA with Scotty in tow.

The supplies I used for this project can be found at Sizzix, Inspiration Emporium or Amazon. Follow the links below and use my code JUICE at Inspiration Emporium to save 10% if you go shopping there. I will also point out that US shipping is always $5 and international shipping is just $10 at IE.


Saturday, January 2, 2016

Guest Post at AJVD

Hello!! Today I have a guest post over at the Jillian Vance Design blog. If you are looking for ideas for masculine cards, be sure to go and check it out. I'm going to be sneaky and just give you just a peek. ;-)


Head on over to the AJVD blog to see the whole thing! Happy New Year too!

Friday, January 1, 2016

Exciting News & the January Mixed Media Monthly Challenge!

I am very pleased to announce that I am now part of the design team for the Mixed Media Monthly Challenge Blog! If you haven't checked out this blog, now is the time to start. Every month they host a fun and interesting challenge following a variety of themes. There is always plenty of inspiration to be found there from the design team and participants! For January, the theme is Time Flies.


I immediately pictured a project with the white rabbit from Alice in Wonderland and his troubles with being on time. I made a little mixed media piece using Eileen Hull's Needle Book die, stamps, stencils, other diecuts, scanned ephemera and a whole load of DecoArt Media products. (I think the kitchen sink is in there too.) Hold on to your seats for a whole bunch of photos…

There goes that rabbit!

I cut the cover out of scoreboard and brushed it with gesso. I left the coverage uneven because I wanted the subsequent paint layers to look variegated. I stamped the rabbit with archival ink over the gesso.

Back cover
After stenciling on the back I glued the white flowers in place on the front and back of the cover. I also brushed them with gesso before applying paint. I like the mottled effect you get.


The text and illustrations I scanned from a vintage copy of Alice in Wonderland. I printed out pages of text to cut up and sized the illustrations to fit the inner pages. After gluing the text strips in place I gave everything a coat of gloss varnish to seal it. Then I used a Pumice Stone (color) Distress Marker to make drop shadows and smudged them with my finger to blend them out a bit.


Thanks for stopping by! Please go and check out the new challenge and all the inspiration from my teammates and our guest designer Cheryl Boglioli. She is providing an awesome prize pack for this challenge! Join in and you could be the lucky winner! =)


Happy New Year and get crackin' because…
TIME FLIES!


Thursday, December 31, 2015

Village Dwelling Gingerbread House

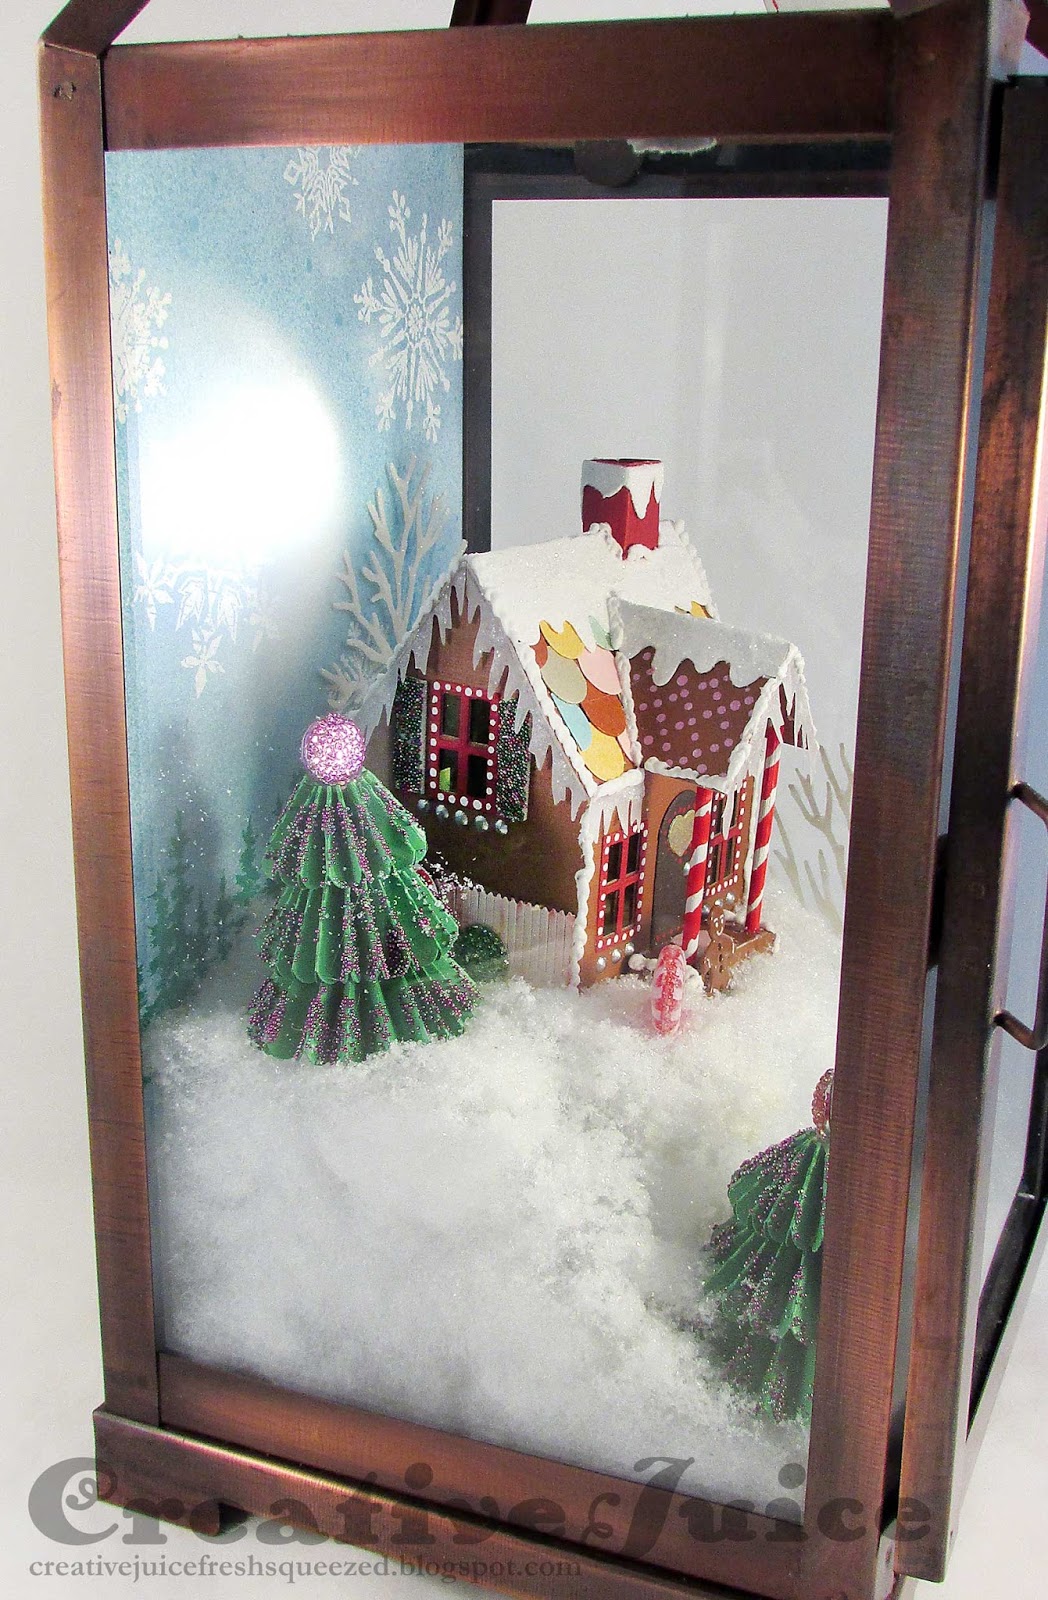
Here is my last post for Christmas projects and 2015! I've had this project in mind for the past few months, ever since I got my hands on the Tim Holtz Village Dwelling die. I can't wait to see what new accessory dies will be coming out in 2016 for it! I want to make a whole town lol. So, onto the project at hand – it's a wee little gingerbread house! I had one lantern left so of course I wanted to make it into a winter setting for my house. (Other lantern projects are HERE and HERE.)


Close up! I had so much fun making this little house and poking around in my stash to come up with "candy" decorations for it.


The trees are made from the Paper Rosette dies. Tim Holtz has a great tutorial on how to make them HERE. I frosted mine with micro bead "sprinkles" and topped them with colored Gumdrops to fit with the theme. Also, be sure to check out Tim's videos on assembling the Village Dwelling houses. They are very helpful.


I used the Village Winter accessory die to cut out the icicles and roof snow patches. The icicles are vellum with Rock Candy Stickles on them and I "frosted" the snow with Ranger Texture Paste and Rock Candy Glitter so it would look like icing. I also used the Texture Paste to pipe frosting details on the edges of the roof lines and walls. I put some paste into a little plastic bag and snipped a tiny bit of the corner off to make a small hole. I used it like a piping bag and added the "frosting" details.

Make your own mini piping bag. ;-)
If you are still reading this looong post I'll show you a few more lantern details:

Left side

Right side


Thanks for stopping by. I hope you have a happy New Year and that 2016 is full of inspiration and creativity for you! I am also entering this into the Filly and Funkie Holiday Hues challenge. Be sure to go and check out inspiration over there. Lots of great projects to see! ;-)