Showing posts with label Shadow Box Frame. Show all posts

Wednesday, January 4, 2023

Funkie Junkie Focus – Favorite Products of 2022

Happy New Years Funkie Junkie fans! It may be 2023 now, but our Focus theme this time was "Favorite Products of 2022". I had lots of favorites so it was hard to choose but here is a project that features some of them.

Lisa Hoel for The Funkie Junkie Boutique - favorite products of 2022  #creativejuicefreshsqueezed #tim_holtz #thefunkiejunkieboutique

I created a little winter scene using Eileen Hull's Shadow Box Frames #2 Die Set to make the frame. It is a handy die set to have in your tool box! Another 2022 favorite is the Holiday seasonal release, Gray Two-tone Woodgrain Cardstock. Love it! It has a great look even without any inking and it was really easy to die cut to make the frame.

The background is the new Tim Holtz 3-D Texture Fade folder Tree Rings (which I LOVE). So much texture! The houses, trees, sky and sentiment are all cut using the Tim Holtz Christmas Cutouts Die Set. It is definitely not limited to Christmas projects. I really like the primitive look of the designs.

Let's take a look at some of the how-to:

Step 1 – First I inked up some Heavystock with Distress Spray Stains to use in the Tree Rings embossing folder.


Step 2 – One of my favorite techniques to use with the 3-D Texture Fade folders is to ink the folder itself with Archival Ink and then emboss. The ink gets transferred to the paper in all the de-bossed areas and really makes the texture pop. I tried three different ink colors to see which I liked best.


Step 3 – Cutting out the Shadow Box frame parts:


Step 4 – The frames aren't too hard to assemble, especially if you build it atop a gridded surface of some sort so you can make sure it glues up squared.


Step 5 – To create the houses and other elements, I applied foil tape over heavy cardstock and then painted over the metal with Distress Paint. (Tip: clean the foil with rubbing alcohol first and the paint will adhere better.) When the paint was dry, I die cut my pieces and then lightly sanded them to reveal some of the metal underneath.


Happy New Years! I hope you are carving in some time to get crafting in! Keep an eye on the Funkie Junkie Boutique Blog, 
Inspiration Ave. because you are now getting regular doses of expanded (and inspiring) content each week. Don't miss it…

Supplies used:

Tim Holtz Die Set - Christmas Cutouts
Eileen Hull Shadow Box Frames #2 Die Set
Tim Holtz 3D Texture Fade embossing folder - Tree Rings
Distress Mixed Media Heavystock
Distress Paint - Lumberjack Plaid, Salvaged Patina, Fossilized Amber, Rustic Wilderness, Peeled Paint
Distress Spray Stains - Pumice Stone, Hickory Smoke, Brushed Corduroy
Distress Rock Candy Dry Glitter

Thursday, August 25, 2022

Eileen Hull Postcard Box Chapter 3 Tutorial

Hello! At the beginning of the month, Eileen Hull kicked off her Chapter 3 Die release with a Live Party! There was a TON of inspiration from all the Design Team members and the rest of the August we've been sharing tutorials for our projects. (Find the links in Eileen's August blog posts!) 

In case you missed it, here is what Eileen has to say about the new dies:

"I am so excited to share my Chapter 3 Sizzix die collection! Each piece in the set stands alone but also coordinates with the others to make a truly versatile and valuable addition to your collection.

The ScoreBoards Skinny Mini Book Box is a really great size – it measures 6 3/4" x 4" with an adjustable built in spine from 3/8" to 2 1/4". This die may be used to create a book by die cutting two covers OR a box if you add the side pieces to the covers. If you add the box supports, it will hold mini-slimline size cards.

The Skinny Mini Elements Thinlits will cut a cool star pattern that perfectly covers the front of the Skinny Mini book or the front of a slimline card. And you can also expand the size of the design to create a whole page pattern.

I have been wanting to make a Card Caddy Die for a while... so many people are making cards these days that I figured that they would love to have the ability to make a really pretty container to hold them. I love the shape of this box and it goes together so quickly – also fun to decorate! It will hold cards up to 5 1/4" wide.

The 3D folder is called Woven Leather and it looks so realistic! Makes a great background for cards, journal pages or covers."

New Chapter 3!

Today I have the tutorial for the postcard box I made using the Skinny Mini Book Box as the base. 

Lisa Hoel for Eileen Hull - Chapter 3 Skinny Mini Book Box Die tutorial #creativejuicefreshsqueezed #EileenHull  #eileenhulldesigns  #sizzix #mymakingstory #TeamEileen

I envisioned this as a gift to give someone that just moved into a new home. The box is filled with stamps, new address labels and postcards to mail out.

Lisa Hoel for Eileen Hull - Chapter 3 Skinny Mini Book Box Die tutorial #creativejuicefreshsqueezed #EileenHull  #eileenhulldesigns  #sizzix #mymakingstory #TeamEileen

Lisa Hoel for Eileen Hull - Chapter 3 Skinny Mini Book Box Die tutorial #creativejuicefreshsqueezed #EileenHull  #eileenhulldesigns  #sizzix #mymakingstory #TeamEileen

Lisa Hoel for Eileen Hull - Chapter 3 Skinny Mini Book Box Die tutorial #creativejuicefreshsqueezed #EileenHull  #eileenhulldesigns  #sizzix #mymakingstory #TeamEileen
A view of the spine.

Postcards:

Lisa Hoel for Eileen Hull - Chapter 3 Skinny Mini Book Box Die tutorial #creativejuicefreshsqueezed #EileenHull  #eileenhulldesigns  #sizzix #mymakingstory #TeamEileen


Now for the how-to!
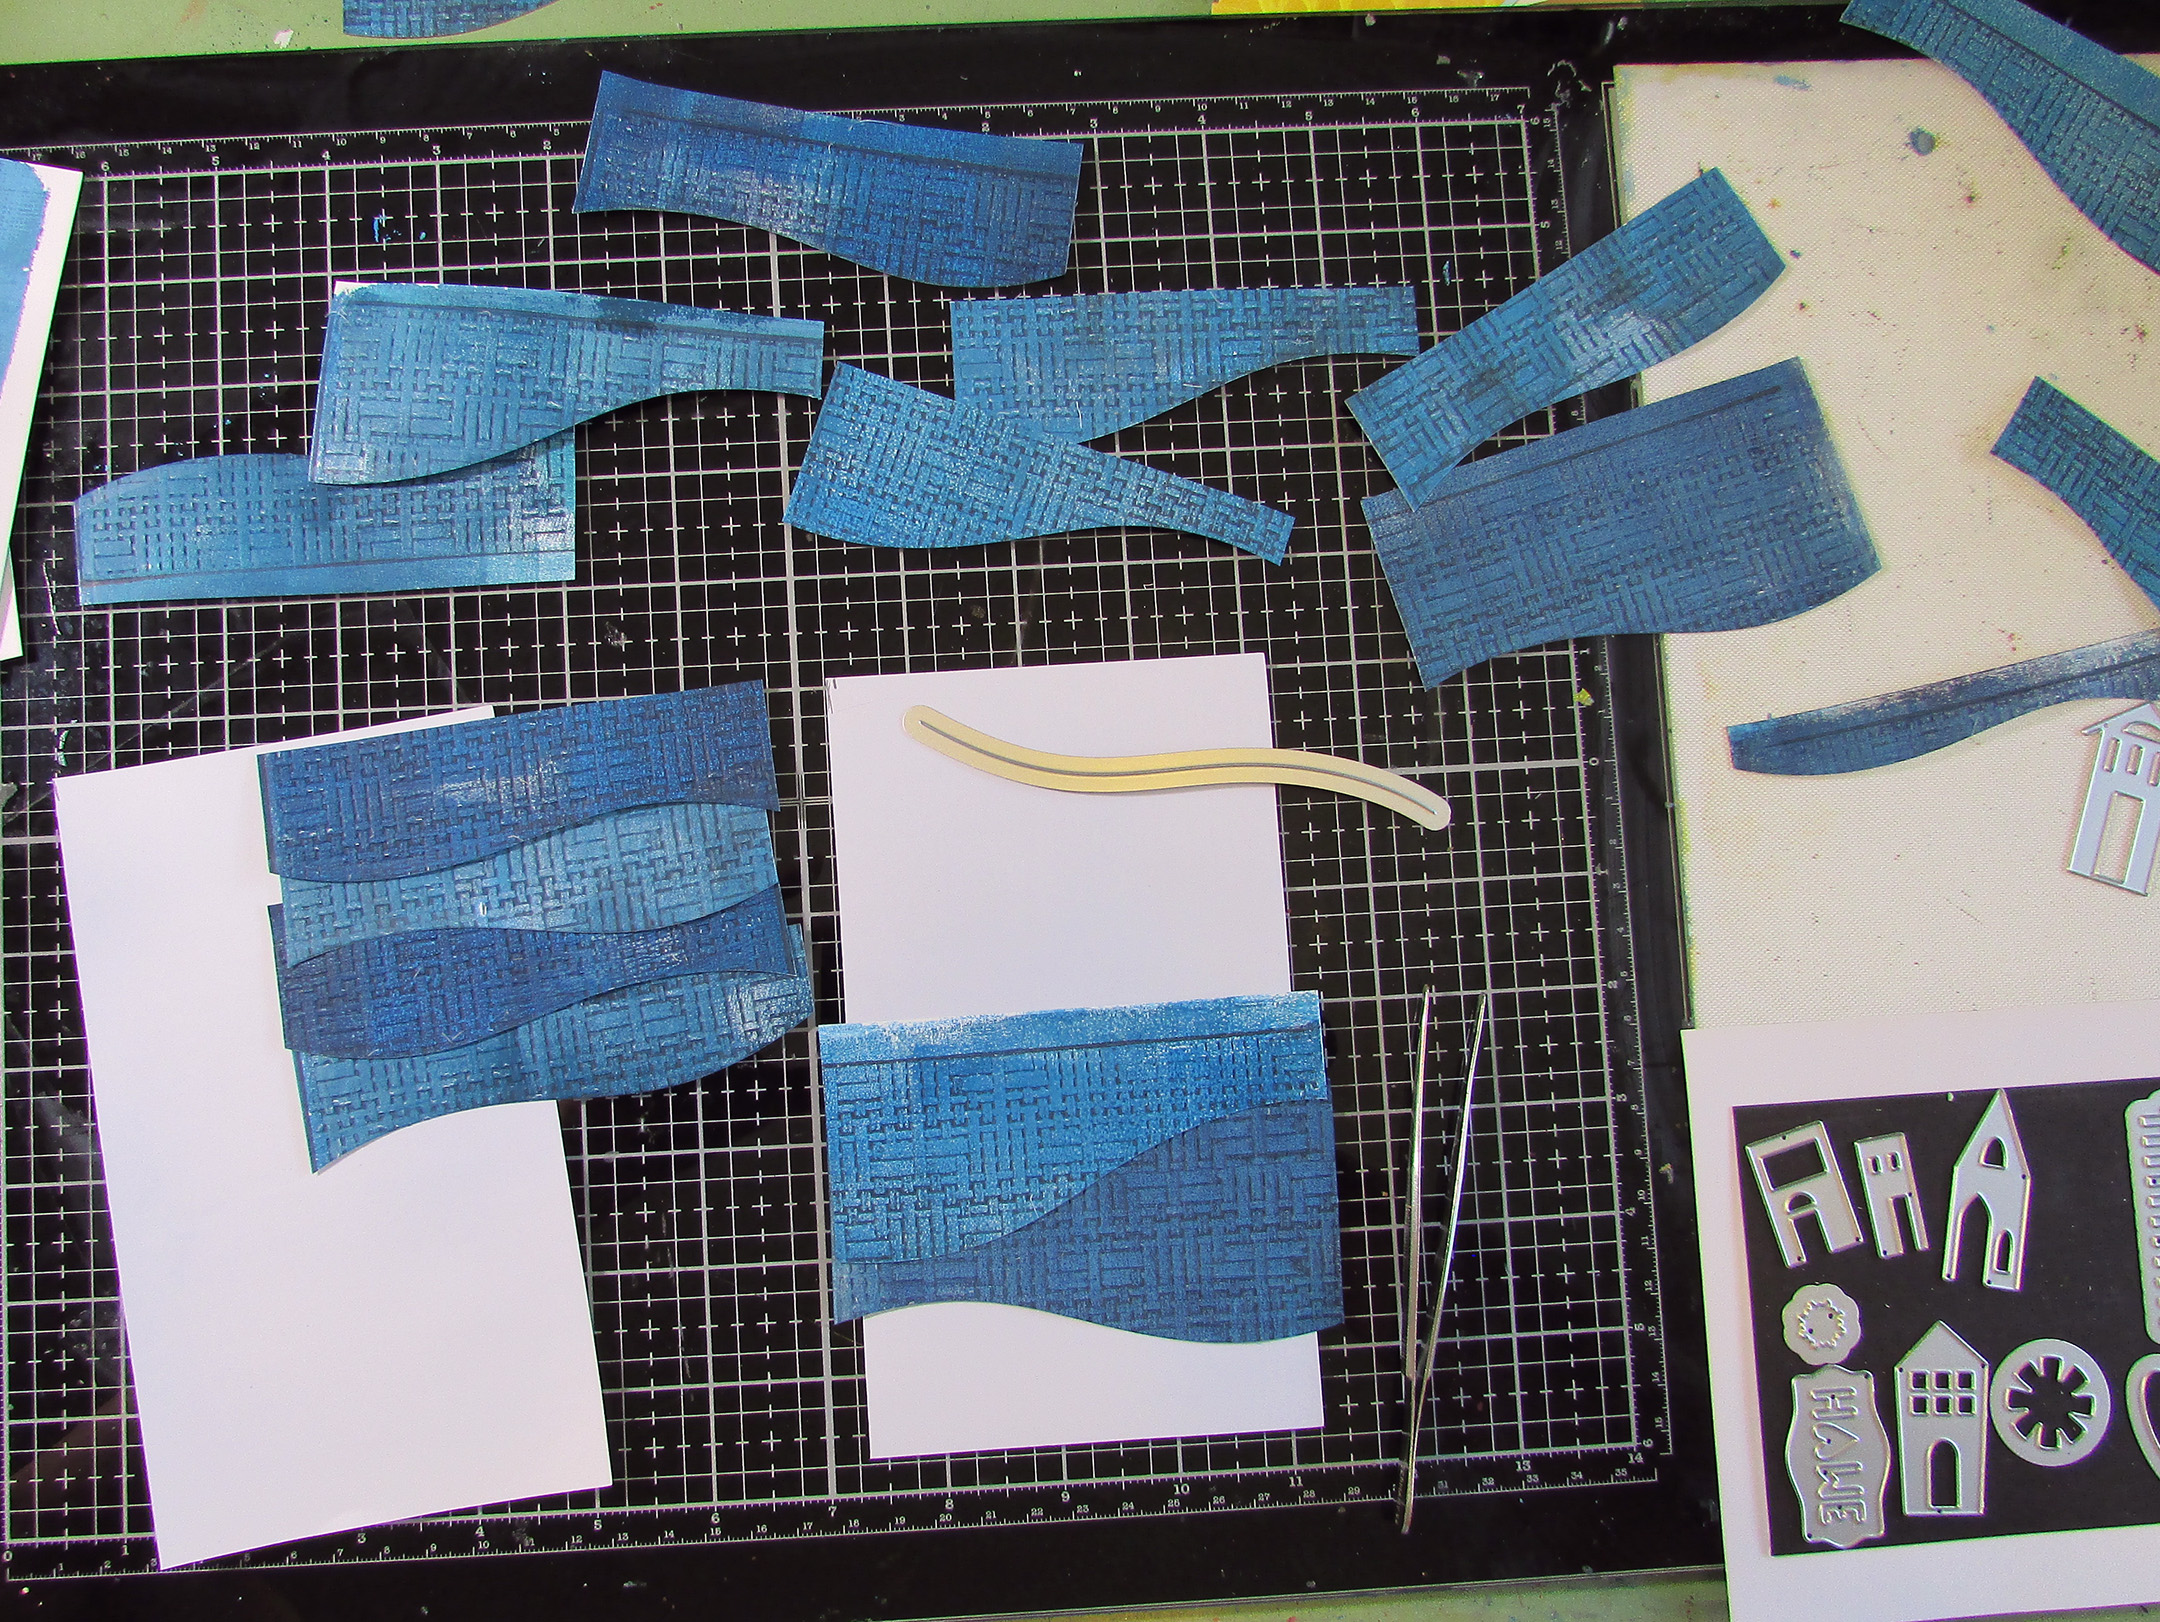
1) First I used my gel plate to create a wide selection of blue-hued prints to use for the embossed sky background. (Warning: gel printing is addictive lol.)


2) I embossed pieces of the prints using the new 3-D Woven Leather folder. One of my favorite 3-D folder techniques is to rub the "deboss" side of the folder with an archival ink pad. When you then emboss, the ink gets down into all the nooks and crannies and really makes the design pop! I did this with black ink to bring out the detail of the embossing.


3) I used the 'hill' die from the Shadow Box #2 die set to cut curved shapes to layer for the sky.


4) I adhered the pieces together on a base rectangle and then added some decorative stitching along the edges with my sewing machine. I added a die cut moon and stenciled on some stars.


5) For the box itself, I chose contrasting colors and stenciled some details onto it. I glued a piece of green cardstock onto the bottom to finish it off.


Assembly is straightforward. I like to use a wet glue but a strong dry adhesive works well too.


6) The postcard bases I cut from more gel prints. I then added pieces trimmed from Skinny Mini Elements die cuts and added stamping and more diecuts on top.


Thanks for stopping by and be sure to keep an eye on Eileen's blog for more inspiration from the Educator and Inspiration Teams!

Lisa Hoel for Eileen Hull - Chapter 3 Skinny Mini Book Box Die tutorial #creativejuicefreshsqueezed #EileenHull  #eileenhulldesigns  #sizzix #mymakingstory #TeamEileen

Supplies used:
Eileen Hull die - Skinny Mini Book Box  (Sizzix / TFJ )
Eileen Hull die - Skinny Mini Elements  (Sizzix / SB / TFJ )
Eileen Hull 3D Embossing Folder - Woven Leather (Sizzix / SB / TFJ )
Eileen Hull die - Shadow Box #2  (Sizzix / SB / TFJ )
Eileen Hull die - Shadow Box Elements  (Sizzix / SB / TFJ )
Eileen Hull Die Set -  Folio page, Pocket & Flowers (Sizzix / SB )
Eileen Hull stamp set - Snail Mail Postage

brayer
various blue acrylic paints
Archival Ink - Black Soot
Tim Holtz layering stencils - Linked Circles, Falling Stars, Codes, Mini Stencil Set 52
iCraft Deco/foil Metallix gel - Glazed Pewter
Distress Oxide inks - Fossilized Amber, Wild Honey

Some links in this post are affiliate links which do not affect the price you pay but allow me to earn a small percentage of a sale. Thanks! (My husband also thanks you!)


Tuesday, April 26, 2022

Maker Forte Stamp Release from Eileen Hull


Hello Eileen Hull fans! Today Eileen is releasing a brand new stamp set from Maker Forte. It is called "Making Plans" and you will find it so useful! It's chock full of labels, dates, weekdays, months and other useful bits making it perfect for planners, scrapbook pages, journals and a host of other projects. Here's what Eileen has to say about it,

"I am excited to release the Making Plans stamp set! If you use a planner, diary, calendar, date book, birthday book or write down any kind of list, this is the set for you! You get a vintage typeset list of days of the week, months, and words associated with planning, organizing or a few phrases just for fun. Along with that there are also eight label shapes that the words will fit it. These are great to use in journals, to customize cards, and on tags and other ephemera. Join me and the team to see uses for this fun stamp set!"

If you missed the live Release Party you can watch it HERE on replay. You can see me share the following makes…

Lisa Hoel for Eileen Hull - new stamp release with Maker Forte! #creativejuicefreshsqueezed #makerforte #EileenHull  #eileenhulldesigns  #sizzix #mymakingstory #TeamEileen

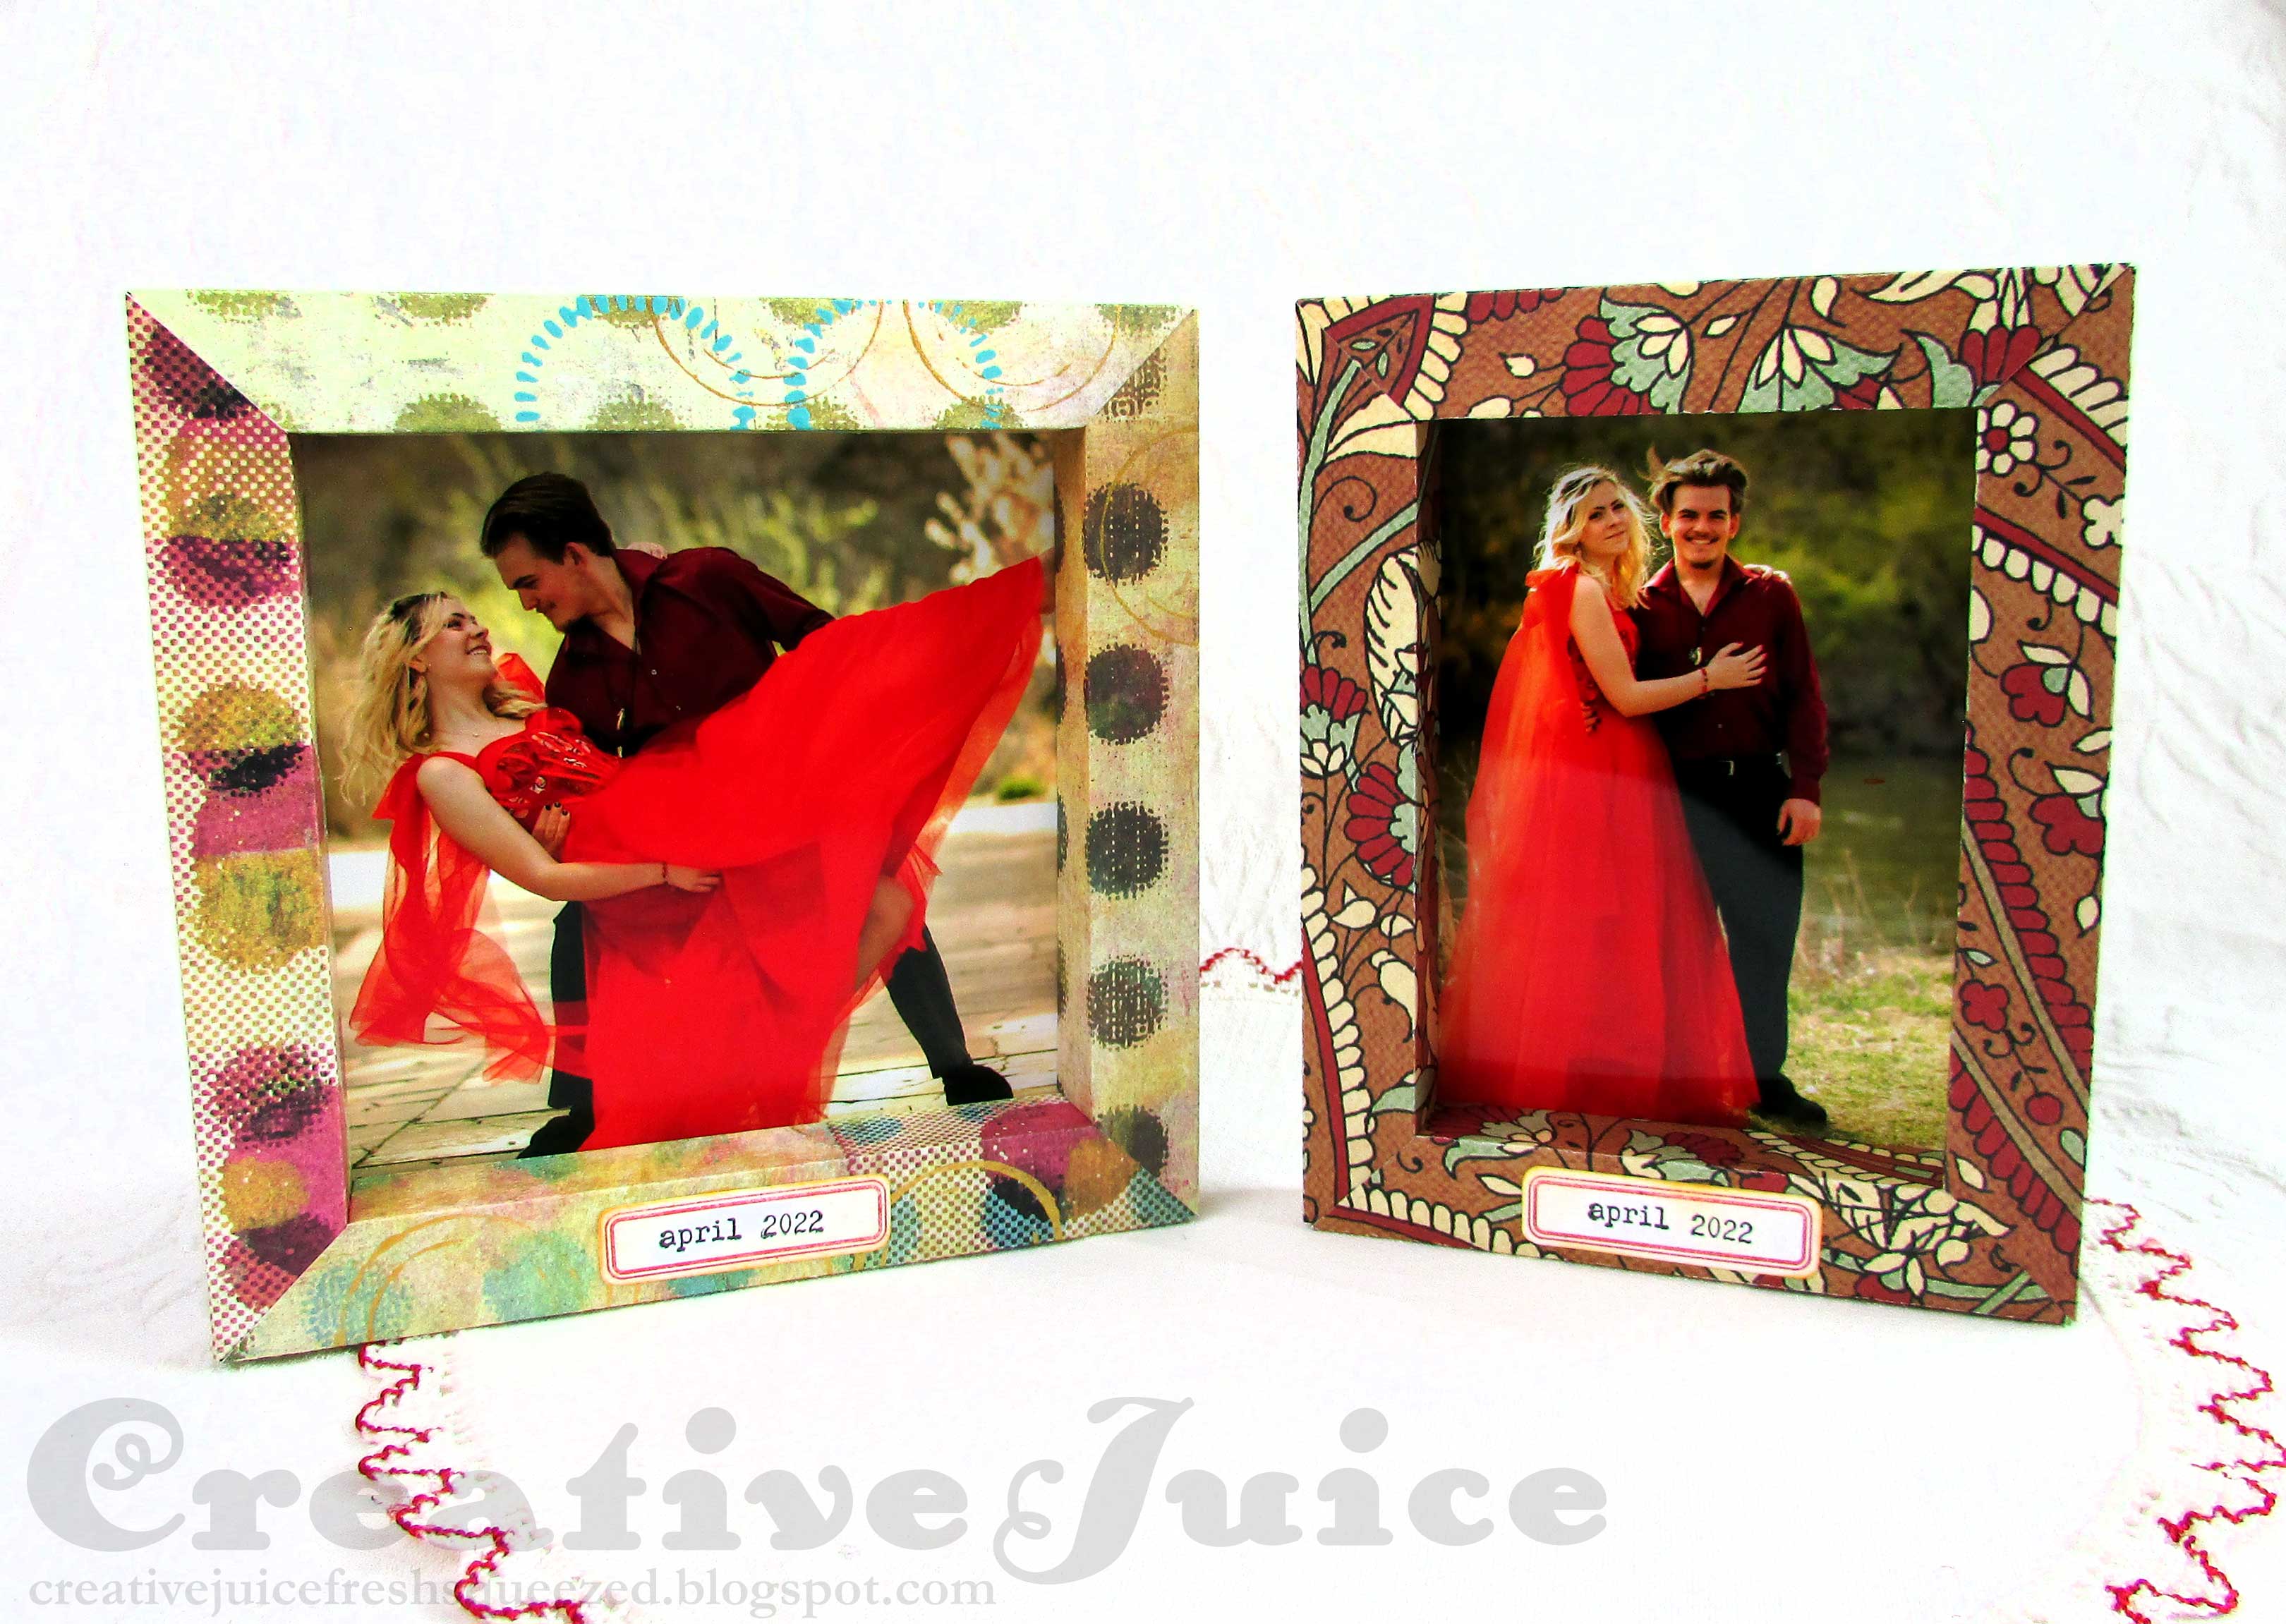
I used the Shadow Box Frames #2 die set to create these frames for some of my son's prom photos. I used the new Making Plans stamp set to add the date labels to make them nice momentos.

I also made a trio of Tiny Books! These little books are perfect for tucking in your purse or giving as gifts. All three are held together with one elastic loop.

Lisa Hoel for Eileen Hull - new stamp release with Maker Forte! #creativejuicefreshsqueezed #makerforte #EileenHull  #eileenhulldesigns  #sizzix #mymakingstory #TeamEileen

I used the stamps to add to the cover backgrounds as well as making the labels on the fronts.


Lisa Hoel for Eileen Hull - new stamp release with Maker Forte! #creativejuicefreshsqueezed #makerforte #EileenHull  #eileenhulldesigns  #sizzix #mymakingstory #TeamEileen

If the covers look familiar, it's because I used collage papers left over from this Postcard Folio I made for Eileen's last stamp release. (Keep the scraps LOL!)

Lisa Hoel for Eileen Hull - new stamp release with Maker Forte! #creativejuicefreshsqueezed #makerforte #EileenHull  #eileenhulldesigns  #sizzix #mymakingstory #TeamEileen

I'll show you how I make the closure down below so keep going!

Lisa Hoel for Eileen Hull - new stamp release with Maker Forte! #creativejuicefreshsqueezed #makerforte #EileenHull  #eileenhulldesigns  #sizzix #mymakingstory #TeamEileen

Check out all of Eileen's stamp sets in her etsy shop! Let's take a look at how I made the little Tiny Books. They are so cute and a great way to use scraps.

1) First I cut the covers out using the Tiny Book Scoreboards Die. I backed my collage cardstock paper scraps with heavy duty cardstock to make the cover substrate nice and thick. Matboard works great too. 


For the pages inside I cut stacks of note paper 4.25" x 2.75" and folded each one in half. I clamped the stack between an acrylic stamp block and a ruler with the edges near the folds of the pages. I spread a layer of glue along along all the folds to glue the page block together.

2) While the page blocks were drying, I set an eyelet in the center of the middle book spine.


3) I used hot glue to adhere the splayed ends of some thin elastic to the inside of the spine. It adds bulk but I sized my page block to allow for that. I also used extra hot glue to fill in the spaces when I glued the page block in. 


Thanks for stopping by and be sure to keep an eye on Eileen's blog for more inspiration from the Educator and Inspiration Teams! On Wednesday the 27th there will be a round up post of all the Team samples made with Eileen's new stamp set so stay tuned for that!