Showing posts with label Tim Holtz Village. Show all posts

Monday, October 31, 2022

The Haunted Mansion Lantern – Tim Holtz Village Die Set

Happy Halloween! I have one last make for the season to share with you and it's a pretty big one. It's been awhile since I created village scene in a lantern so I made this one as a birthday gift for some friends of ours.

Lisa Hoel for The Funkie Junkie Blog - Halloween Journal #creativejuicefreshsqueezed #tim_holtz #sizzix #mysizzixstory #mymakingstory #thefunkiejunkie #thefunkiejunkieboutique #frillyandfunkie

I based the design on the Disney Haunted Mansion book/ride. (Our friends are classic Disney fans.)


The house itself is loosely based on the illustration in the book:

Lisa Hoel for The Funkie Junkie Blog - Halloween Journal #creativejuicefreshsqueezed #tim_holtz #sizzix #mysizzixstory #mymakingstory #thefunkiejunkie #thefunkiejunkieboutique #frillyandfunkie

Last fall Tim Holtz released an 87 piece Thinlits die set, Christmas Village, that was based on his wildly popular (and retired) steel rule Village die collection. This new set has much more flexibility with mix and match doors, windows, additions etc. so you can cobble together your own versions of mini houses. Check out Tim's excellent video where he explains his thoughts on this set and all the ins and outs. (More on how I constructed my mansion below.)

https://www.youtube.com/watch?v=GstjNChz7zo&t=963s

The background is alcohol ink on a large sheet of translucent Yupo.

https://www.youtube.com/watch?v=GstjNChz7zo&t=963s

The mansion grounds are filled with gravestones, ghosts and the frightened caretaker.

https://www.youtube.com/watch?v=GstjNChz7zo&t=963s
I scanned and printed pages from the book to fussy cut out the figures.

Of course there are also Halloween Tiny Lights as part of the scene.

https://www.youtube.com/watch?v=GstjNChz7zo&t=963s

The vignette on the top of the lantern echoes details from the story (and a delightfully detailed Idea-ology Tombstone).

https://www.thefunkiejunkie.com/ProductDetails.asp?ProductCode=TH94173
Arthur the owl and the Mischievous cats are stars.


Let's take a look at some of the how-to:
1) First off the bat was making the house. I cut the pieces out of Kraft Heavystock paper and inked them with Distress Oxide Pumice Stone and Hickory Smoke ink. I stacked the sides to make a multi-story structure.


2) The background is a large piece of Yupo paper I alcohol inked as a night sky. (You can get large sheets of Yupo at art stores. Ranger sells smaller sheets of Yupo cardstock packs that are perfect for card making etc. I also used the Moon Masks set to mask the moon while making the background and then adding the moon shadow details on the face of it.


3)  To add the tiny lights, I left a hole in the base of the house and hot glued several loops of lights onto the landscape platform. I then ran the wire with the rest of the lights around the front and tacked it into position with hot glue. I disguised the wire with paint and placed the bulbs behind bushes and gravestones.


4) The gravestones were die cut out of heavy cardstock coated with grit paste and painted. I used the Halloween 2022 Remant Rubs to add details.


5) The structure the top vignette is built on is an Etcetera Trims piece I hot glued onto the lantern.


Thanks for stopping by and Happy Halloween!! Time to pivot to Christmas LOL.

Supplies used:
Tim Holtz die set - Christmas Village
Tim Holtz die set - Mischievous
Tim Holtz die set - Vault Series Halloween 2021 #665563
Tim Holtz die set - Decorative Trims
Tim Holtz die set - Ghost Town #2 #665560
Tim Holtz die set - Arthur, Colorize #664730
Tim Holtz die - Branches #663138
Tim Holtz 3D Embossing Folder - Lumber
Tim Holtz 3D Embossing Folder - Mini Brickwork
Tim Holtz 3D Embossing Folder - Mini Cobblestone
Tim Holtz Layering Mask Set - Moon Masks

Ranger Archival Inks - Hickory Smoke
Distress Oxide Ink - Pumice Stone, Hickory Smoke
Distress Grit Paste - Crypt
Idea-ology Tombstones
Stampers Anonymous Etcetera Trims, Bracket

Wednesday, January 26, 2022

January, Icy and Cold? – Funkie Junkie Blog Challenge

I don't know about you, but January here in Idaho definitely qualifies as icy and cold! That is the new challenge on the Funkie Junkie Boutique Blog

"Highlight anything that speaks icy and/or cold to you which could include: snowflakes, icy tones of colors, icicles or winter activities. Come share what icy and cold inspires in your art!"

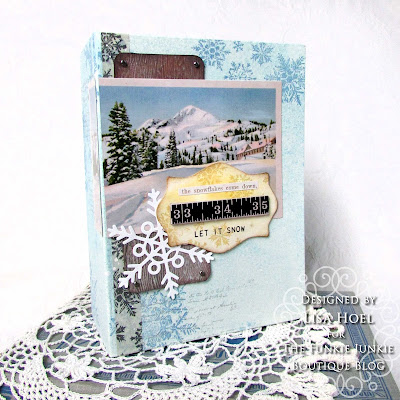
My creation is all about the winter landscape.

Lisa Hoel for the Funkie Junkie Boutique - Icy & Cold Challenge  #creativejuicefreshsqueezed #eileenhull #tim_holtz #sizzix #mymakingstory #winter

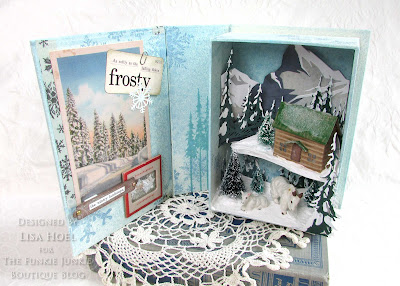
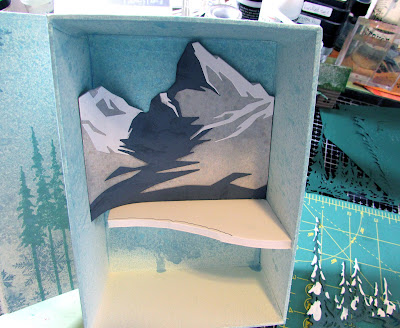
What is inside?
More icy, cold winter!

Lisa Hoel for the Funkie Junkie Boutique - Icy & Cold Challenge  #creativejuicefreshsqueezed #eileenhull #tim_holtz #sizzix #mymakingstory #winter

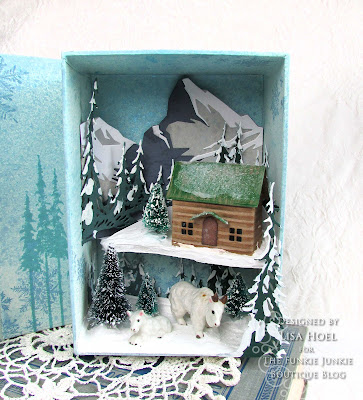
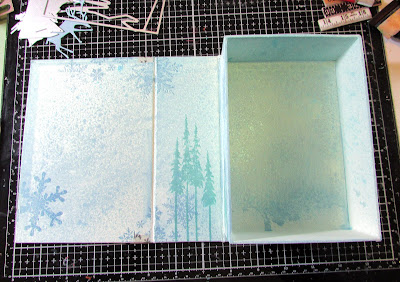
The structure is a Graphic 45 Book Box (retired I believe). I created a wintery scene inside.

Lisa Hoel for the Funkie Junkie Boutique - Icy & Cold Challenge  #creativejuicefreshsqueezed #eileenhull #tim_holtz #sizzix #mymakingstory #winter

I included some vintage bone china Mountain Goat figurines in my little vignette. I think they fit right in! The log cabin is made using the Tim Holtz Paper Village #2 die set.

Lisa Hoel for the Funkie Junkie Boutique - Icy & Cold Challenge  #creativejuicefreshsqueezed #eileenhull #tim_holtz #sizzix #mymakingstory #winter

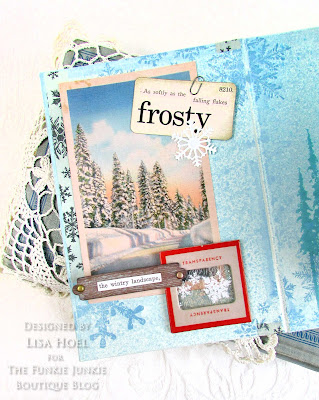
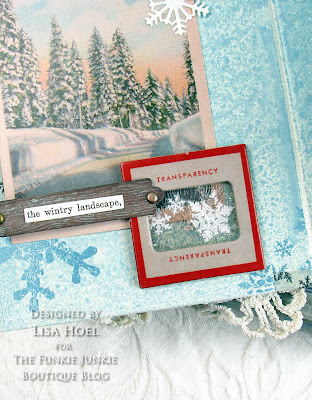
Various Tim Holtz ephemera (mostly from past years' Christmas releases) combined to decorate the inside cover. 

Lisa Hoel for the Funkie Junkie Boutique - Icy & Cold Challenge  #creativejuicefreshsqueezed #eileenhull #tim_holtz #sizzix #mymakingstory #winter

For the slide mount element, I put snowflake rub-ons onto a piece of mica, covered it with a thick layer of Holiday Distress Icicle Crackle Paste and then stuck the cardboard slide mount on top of it. It crackled beautifully!

Lisa Hoel for the Funkie Junkie Boutique - Icy & Cold Challenge  #creativejuicefreshsqueezed #eileenhull #tim_holtz #sizzix #mymakingstory #winter

Here are a few peeks of the "in process" building of my project:

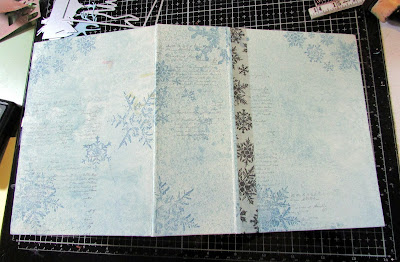
1) I used Distress Sprays to lay down the base color on the box, then stamped with Distress and Archival Ink.


After inking, I also lightly spritzed the outside of the box with Distress Resist Spray and then dusted with Rock Candy Dry Glitter for extra sparkle.


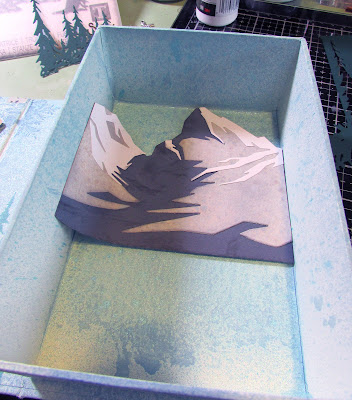
2) The background scenery was built in layers with Sizzix die cuts:


Foam core board is one of my favorite building materials. ;-) It worked well for the little shelf for the cabin.


3) The cabin is made with small scale corrugated board. It has a great look for "logs". Tim Holtz shared how to make one in 2020 when the first Paper Village Die Set was released. You can find that video here.


I completed the scene with mini bottle brush trees and snow texture paste (and the figurines).  This vignette will take its place in my winter decor!

Thanks for stopping by! I hope you check out the fun challenges we have on the 
Funkie Junkie Boutique Blog. They are always good for sparking your creativity! You have two weeks to join the current challenge so I hope you give it a go.

Supplies used:
Tim Holtz stamp set CMS098 - Grunge Flakes
Tim Holtz stamp set CMS052 - Reindeer Flight
Tim Holtz stamp set CMS328 - Entomology
Tim Holtz die set - Paper Village #2
Tim Holtz die set - Tall Pines
Tim Holtz die set - Mountain Top
Eileen Hull die set - Wreath & Snowflake
Eileen Hull Full Size Journal Die (for the label shape diecuts)

Distress Paint - Picket Fence
Distress Spray Stain, regular & Oxide - Speckled Egg
Distress Ink - Stormy Sky, Evergreen Bough
Distress Glitter - Rock Candy
Tim Holtz Mica Spray Stain - Snow Flurries
Ranger Archival Ink - Hickory Smoke, Black Soot
Tim Holtz Distress Holiday Texture Set
Mica sheets
Graphic 45 Book Box (retired)
Tim Holtz Christmas Stickers, Remnant Rubs, Flashcards, Layers & Baseboards Frames, Tissue Tape from years past
Tim Holtz Baseboards - Junk Drawer

Some links in this post are affiliate links which do not affect the price you pay but allow me to earn a small percentage of a sale. Thanks! (My husband also thanks you!) 


Thursday, January 13, 2022

Gel Press + Eileen Hull Dies = Fabulous!

Hello! This month the Teams of Eileen Hull are collaborating with Gel Press and the paint is flying! Gel Press makes a wonderful assortment of gel plates and products for monoprinting and it is truly addictive. Once you start pulling prints you won't want to stop! Eileen's dies and gel printing are perfect combination to create fabulous projects.

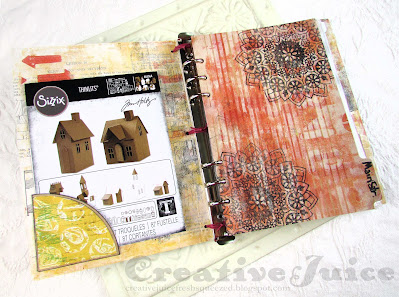
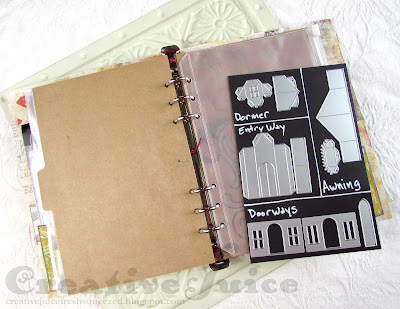
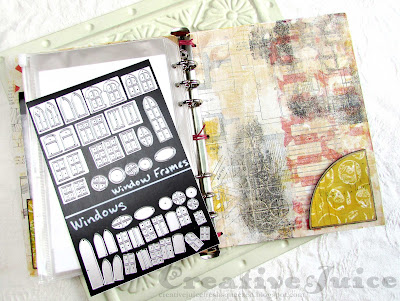
I have a Full Size Journal creation to share with you this week. First though, the story behind it. Last October Tim Holtz re-imagined a beloved (but retired) Sizzix die set – and the new Village Collection was released. The original Village Dies were large steel rule dies but this new collection is a complete set of mix and match Thinlits dies. Bottom line, it's a completely awesome set and has a whole bunch of pieces that need organizing. Zoe Hillman came up with a very logical way to sort the dies on magnetic sheets that fit in Sizzix die storage envelopes and shared that with Village lovers everywhere so we could get organized too! I adapted the idea a bit to fit into binder made with Eileen's Full Size Journal Die. Perfect! Whew, now we can take a look…

Lisa Hoel for Eileen Hull - collaboration with Gel Press! Full Size Journal die organizer  #creativejuicefreshsqueezed #gelpressobsessed #eileenhull #eileenhulldesigns #eileenhullsizzix #ehinspirationteam #eheducators #Sizzix #mymakingstory #diecutting
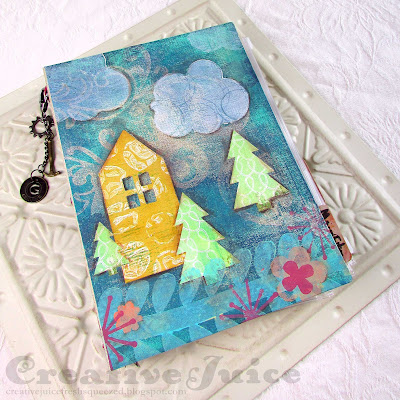
Front cover

Lisa Hoel for Eileen Hull - collaboration with Gel Press! Full Size Journal die organizer  #creativejuicefreshsqueezed #gelpressobsessed #eileenhull #eileenhulldesigns #eileenhullsizzix #ehinspirationteam #eheducators #Sizzix #mymakingstory #diecutting
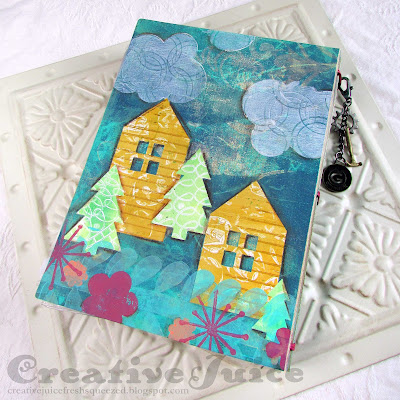
Back cover

Lisa Hoel for Eileen Hull - collaboration with Gel Press! Full Size Journal die organizer  #creativejuicefreshsqueezed #gelpressobsessed #eileenhull #eileenhulldesigns #eileenhullsizzix #ehinspirationteam #eheducators #tim_holtz #VillageCollection #Sizzix #mymakingstory #diecutting

Lisa Hoel for Eileen Hull - collaboration with Gel Press! Full Size Journal die organizer  #creativejuicefreshsqueezed #gelpressobsessed #eileenhull #eileenhulldesigns #eileenhullsizzix #ehinspirationteam #eheducators #tim_holtz #VillageCollection #Sizzix #mymakingstory #diecutting

Lisa Hoel for Eileen Hull - collaboration with Gel Press! Full Size Journal die organizer  #creativejuicefreshsqueezed #gelpressobsessed #eileenhull #eileenhulldesigns #eileenhullsizzix #ehinspirationteam #eheducators #tim_holtz #VillageCollection #Sizzix #mymakingstory #diecutting

Lisa Hoel for Eileen Hull - collaboration with Gel Press! Full Size Journal die organizer  #creativejuicefreshsqueezed #gelpressobsessed #eileenhull #eileenhulldesigns #eileenhullsizzix #ehinspirationteam #eheducators #tim_holtz #VillageCollection #Sizzix #mymakingstory #diecutting

The A5 dividers, plastic zip pockets and binder I cannibalized for the ring mechanism were all found on amazon (links in supply list below).


Now for the tips and tricks part! As far as using the Gel Press, I'm somewhat of a newbie and was winging it lol. So no fancy video from me. ;-) BUT, my teamie Karen Bearse just shared a two part video on her YouTube channel that has LOTS of great info and techniques. I highly recommend checking it out. Also, the Gel Press YouTube channel is an absolute treasure trove of videos on how to do all sorts of nifty things with Gel Press products. You will learn a ton! Don't miss those valuable resources.

Specifically for my journal:

I got all crazy and printed directly onto the mat board substrate I used for the covers. I also could have done prints on paper and then adhered the paper to the mat board before cutting the covers. I just went for it though. I like to live dangerously that way. ;-)


So after playing around, here are the covers with their 'base' layers. Pretty happy with that! Next I added some 'clouds' using one of the small plates from a Petites set:


I put the small plate onto one of my acrylic stamping blocks, applied white paint to it with a brayer, and then added texture with the center of a used up tape roll. I used the prepped gel plate just like a stamp!

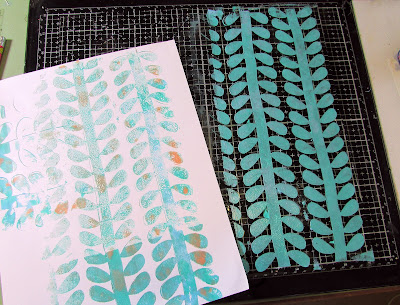
Which brings me to 'found objects'. Random stuff from the recycle bin and around the house make fab tools for gel printing. Press them into the paint on your plate for added texture! Here's a photo of some of the things I used during these print making sessions. Stencils and foam stamps are also great tools. Keep your eyes open and all sorts of 'print possibilities' will present themselves.


I knew I was going to collage elements to the journal covers (houses and trees) so I created appropriately colored prints for the purpose during my printing play time.


I cut the elements out with the dies and glued them onto the covers.


I used the Impressables plate to add more layers over the collaged elements. (Print shown was for practice. I used the plate to print directly onto the covers by the base of the houses.)

Super fun texture plate. I will definitely be
experimenting more with it!


I added more details with foam stamps I had previously made with a flower die set of Eileen's. I also went in with a brown Stablio water soluble pencil to blend around some of the elements to add more depth.

Here's a peek at the insides:


I covered the inside covers with pages from a vintage 'how to build houses' book I have. (Appropriate right!) Then I did a little bit of gel printing over it. I still wanted the book pages to show through in spots so I didn't make it too heavy.

I printed on the dividers as well 'cause, why not?

Adding the ring binder spine: 


I cut the plastic cover away from the metal binder spine but I left some strips of plastic intact around the rivets that had attached the spine to the cover. I used E6000 glue to glue the tabs onto the cover spine. After it was dry, I also tied the metal binder spine in for added strength and decoration.


A look at some of the die pocket pages:

The pages are thin magnetic sheets adhered to heavy cardstock. They fit right into the zip pockets. Easy!

Whew! Thanks for stopping by and be sure to keep an eye on Eileen's blog for more inspiration from the Educator and Inspiration Teams.

Also keep an eye on the Gel Press YouTube channel to see how their Design Team utilizes Eileen's dies in their projects this month!

Supplies used:

Dies:
Eileen Hull Sizzix 
Full Size Journal Die  Sizzix / SB )
Folio Page, Pocket & Flowers Die Set  Sizzix / SB )
Vintage Truck Die Sizzix / SB )
Mandala Thinlits Die ( Sizzix / SB )

Gel Press supplies:

Other:
mat board
brayer
lots of different acrylic paints from my stash
found objects for mark making
thick cardstock
Stablio water soluble pencil - brown

From Amazon:

Some links in this post are affiliate links which do not affect the price you pay but allow me to earn a small percentage of a sale. Thanks! (My husband also thanks you!) 


Wednesday, December 8, 2021

Merry Kitschmas! Guest Designer Post for The Funkie Junkie Boutique Blog

Merry Kitschmas! I am honored to be a guest designer on The Funkie Junkie Boutique Blog today with a project for their current challenge:

Yuletide Delights Let's get festive and create some Vintage Yuletide magic. Perhaps use some holiday distress colors or go full glitz with sparkles and falling snow. It is getting cold and we are thinking of sugarplums, candy canes, and holiday cheer. Create holiday cards, décor, or ornaments to show your Yuletide Delights. Have fun with your make and create some holiday magic! Happy crafting!

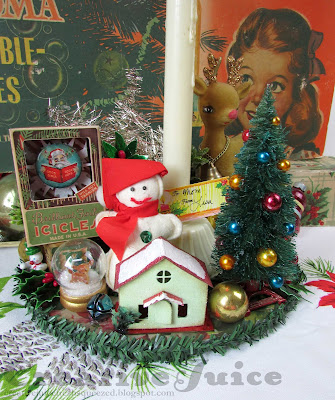
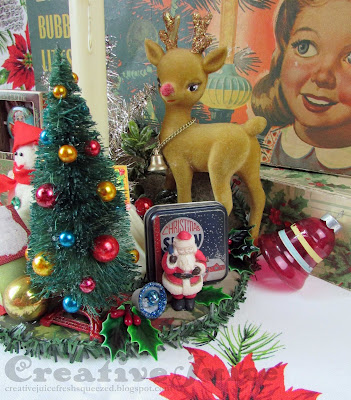
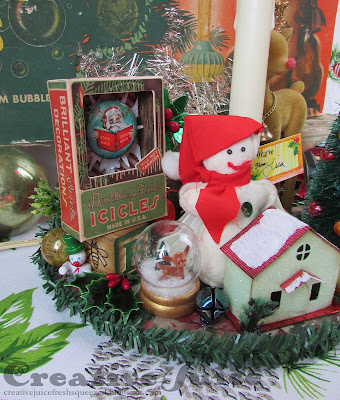
I love all things vintage Christmas and when my Mom mentioned her fond memories and childhood fascination with their Christmas tree bubble lights, an idea was sparked! I happened to have a stash of old bubble light bulbs and vintage candoliers in my stash that I knew would be perfect to craft-ify. I mixed truly vintage holiday bits with Tim Holtz Idea-ology and die cuts. I love how his products mix so well with the actual vintage! I hope my Mom enjoys this merry Kitschmas decoration as much as I do.

Lisa Hoel for The Funkie Junkie Boutique Blog - Merry Kitschmas! Vintage and Tim Holtz products combine for maximum nostalgia. #creativejuicefreshsqueezed #timholtz #sizzix #mymakingstory #vintagechristmas

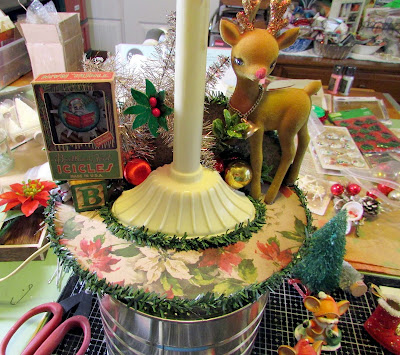
I glued the candolier onto a base I made out of foam core; then went to town filling it with delightful Christmas details. I used both new and old supplies from my stash. (It's handy to have a stash!)

Lisa Hoel for The Funkie Junkie Boutique Blog - Merry Kitschmas! Vintage and Tim Holtz products combine for maximum nostalgia. #creativejuicefreshsqueezed #timholtz #sizzix #mymakingstory #vintagechristmas

Tim Holtz Christmas Idea-ology rounded out my vintage bits and bobs. I made sure many of my favorites made it in. I also used many of the tips that Tim Holtz shared in his recent Holiday Live on YouTube. Check it out if you haven't already!

Lisa Hoel for The Funkie Junkie Boutique Blog - Merry Kitschmas! Vintage and Tim Holtz products combine for maximum nostalgia. #creativejuicefreshsqueezed #timholtz #sizzix #mymakingstory #vintagechristmas

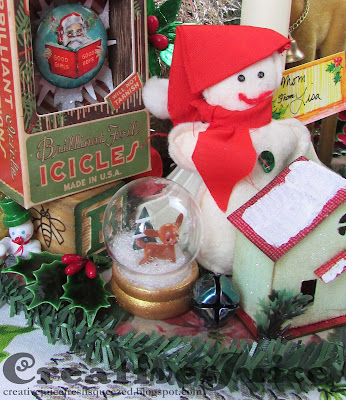
I couldn't resist adding a Snow Globe with a tiny little deer inside. I have a thing for snow globes. and deer. Can't you tell? ;-)

Lisa Hoel for The Funkie Junkie Boutique Blog - Merry Kitschmas! Vintage and Tim Holtz products combine for maximum nostalgia. #creativejuicefreshsqueezed #timholtz #sizzix #mymakingstory #vintagechristmas

I also have a thing for tiny houses and adding a Paper Village Putz house was definitely a box I wanted to check for this project.

Lisa Hoel for The Funkie Junkie Boutique Blog - Merry Kitschmas! Vintage and Tim Holtz products combine for maximum nostalgia. #creativejuicefreshsqueezed #timholtz #sizzix #mymakingstory #vintagechristmas

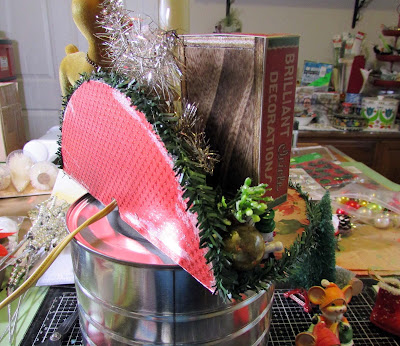
I meant to take more photos of the basic base structure but I got going and forgot until after I had already started gluing parts on. Oops! Here is a peek though to give you an idea.

I cut a large circle out of foam core board and sliced off the back third. I flipped it up to form the backboard. I covered the pieces with Tim Holtz Christmas Backdrops and Rinea Foil papers before I glued them together. I also cut a notch out of the back for the cord.


I had some wired green garland trim in my stash which covered the edges nicely. Working from back to front, I just layered in the components. My mini hot glue gun was my friend!


Thanks for stopping by! I hope you check out the fun bi-weekly challenges they have on the Funkie Junkie Boutique Blog. They are always good for sparking your creativity! You have another week to join the current challenge so I hope you give it a go.

Tim Holtz Sizzix Dies used:
Christmas Minis (tree in snow globe)
various snowflake dies

Distress Paint - Candied Apple
Distress Spray Stain - Rustic Wilderness
Ranger Alcohol Ink - Mushroom, Stream, Raisin, Red Pepper, Butterscotch
Distress Glaze - Fired Brick
Distress Glitter - Rock Candy

Some links in this post are affiliate links which do not affect the price you pay but allow me to earn a small percentage of a sale. Thanks! (My husband also thanks you!)