Showing posts with label vignette. Show all posts

Monday, July 22, 2024

July Blooms with Eileen Hull Sizzix Products

Hello Eileen Hull fans! This month the Inspiration Team is playing more with Eileen's new Sizzix releases – the Watercolour Florals & Lattice Stencil Set with the Painterly Blooms & Background Thinlits die set that will easily cut out the stenciled flowers. 

Lisa Hoel for Eileen Hull - 2024 June Sizzix Collection Release  #creativejuicefreshsqueezed #EileenHull  #eileenhulldesigns  #sizzix #mymakingstory #TeamEileen #mysizzixstory

I haven't used the stencil set for this project, but I definitely utilized the die set! The box for this vignette is the lid from the Slotted Treat Box Plus Die.

Lisa Hoel for Eileen Hull - 2024 June Sizzix Collection Release  #creativejuicefreshsqueezed #EileenHull  #eileenhulldesigns  #sizzix #mymakingstory #TeamEileen #mysizzixstory

I'm a fan of Graphic 45 paper collections. The one I used here is the 8" x 8" Little Things paper pad.

Lisa Hoel for Eileen Hull - 2024 June Sizzix Collection Release  #creativejuicefreshsqueezed #EileenHull  #eileenhulldesigns  #sizzix #mymakingstory #TeamEileen #mysizzixstory

The white flowers are all cut from coffee filters using the Painterly Blooms & Background Die Set. The handle is cut with the Treasure Box Die. I covered the side with paper embossed using Eileen's 3-D Crochet Mandala folder.

   Lisa Hoel for Eileen Hull - 2024 June Sizzix Collection Release  #creativejuicefreshsqueezed #EileenHull  #eileenhulldesigns  #sizzix #mymakingstory #TeamEileen #mysizzixstory

In progress…

The lid of the Slotted Treat Box was the perfect size to fit the Graphic 45 image!


I spritzed white coffee filters with pearl mist and when dry, die cut several layers of flowers. I had some yellow flower stamens that I glued in the middle after poking a hole with a die pick. Easy!


Thanks for stopping by and be sure to keep an eye on Eileen's blog for more inspiration from the Educator and Inspiration Teams.

Supplies used:

Eileen Hull Plus Die - Slotted Treat Box 
Eileen Hull Die Set - Painterly Blooms & Background 
Eileen Hull Die - Treasure Box 
Eileen Hull 3-D Embossing Folder - Crochet Mandala  ( Sizzix, SB )


Some links in this post are affiliate links which do not affect the price you pay but allow me to earn a small percentage of a sale. Thanks! (My husband also thanks you!)


Wednesday, January 17, 2024

Funkie Junkie Focus – "It's Cold Outside"

Hello, our current Funkie Junkie Focus is "It's Cold Outside". Our projects need to show what we love (or hate) about the wintertime. One of my favorite winter activities is skiing! I learned when I was a little kid and have very fond memories of yearly family ski vacations in Lake Tahoe. I created a Vignette Divided Box project to celebrate skiing:

Lisa Hoel for The Funkie Junkie Boutique  #creativejuicefreshsqueezed  #mymakingstory #tim_holtz #thefunkiejunkieboutique #sizzix

I removed one of the dividers to create a large compartment in the top half of the box.

Lisa Hoel for The Funkie Junkie Boutique  #creativejuicefreshsqueezed  #mymakingstory #tim_holtz #thefunkiejunkieboutique #sizzix

I used one of the new Tim Holtz Vault series die sets, Vault Rosettes to create background elements.

Lisa Hoel for The Funkie Junkie Boutique  #creativejuicefreshsqueezed  #mymakingstory #tim_holtz #thefunkiejunkieboutique #sizzix

The little snow bunny is cut using the original Bunny Games Die Set. This cute bunny is in the new Vault Bunny + Chick Die Set as well although in a larger size. It does pay to have both so you can choose what works best in your project! If you missed the Tim Holtz live go check it out on replay. Tim goes through all the new Vault dies and shows the size comparisons between old and new. It's very helpful.

Lisa Hoel for The Funkie Junkie Boutique  #creativejuicefreshsqueezed  #mymakingstory #tim_holtz #thefunkiejunkieboutique #sizzix

Here's a look at some of the "in process" steps.

1) Little snow bunny. Don't forget to search through your old dies to mix and match! The hat from the Winter Critters Die Set fit the bunny perfectly.


2) I cut rosette pieces out of vellum and layered with snowflakes. Vellum is trickier to work with than paper as far as scoring and folding but it works with a bit of care.


The half rosettes are made from two of the pieces. I found  it helpful to have the base circle folded at a 90 degree angle to make a little "shelf" on which to glue the rosette parts.


3) Elements in the box before I glued in all the top layer parts:


All the snow was created with Snowfall Grit Paste. Love that icy look!

Thanks for stopping by. Keep an eye on the Funkie Junkie Boutique Blog, Inspiration Ave. because you are now getting regular doses of expanded (and inspiring) content each week. Don't miss it…

Supplies used:  

Tim Holtz Die Set - Forest Shadows
Tim Holtz Die Set - Vault Rosettes
Tim Holtz Die Set - Festive Gatherings
Tim Holtz Die Set - Bunny Games
Tim Holtz Die Set - Winter Critters
Tim Holtz Die Set - Paper Snowflakes, Mini
Tim Holtz Die Set - Paper Snowflakes
Tim Holtz Die Set - Tree Line
Tim Holtz Die Set - Vintage Labels
Tim Hotz Stamp Sets - Reindeer Flight, Grunge Flakes


Distress Spray Stain - variety of greens
Distress Paint - Tumbled Glass
Distress Texture Paste - Sparkle
Distress Grit Paste - Snowfall
Distress Rock Candy Glitter
Glitter Duster

Idea-ology Vignette Divided Box
Idea-ology Christmas '23 - Pinecones
Idea-ology Christmas '23 - Layer Frames
Idea-ology Christmas '23 - Alpine Trees
Idea-ology Design Tape - Trims

Wednesday, January 3, 2024

Funkie Junkie Focus – Favorite Products of 2023

Hello there Funkie Junkie fans! For this focus, we were given the difficult task of choosing our favorite products that were introduced in 2023. So hard!! I've incorporated a few of them into my project; I really couldn't choose just one.

Lisa Hoel for The Funkie Junkie Boutique  #creativejuicefreshsqueezed  #mymakingstory #tim_holtz #thefunkiejunkieboutique #sizzix

The Idea-ology Reliquary Dome introduced this year is definitely a favorite! I love the size and shape of the glass dome. There is so much you can do with it. Another new favorite is the Tim Holtz Die Set Holiday Blocks. I'm looking forward to playing more with it. It's like a set of puzzle pieces you can combine in so many different ways! 

Lisa Hoel for The Funkie Junkie Boutique  #creativejuicefreshsqueezed  #mymakingstory #tim_holtz #thefunkiejunkieboutique #sizzix

I am also quite fond of the Idea-ology Salvaged Deer and Alpine Trees (love that thinner profile!)

Let's take a peek at how I put this all together:

Step 1 – I wanted to build the die cut panel out of distressed metal pieces. You can get a great look by using copper or aluminum tape placed on cardstock and then cut. I also like to add a layer of paint which I then distress.


Step 2 – After cutting out the shapes, I sanded the edges and grunged it up with Archival Ink.


Step 3 – Foundry Wax is another product I need to play more with. It's so cool! I gilded the Salvaged Deer to make them look metallic to match the die cut panel. It's easy to use. You apply it with a brush and when it dries (which is quick!) you hit it with a heat gun and watch the magic happen. Tim Holtz has an extensive video demo about it.


Here's a look at the scene before I add the glass dome:


Thanks for stopping by. Keep an eye on the Funkie Junkie Boutique Blog, 
Inspiration Ave. because you are now getting regular doses of expanded (and inspiring) content each week. Don't miss it…

Supplies used:  

Tim Holtz Die Set - Holiday Blocks

Distress Crayons - Salvaged Patina
Distress Paint - variety
Distress Archival Ink - Ground Espresso
Ranger Alcohol Ink

Idea-ology Christmas '23 - Salvaged Reindeer
Idea-ology Christmas '23 - Alpine Trees
Idea-ology Christmas Baubles
Idea-ology Reliquary Dome
Idea-ology Mini Fasteners
Copper Tape

Wednesday, February 1, 2023

Funkie Junkie Focus – Frozen Winter

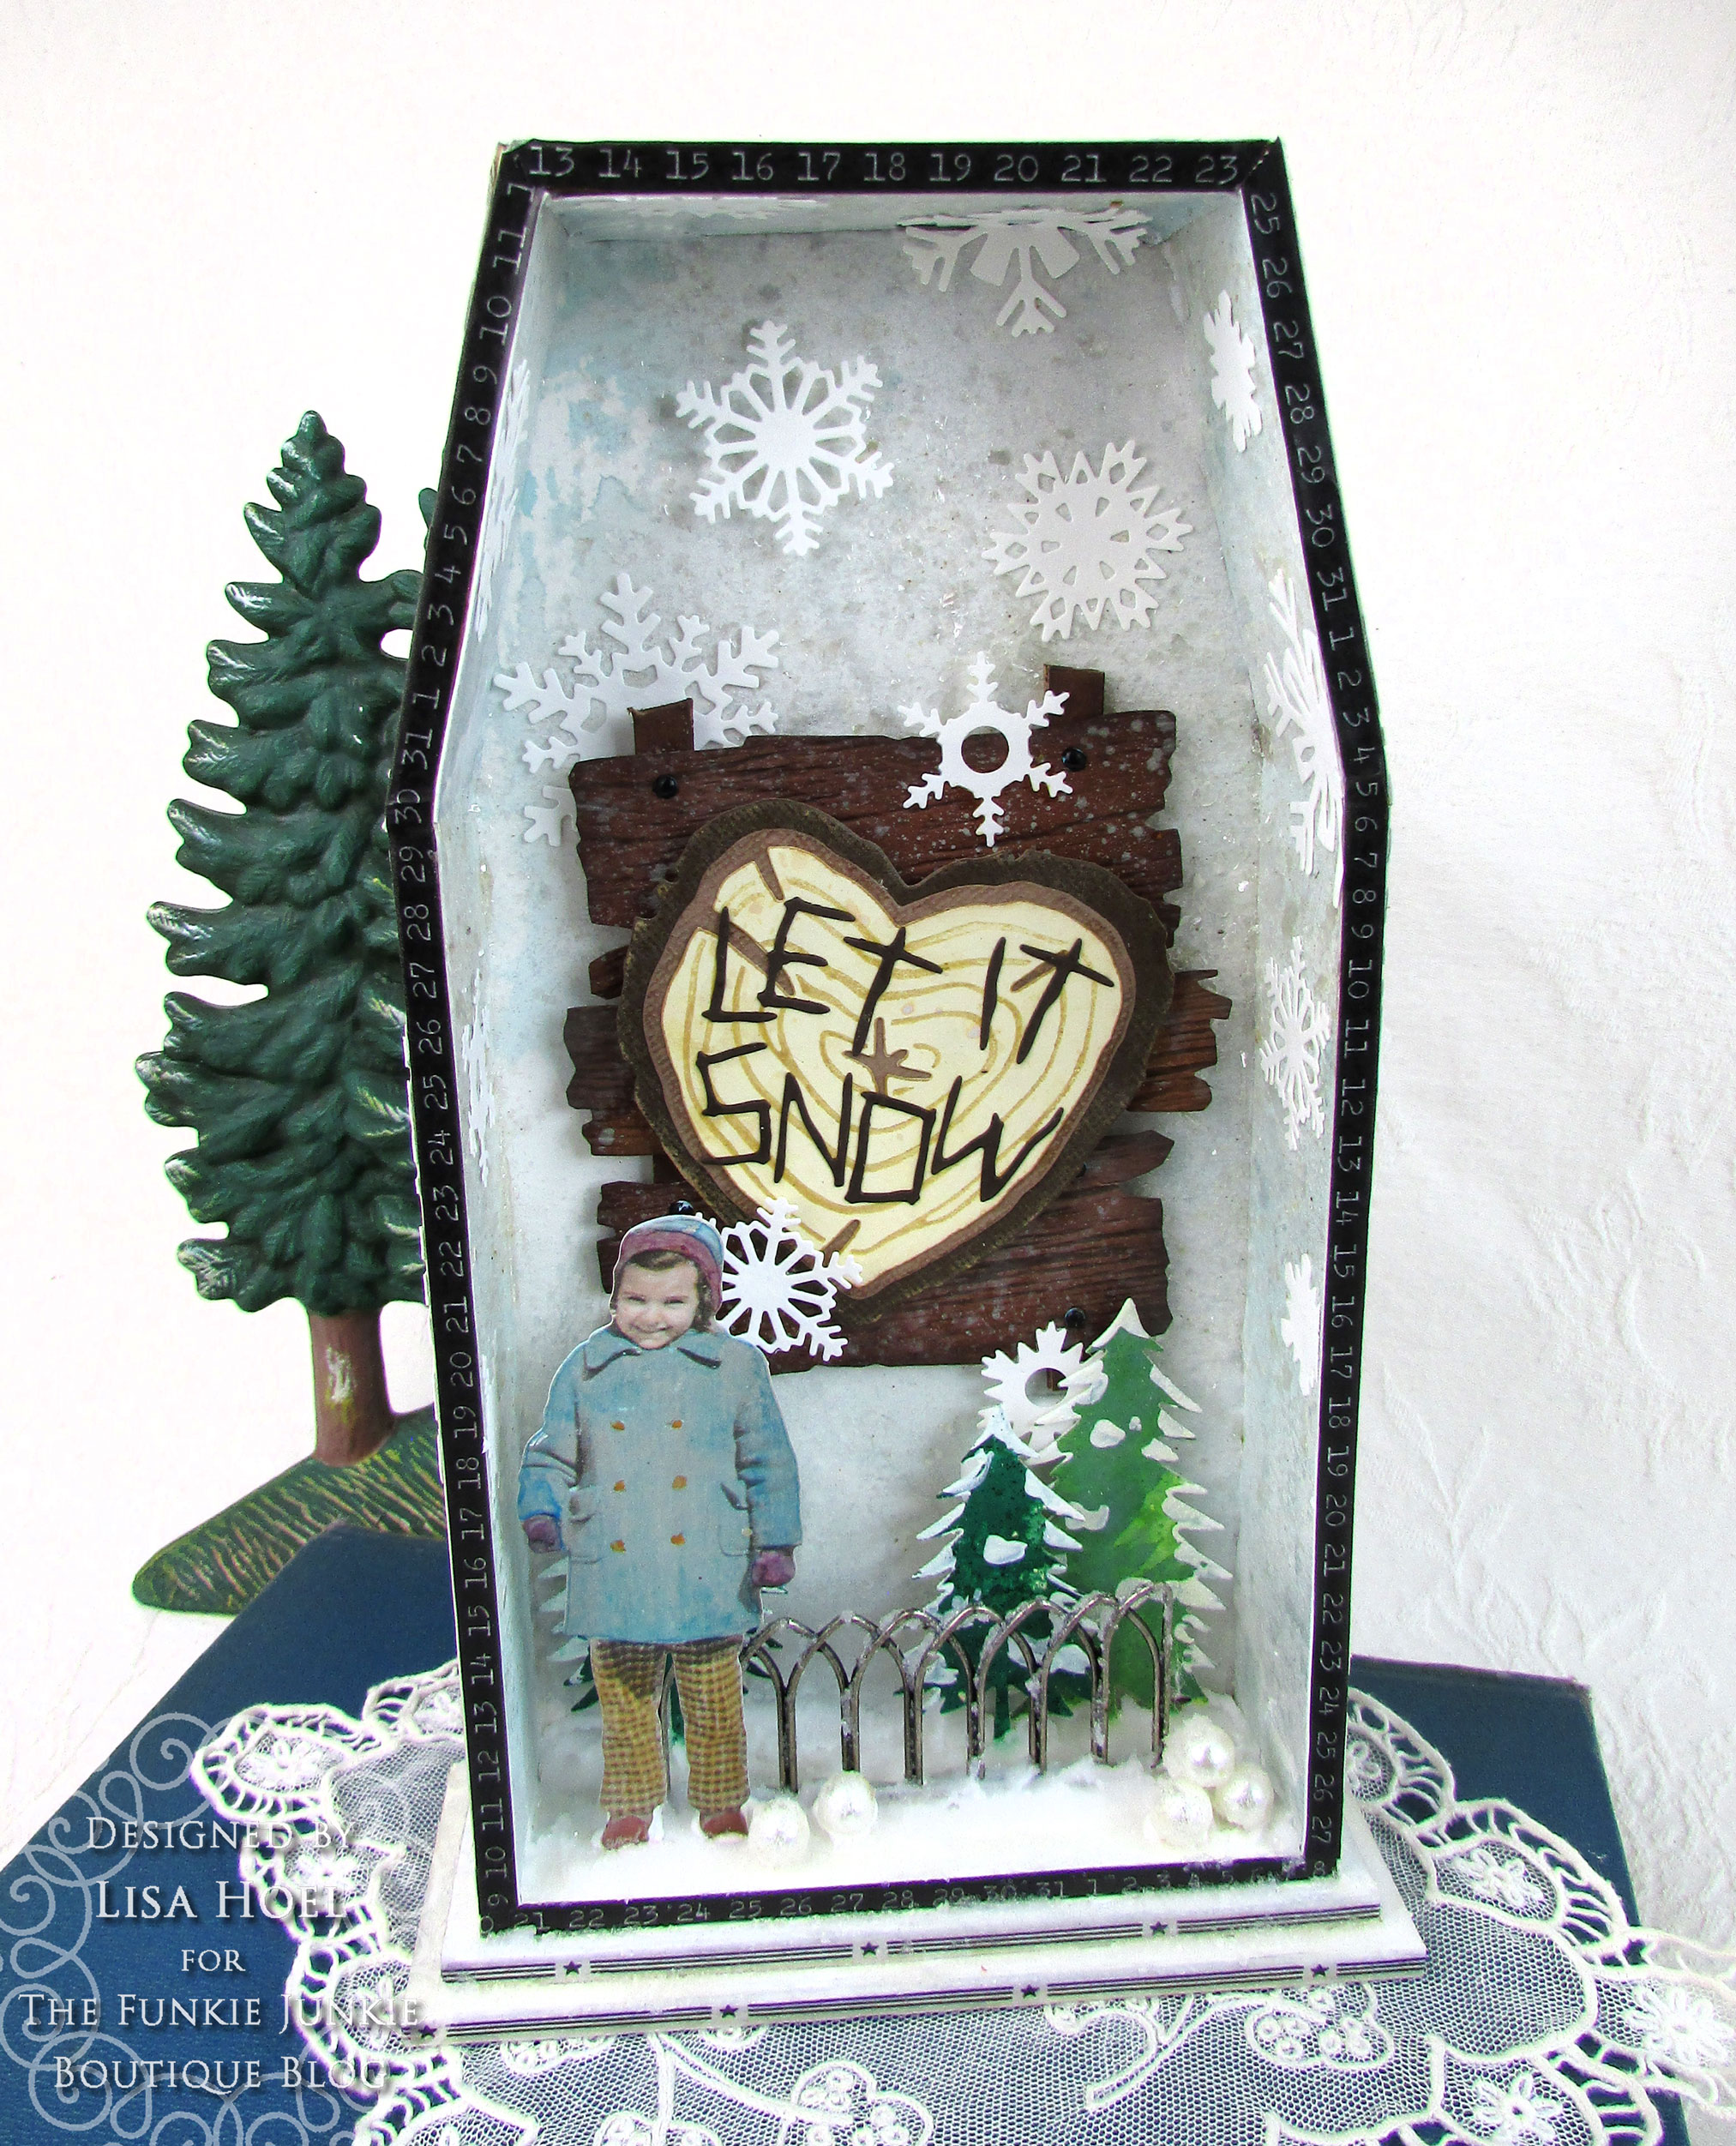
Hello there and welcome to my take on the current Funkie Junkie focus! The theme is Frozen Winter so I happily created a home decor piece to display since I had to put all my Christmas decorations away.

Lisa Hoel for The Funkie Junkie Boutique - Frozen Winter  #creativejuicefreshsqueezed  #mymakingstory #tim_holtz #thefunkiejunkieboutique #sizzix

I've used new and old favorites in the creation of this project. The structure is the Halloween 2022 Vignette Arched Shrine box. (It's not just for Halloween!) 

Lisa Hoel for The Funkie Junkie Boutique - Frozen Winter  #creativejuicefreshsqueezed  #mymakingstory #tim_holtz #thefunkiejunkieboutique #sizzix

The outside is covered with strips of Holiday Gray Two-tone Woodgrain Cardstock and diecut snowflakes.

Lisa Hoel for The Funkie Junkie Boutique - Frozen Winter  #creativejuicefreshsqueezed  #mymakingstory #tim_holtz #thefunkiejunkieboutique #sizzix

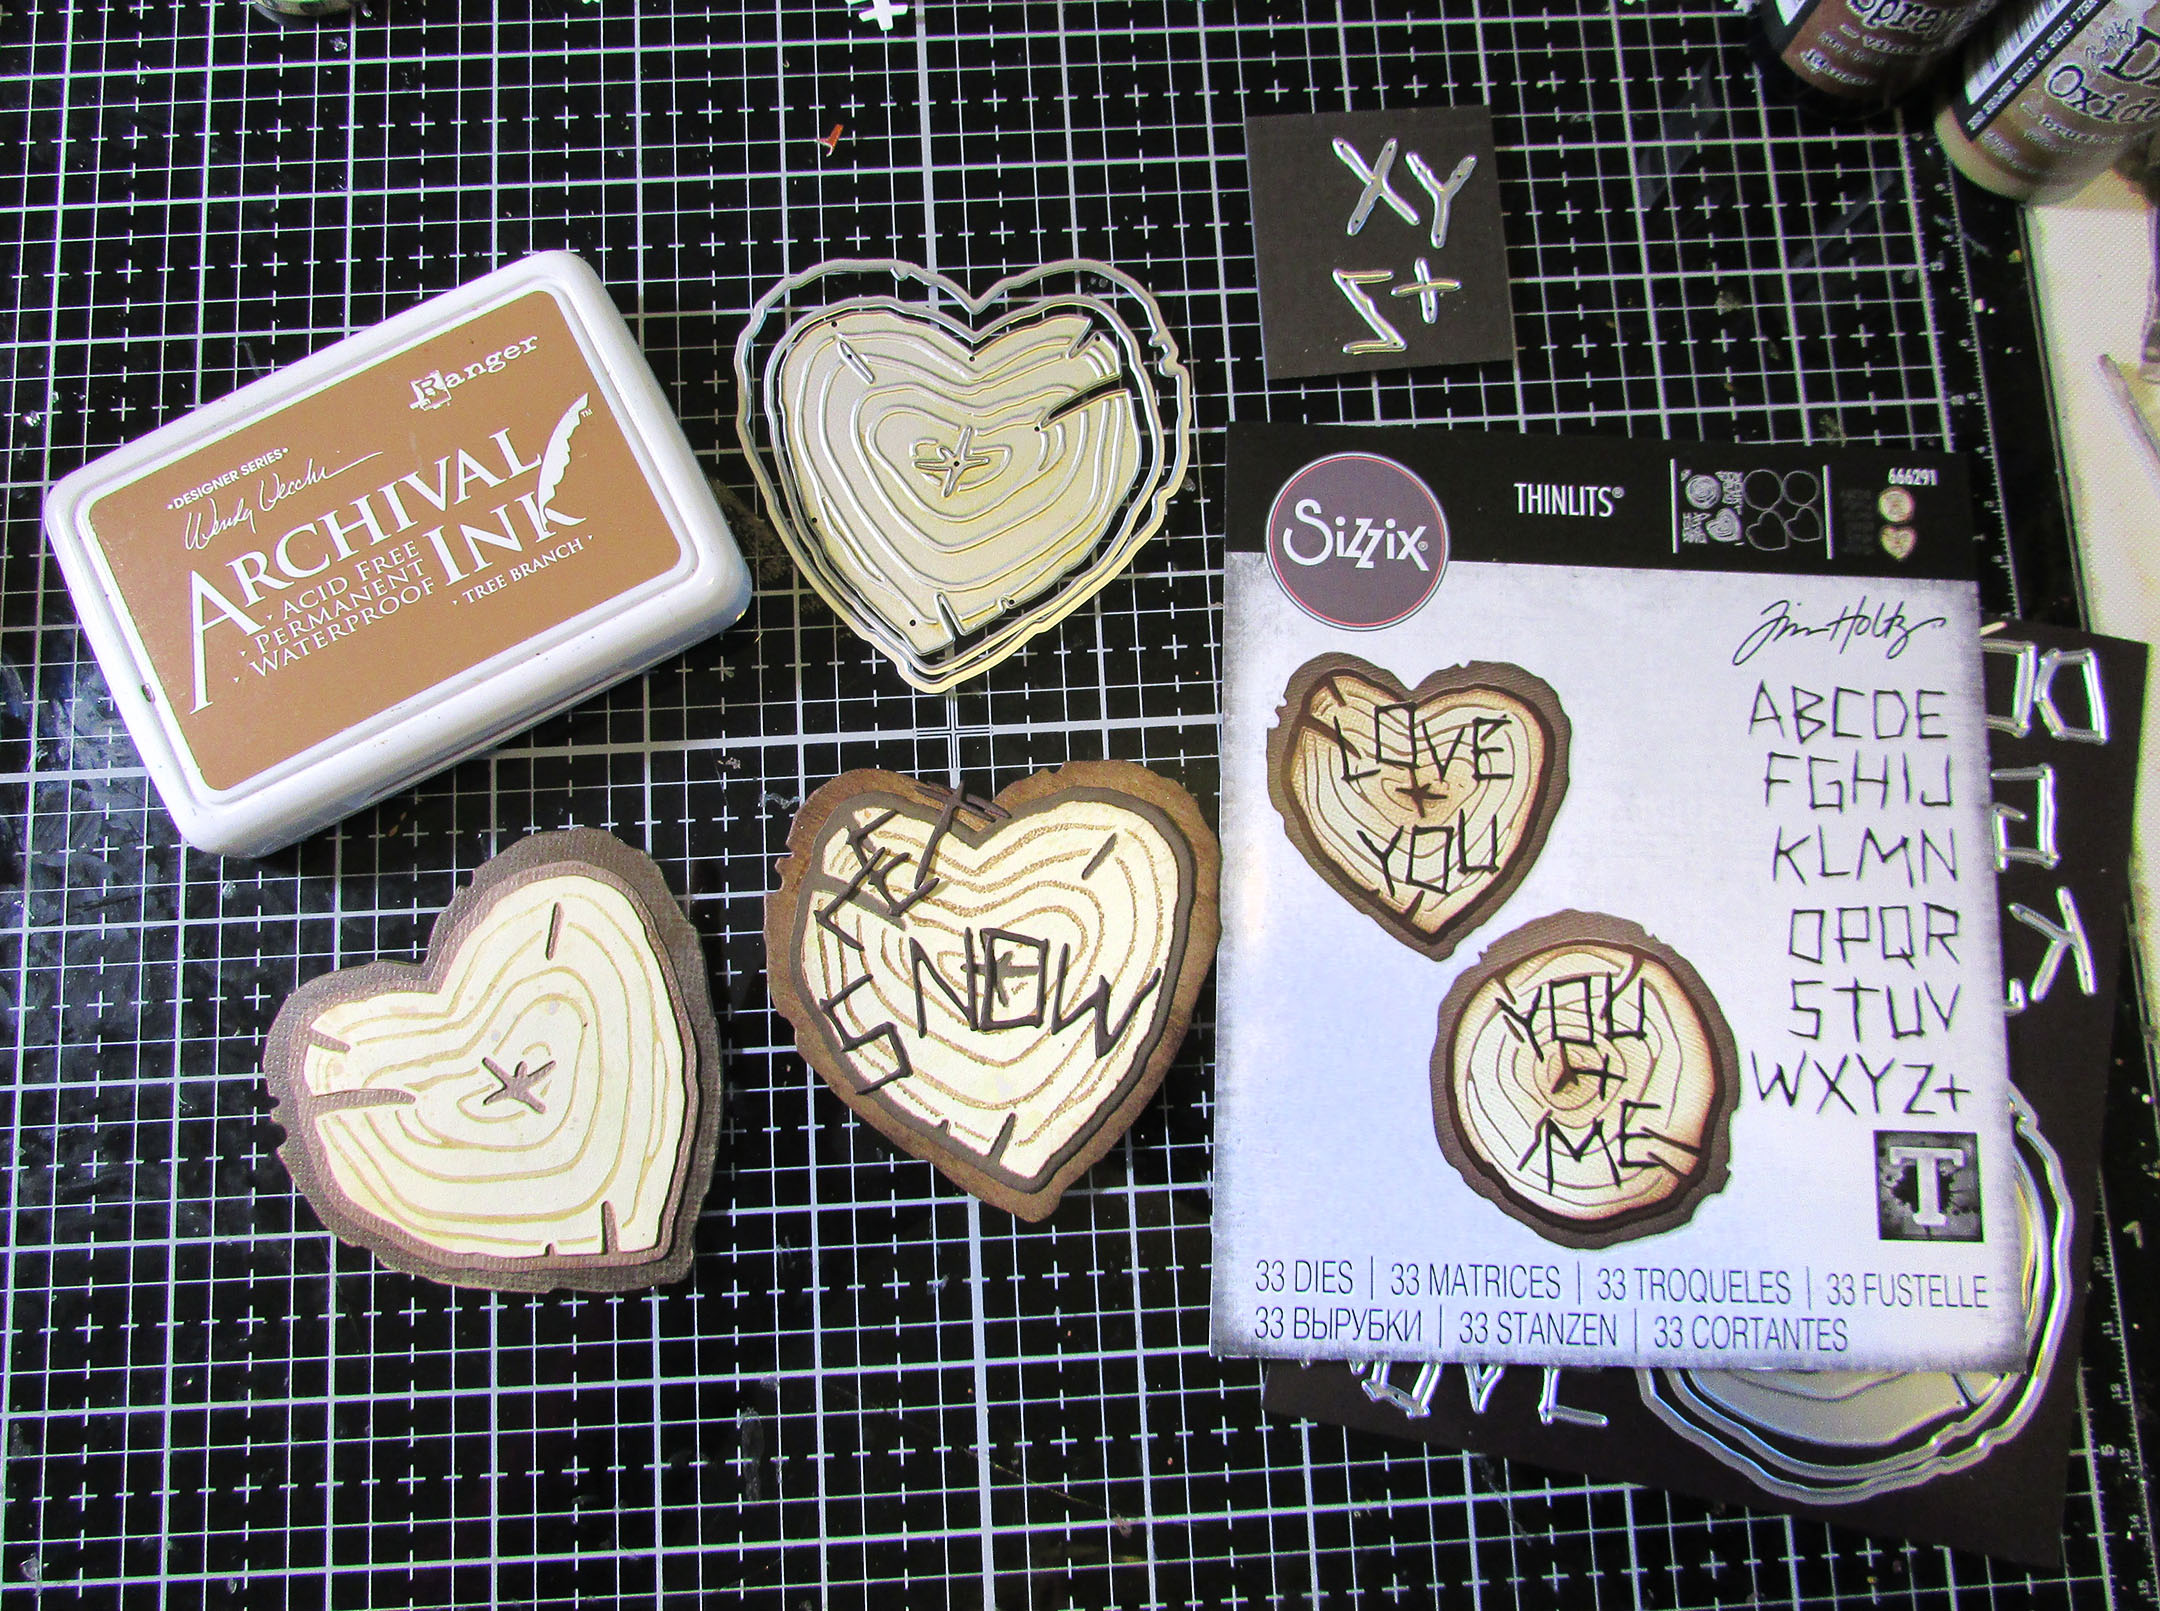
I wanted to capture the joy of snowy weather when you are a child. This little girl is ready with her snowballs! (Baubles covered with Snowfall Grit Paste.) I also thought this was a perfect opportunity to use the new Tim Holtz Wood Slice Thinlits Die Set. I like that it comes with the alphabet so you can "carve" whatever message you want.

Let's take a look at some of the "how-to":

Step 1 - I love the new Wood Slice Die Set! I first inked the inner wood portion die with Archival Vintage Photo ink so it would transfer when I cut that piece. I thought the rings ended up too dark and there wasn't enough contrast with the letters. I recut the pieces with different brown cardstock and used a lighter brown Archival Ink on the die. (Heart on the left.) Much better!


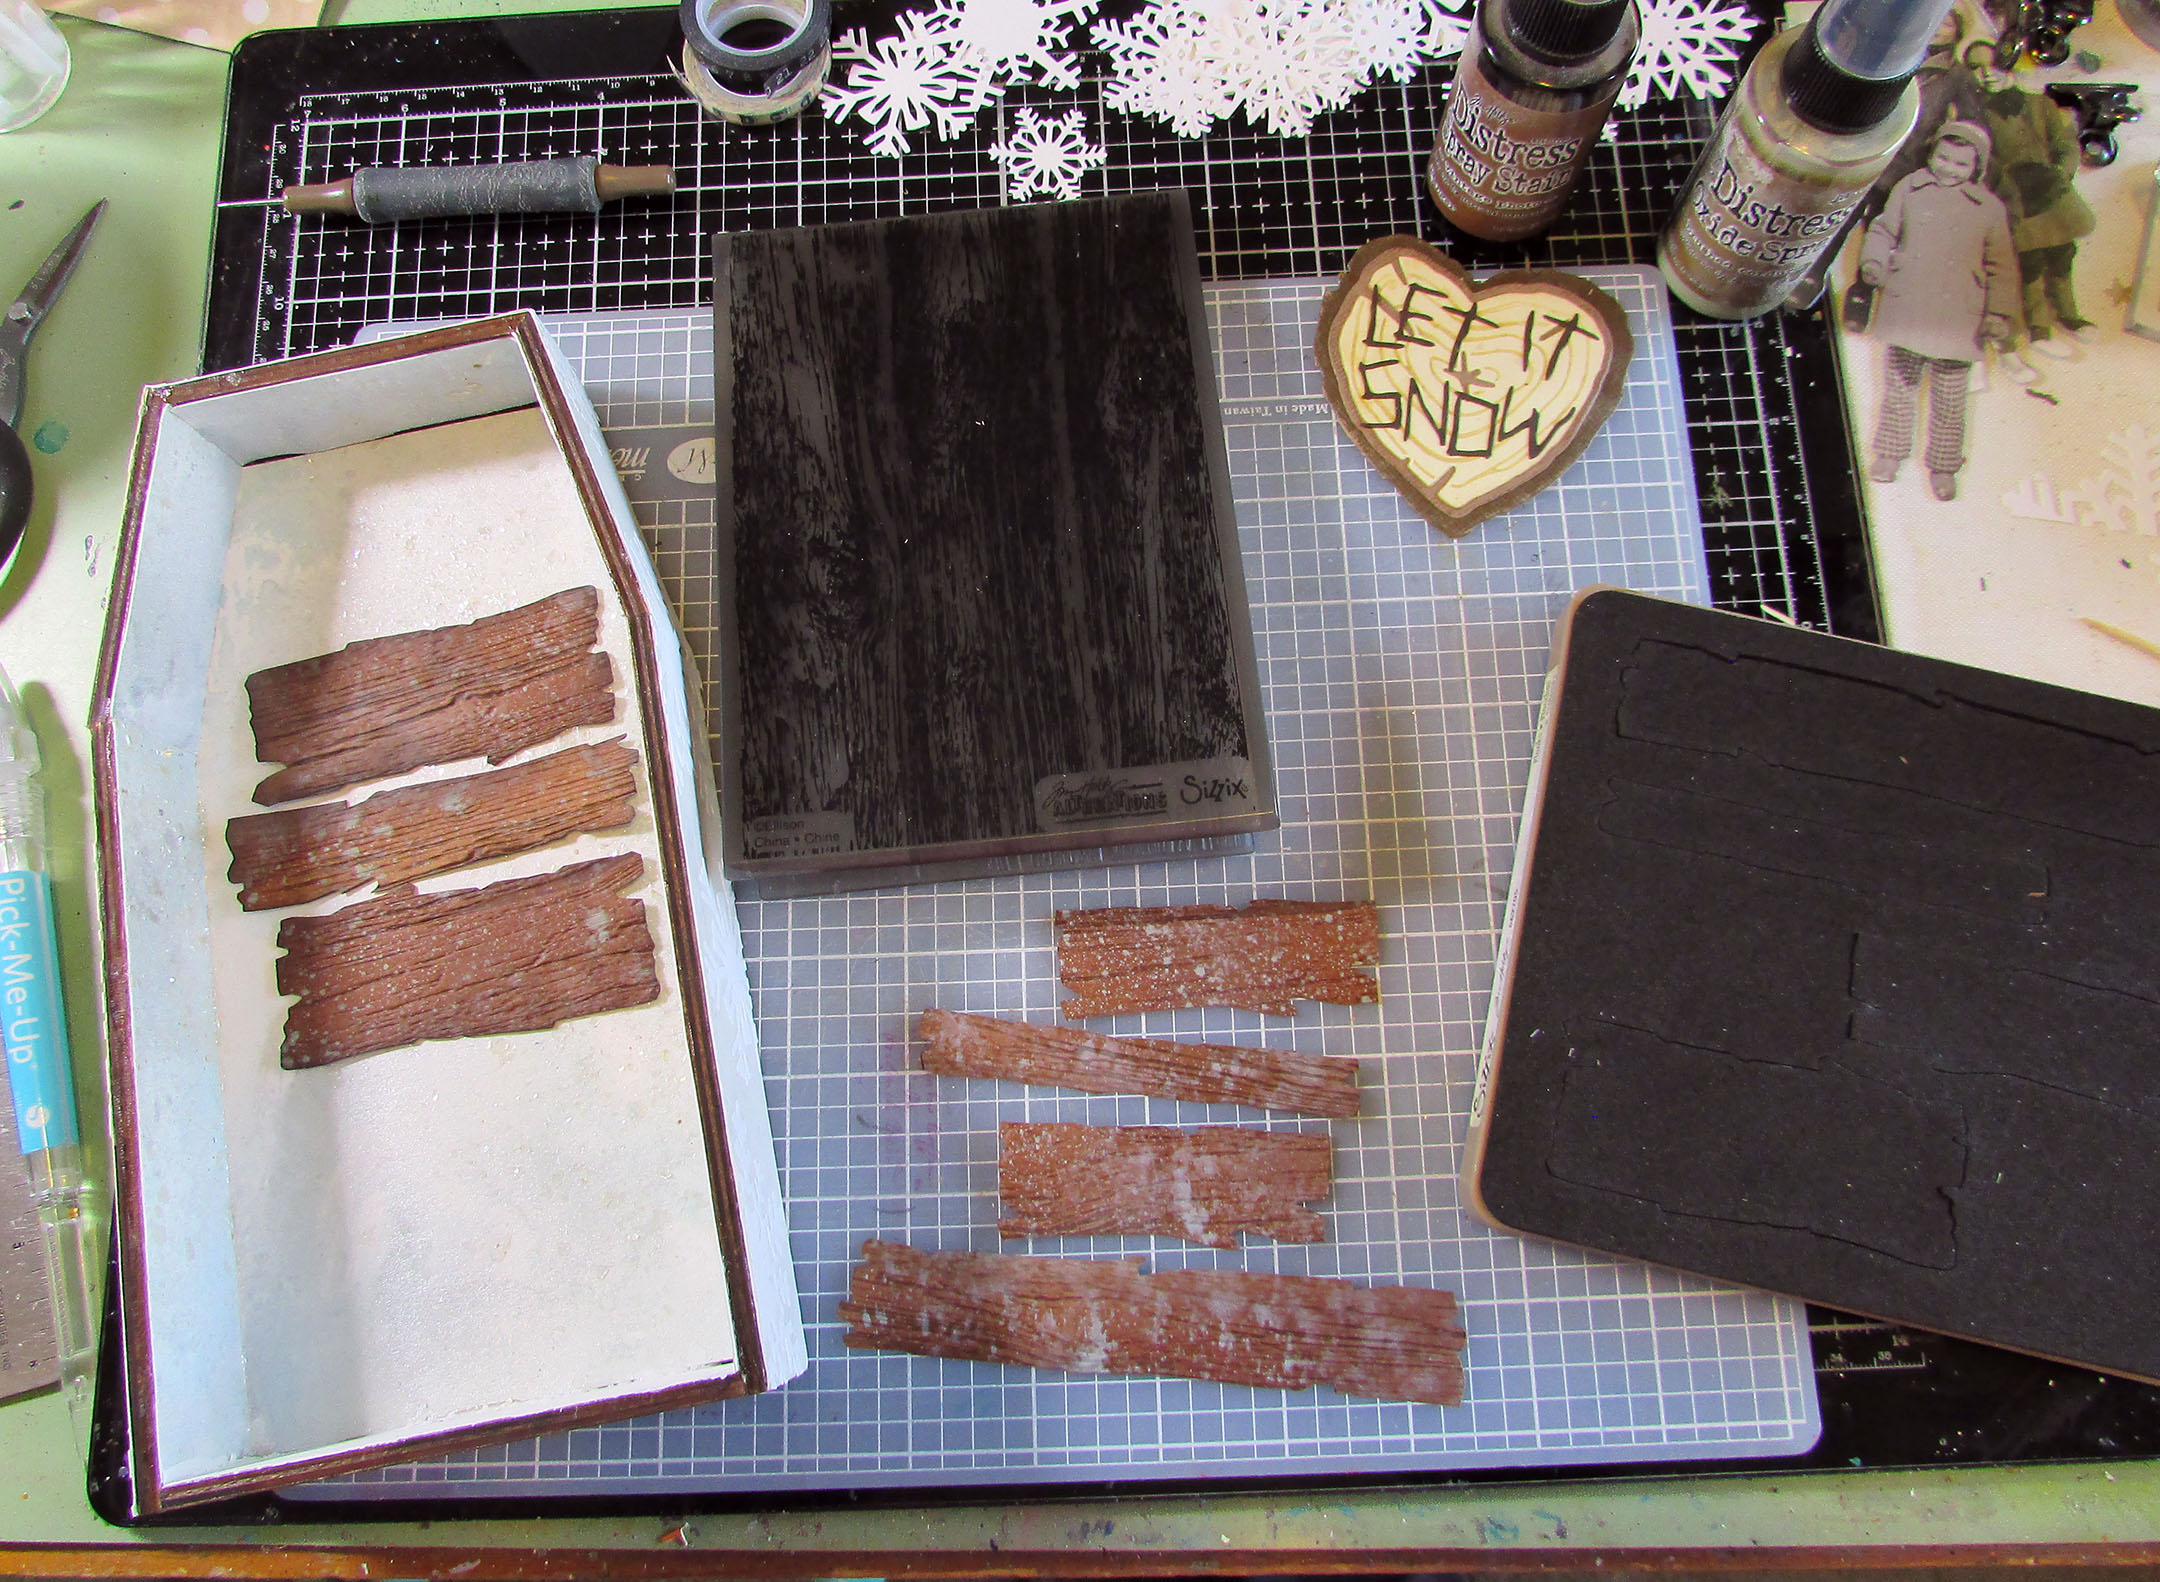
Step 2 - I lined the shrine with paper spritzed with Tumbled Glass and Brushed Pewter Distress Spray Stains. I also brushed on Collage Medium and sprinkled it with Distress Mica Flakes. That added great sparkle to the background.

The wood slats behind the heart were cut out of inked Kraft Heavystock and then embossed using the Lumber 3-D Embossing Folder by Tim Holtz. The wood edges of the shrine I covered with Trims Design Tape.


Step 3 - Coloring Paper Dolls
I used Distress Watercolor Pencils to tint the Paper Doll I chose for my vignette. Paula Cheney has a great tutorial post on all the ins and outs of using them for coloring the dolls. Definitely check that out.


This particular figure is from a Paper Doll pack from a few years ago but there are plenty of options in the 2022 Christmas pack too. I used a combination of coloring directly onto the figure, then blending the color with a water/brush as well as 'painting' with the pigment pulled directly off of the tip of a pencil that had been dipped in water. 

Thanks for stopping by. Keep an eye on the Funkie Junkie Boutique Blog, Inspiration Ave. because you are now getting regular doses of expanded (and inspiring) content each week. Don't miss it…

Supplies used:

Tim Holtz Thinlits Die Set - Wood Slice
Tim Holtz - 3-D Textured Impressions Embossing Folder - Lumber
Tim Holtz Thinlits Die Set - Festive Things
Tim Holtz Thinlits Die Set - Paper Snowflakes
Tim Holtz Thinlits Die Set - Paper Snowflakes, Mini
Tim Holtz Bigz Die - Planks

Distress Embossing Glaze - Twisted Citron
Distress Crackle Paste Opaque
Tim Holtz Idea-ology - Christmas Paper Dolls
Tim Holtz Idea-ology - Design Tape, Trims
Tim Holtz Idea-ology - Baubles
Tim Holtz Idea-ology - Metal Gates
Distress Rock Candy Dry Glitter
Stampers Anonymous Glitter Duster
Distress Mica Flakes
Distress Holiday Grit Paste - Snowfall
Distress Watercolor Pencils
Distress Spray Stains - Tumbled Glass, Brushed Pewter, Vintage Photo
Distress Oxide Spray Stain - Brushed Corduroy


Wednesday, January 26, 2022

January, Icy and Cold? – Funkie Junkie Blog Challenge

I don't know about you, but January here in Idaho definitely qualifies as icy and cold! That is the new challenge on the Funkie Junkie Boutique Blog

"Highlight anything that speaks icy and/or cold to you which could include: snowflakes, icy tones of colors, icicles or winter activities. Come share what icy and cold inspires in your art!"

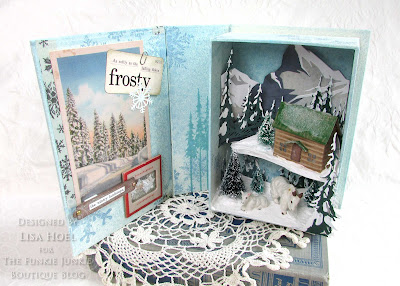
My creation is all about the winter landscape.

Lisa Hoel for the Funkie Junkie Boutique - Icy & Cold Challenge  #creativejuicefreshsqueezed #eileenhull #tim_holtz #sizzix #mymakingstory #winter

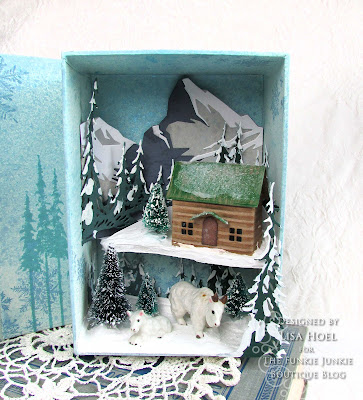
What is inside?
More icy, cold winter!

Lisa Hoel for the Funkie Junkie Boutique - Icy & Cold Challenge  #creativejuicefreshsqueezed #eileenhull #tim_holtz #sizzix #mymakingstory #winter

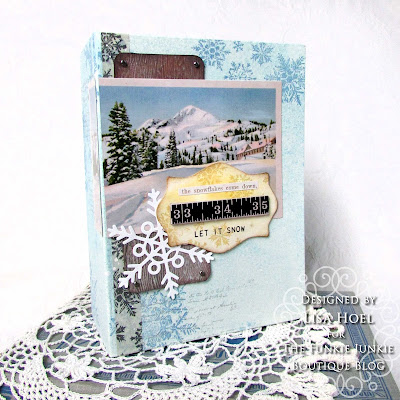
The structure is a Graphic 45 Book Box (retired I believe). I created a wintery scene inside.

Lisa Hoel for the Funkie Junkie Boutique - Icy & Cold Challenge  #creativejuicefreshsqueezed #eileenhull #tim_holtz #sizzix #mymakingstory #winter

I included some vintage bone china Mountain Goat figurines in my little vignette. I think they fit right in! The log cabin is made using the Tim Holtz Paper Village #2 die set.

Lisa Hoel for the Funkie Junkie Boutique - Icy & Cold Challenge  #creativejuicefreshsqueezed #eileenhull #tim_holtz #sizzix #mymakingstory #winter

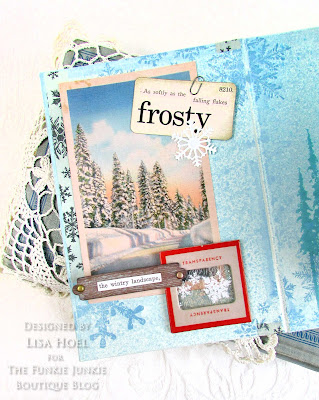
Various Tim Holtz ephemera (mostly from past years' Christmas releases) combined to decorate the inside cover. 

Lisa Hoel for the Funkie Junkie Boutique - Icy & Cold Challenge  #creativejuicefreshsqueezed #eileenhull #tim_holtz #sizzix #mymakingstory #winter

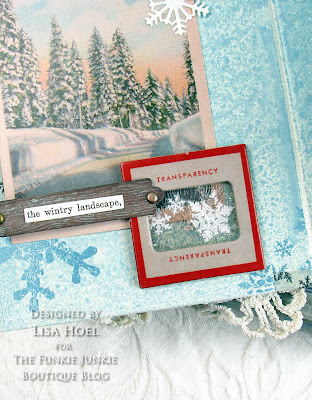
For the slide mount element, I put snowflake rub-ons onto a piece of mica, covered it with a thick layer of Holiday Distress Icicle Crackle Paste and then stuck the cardboard slide mount on top of it. It crackled beautifully!

Lisa Hoel for the Funkie Junkie Boutique - Icy & Cold Challenge  #creativejuicefreshsqueezed #eileenhull #tim_holtz #sizzix #mymakingstory #winter

Here are a few peeks of the "in process" building of my project:

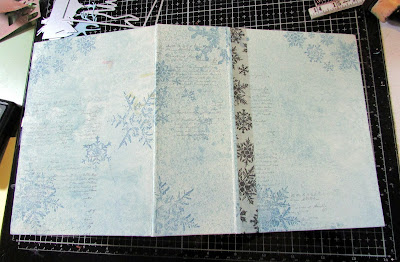
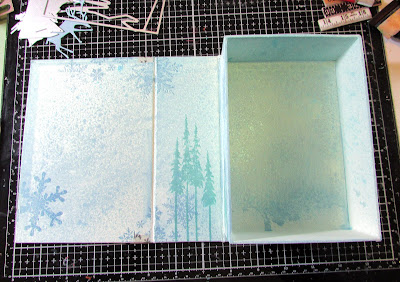
1) I used Distress Sprays to lay down the base color on the box, then stamped with Distress and Archival Ink.


After inking, I also lightly spritzed the outside of the box with Distress Resist Spray and then dusted with Rock Candy Dry Glitter for extra sparkle.


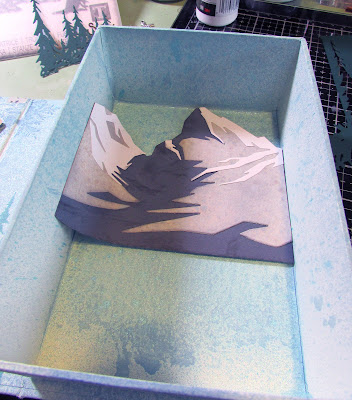
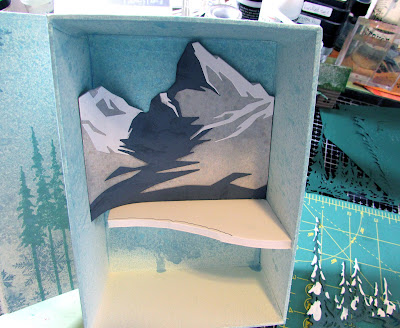
2) The background scenery was built in layers with Sizzix die cuts:


Foam core board is one of my favorite building materials. ;-) It worked well for the little shelf for the cabin.


3) The cabin is made with small scale corrugated board. It has a great look for "logs". Tim Holtz shared how to make one in 2020 when the first Paper Village Die Set was released. You can find that video here.


I completed the scene with mini bottle brush trees and snow texture paste (and the figurines).  This vignette will take its place in my winter decor!

Thanks for stopping by! I hope you check out the fun challenges we have on the 
Funkie Junkie Boutique Blog. They are always good for sparking your creativity! You have two weeks to join the current challenge so I hope you give it a go.

Supplies used:
Tim Holtz stamp set CMS098 - Grunge Flakes
Tim Holtz stamp set CMS052 - Reindeer Flight
Tim Holtz stamp set CMS328 - Entomology
Tim Holtz die set - Paper Village #2
Tim Holtz die set - Tall Pines
Tim Holtz die set - Mountain Top
Eileen Hull die set - Wreath & Snowflake
Eileen Hull Full Size Journal Die (for the label shape diecuts)

Distress Paint - Picket Fence
Distress Spray Stain, regular & Oxide - Speckled Egg
Distress Ink - Stormy Sky, Evergreen Bough
Distress Glitter - Rock Candy
Tim Holtz Mica Spray Stain - Snow Flurries
Ranger Archival Ink - Hickory Smoke, Black Soot
Tim Holtz Distress Holiday Texture Set
Mica sheets
Graphic 45 Book Box (retired)
Tim Holtz Christmas Stickers, Remnant Rubs, Flashcards, Layers & Baseboards Frames, Tissue Tape from years past
Tim Holtz Baseboards - Junk Drawer

Some links in this post are affiliate links which do not affect the price you pay but allow me to earn a small percentage of a sale. Thanks! (My husband also thanks you!) 


Tuesday, October 23, 2018

Halloween Brew

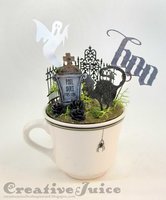
Howdy all! Since life without coffee would be downright scary, I thought using a pair of vintage diner coffee mugs I thrifted for Halloween decorations would be a perfect idea. (Especially filled with Tim Holtz die cuts and Idea-ology bwhahahaha…)

Behold, mug number one:

I love how the cups had the black lines around the rim.

And a closer look:


I used the Village Graveyard, Witchcraft set cat and Vintage Spirits dies to create this little scene. I love how the Halloween Remnant Rubs have inscriptions that fit the Idea-ology Tombstones. I used Clearly for Art Modeling Film as the substrate for the ghost. This film becomes pliable when heated and then holds its shape when it cools down. It's great for making 'fluttery' ghosts! Painted texture paste gives the ground a nice rough surface. I spread that onto the cardboard circle I cut to fit the top of the mug.

Mug number two:

ahhhh, mini pumpkins!!! I love them so.
And a detail:


The Remnant Rubs also have little faces you can put on the pumpkins! How cute is that?? I couldn't resist. I also couldn't resist the little domes with bats on top I found at Michaels. They were sold glued shut (really Michaels???) but a heat gun softens the glue and you can pop the dome and base apart. I glued little bats inside.

Seriously, can you stand it? Love. It.

Thanks for stopping by! I am entering this project into the Frilly and Funkie Haunted Halloween challenge. (Getting in by the skin of my teeth ha ha.) They always have fun challenges; check them out!

Dies:
Tim Holtz Village Graveyard - Sizzix
Tim Holtz Silly Monsters - retired
Tim Holtz Witchcraft - Sizzix
Tim Holtz Vintage Spirits - Sizzix
Tim Holtz strip die - Halloween Shadows - retired

Other:
Emerald Creek Allure Embossing Powder - Onyx Frost
Prima Glass Glitter - Copper
Wendy Vecchi Modeling Film Clearly for Art - Whiteout
Tim Holtz Idea-ology Halloween Remnant Rubs
Tim Holtz Idea-ology Tombstones
Tim Holtz Idea-ology Mini Pumpkins
Tim Holtz Idea-ology Halloween Adornments (2017)
Tim Holtz Idea-ology Halloween Clippings Stickers
Tim Holtz Idea-ology Halloween Ephemera
Tim Holtz Idea-ology Memo Pins
Distress Paint - Black Soot, Walnut Stain, Forest Moss
Ranger Texture Paste
Distress Collage Medium - Matte, Vintage
landscaping foam, lichen


Sizzix & Scrapbook.com links in this post are affiliate links which do not affect the price you pay but allow me to earn a small percentage of a sale. Thanks! (My husband also thanks you!)


Also viewable in my gallery on Scrapbook.com: