Showing posts with label pincushion. Show all posts

Tuesday, May 12, 2020

May Flowers Pincushions with Eileen Hull

Wow, has it really been almost a month since my last post?? I really have lost all sense of time. Everything is blending together. At least one thing that marks the time is the blooming going on in my garden! More and more flowers are coming up and my irises are going to town.

Bee in the Bachelor's Buttons

The theme over on Eileen Hull's blog this month is May Flowers and the Inspiration Team is off to a great start sharing beautiful projects of all sorts featuring flowers. I created some more embroidered teacup pincushions using wool felt flowers cut out with some of Eileen's dies.


I love finding old teacups at thrift stores and garage sales and upcycling them into something new!


I use cotton flannel for the base and then cut the flowers out of wool felt. Buttons and embroidery are added for detail!


I'd also like to mention that Eileen Hull’s newest e-book, Pocket Notebooks with Eileen Hull & Friends, from Bella Crafts Publishing is now available! Click the photo below to buy yours now to get your creative juices flowing! There are over 50 projects to inspire you, complete with instructions and links to the designer’s blog posts or videos. You will be amazed at the versatility of Eileen’s Pocket Notebook Die and the endless creativity of all the designers’ uses for it. I am very honored to have several projects included. =)
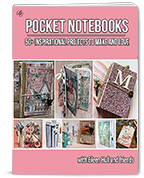
Pocket Notebooks with Eileen Hull

Thanks for stopping by! Check out Eileen's blog and if you are not already a member, join the Facebook Eileen Hull Fan Club group. It is a warm, supportive group with lots of inspiration and sharing going on. You'll just have to answer a few simple questions when asking to join (to keep out spammers) and then you'll be added. ;-)


Dies:
Eileen Hull Sizzix
Heart & Soul Flower Die - retired
Flower & Leaf Stitchlits - retired

Other:
flannel
wool felt
embroidery floss
buttons
stuffing
hot glue gun

Some links in this post are affiliate links which do not affect the price you pay but allow me to earn a small percentage of a sale. Thanks! (My husband also thanks you!) If you shop at Topflight Stamps, use my coupon code LISAHOEL for 12% off your order.

Monday, October 22, 2018

AJVD Sneak Peek…

I made another one! Can you guess? ;-) Head on over to the A Jillian Vance Design blog to see what I made:


Thanks for stopping by and have a great week!

Monday, July 23, 2018

Cactus Pincushion on the AJVD Blog!

Hello there! I have something fun to share with you today. ;-) I have a tutorial over on the AJVD blog today so if you want to see how to make this…


… then head on over to the blog HERE. It's wool felt fun time!

Tuesday, May 29, 2018

May Flowers with Eileen Hull – Embroidered Teacup Pincushions

Hello there everyone! After April showers come May flowers so all month long Eileen Hull's Inspiration Team has been sharing projects made with her flower and other dies on her blog. This week I indulged in my love of wool felt and used Eileen's Heart & Soul Flower and Flower Layers with Heart Petals dies to cut flower layers out of my felt stash. I had previously picked up these two Blue Willow cups at an estate sale and I knew they would be perfect for making into teacup pincushions!


I used white cotton flannel for the base and stretched it into an embroidery hoop before beginning all my embroidery. I made it up as I went along!


When all the stitching was done, I trimmed the flannel into a circle and ran a gathering stitch all around the outer edge. I half gathered the 'pouff' and used stuffing to fill it. Crushed walnut shells would be more practical for a fully functional pincushion but I don't have any right now (Put that on my list!) so stuffing it is!

I used 3 strands of floss for all the stitching.


Once it was stuffed, I pulled the running stitch tight and tied it off. I used hot glue to fasten it into the teacup. I think I'm going to find some decorative cording to run around the edge to finish it off better. Can you believe I didn't have any in my stash? What? ;-)

Thanks for stopping by! Be sure to head on over to Eileen's blog and see what all my team mates have been up to this month. You will be inspired! Have a great week. =)


Other:
embroidery floss
wool felt
white cotton flannel (base)
stuffing

Sizzix & Simon Says Stamp links in this post are affiliate links which do not affect the price you pay but allow me to earn a small percentage of a sale. Thanks! (My husband also thanks you!)

Monday, August 7, 2017

Vintage Trailer Pincushion


Hello! This month on her blog Eileen Hull is featuring unique ways to use her dies. The team is getting pretty creative for this one! Be sure to check out what they are doing all month long. For one of my projects, I converted the Trailer Box die into a pincushion.


Unfortunately all my step photos went AWOL, but this wasn't hard to do. I constructed my trailer normally but I cut the flat top section out before I assembled it. I cut a small rectangle of fabric a bit bigger than the opening in the top and hot glued it in place (from the inside). I padded it with a bit of batting and then filled the whole trailer with rice. The trailer doesn't normally have a bottom so I cut a piece of scrap matboard to fit and hot glued it in place to seal it all up.

Stay tuned for another unique die use project later in the month. In the meantime, be sure to check out what the rest of the Inspiration Team is up to. You won't be sorry! ;-)

Dies Used: 
Sizzix:
Other supplies:
Tim Holtz Sizzix embossing folder set – Harlequin & Stripes
Sizzles Matboard – (SSS / Sizzix)
Deco Sheets

Simon Says Stamp links in this post are affiliate links which do not affect the price you pay but allow me to earn a small percentage of a sale. Thanks!

Saturday, May 6, 2017

Sewing Themed Pincushion

Hello! Today I have a fun (and useful!) project to share with you using Eileen Hull's always popular Cookie Box Die and a bunch of Tim Holtz goodies. I made another pincushion:

It is my opinion that you cannot have too many cute pincushions.
Plus, I made it for my Mom.

It's easy to make! Take a look:


I cut out my cookie box pieces from mat board (you don't need a top) and inked them with the new Distress Oxide Inks (love them!) The On the Edge Sewing die parts I cut out of my hoarded Grunge Paper. In retrospect, I could have also used Paper Leather because both have the sturdiness and flexibility to wrap around the box and take the media I painted them with.

I also stamped on the sides of the box.

Sides are ready to get wrapped and glued!

The "cushion" part is just a circle of fabric with a running stitch around the perimeter. I pulled the stitch tight while filling it with batting. Then I stitched the hole closed so it wouldn't come undone.


To weight the pincushion down, I filled the box with rice. I also made the top more "cushion-like" with a button in the center and heavy thread to divide it into sections.


All that was left to finish it was to use my hot glue gun to glue on the top. I made sure I applied glue all around the edge so no rice could escape. =)

Thanks for stopping by! I am entering this project in the Frilly and Funkie Challenge Blog's current 'Put Your Inking Cap On' challenge. No patterned paper used here! ;-)


Dies Used:
Sizzix: 
Eileen Hull, Cookie Boxl (Sizzix )
Sewing Edge - retired 

Stamps Used:
Tim Holtz (S.A) - Haberdashery
Prima - Seamstress Vintage, 9607801

Other:
Distress Oxide Ink - Vintage Photo, Walnut Stain, Iced Spruce, Cracked Pistachio
Ranger Archival Ink - Potting Soil
Tim Hotz fabric
Sizzles mat board

Sizzix & Simon Says Stamp links in this post are affiliate links which do not affect the price you pay but allow me to earn a small percentage of a sale. Thanks! (My husband also thanks you!)

Tuesday, March 14, 2017

Eileen Hull – New Heartfelt Collection Pincushion


Hello! Eileen's new collection, Heartfelt, is soon to be in stores and all this month the Inspiration Team is sharing projects using it! For this project, I transformed the Basket Die into a pincushion:


It's not hard! First I cut the basket parts out of Sizzix matboard and coated them (except the handles) with matte Glue n Seal. Once it was dry, I "base coated" the basket with my Antique Linen Distress Crayon.


Next I embossed the sides and ends of the basket with Eileen's Basket Weave embossing folder. Then came more Distress Crayon fun! I scribbled on Vintage Photo, Rusty Hinge, and Fossilized Amber and blended them together with a wet fingertip.


I assembled the parts using a glue gun and filled it with rice. The little cushion on top was simply a piece of fabric folded in half, right sides together and stitched on three sides. I turned it inside out and stuffed it with a bit of poly fill. I just stitched straight across the end to seal it. I knew the end would get tucked and glued under so I didn't worry about blind stitching it closed.


I used a hot glue gun to glue the cushion on top, making sure to seal all the edges to the sides of the basket so no rice could escape.

I tucked the Butterflies diecut into a memo pin and stuck it into the pincushion. I also used the heart Word Stitchlits die to make a tiny tag to tie onto the handle. The Stitchlits dies make it really easy to add stitched elements to your projects. The dies cut holes and all you do is thread your needle in and out. See this post for another project using the new Word Stitchlits.

Thanks for stopping by for a visit! Please be sure to head on over to Eileen's Blog and see all the wonderful projects the Team is sharing. There is a lot of inspiration to be had! ;-) Each week there will be a new batch to see.


Dies Used:
Sizzix, Eileen Hull: 
Basket (Sizzix)
Word Stitchlits (Sizzix / SSS)
Birds & Butterflies (Sizzix )
Basket Weave Embossing Folder (Sizzix )

Other:
Sizzles mat board
Distress Paint - Spiced Marmelade, Twisted Citron, Vintage Photo
Distress Crayons - set 2, set 3
Idea-ology Hex Fasteners
Tim Holtz fabric
Idea-ology Memo Pin
Archival Ink - Potting Soil

Sizzix & Simon Says Stamp links in this post are affiliate links which do not affect the price you pay but allow me to earn a small percentage of a sale. Thanks! (My husband also thanks you!)