Wednesday, March 29, 2023

Funkie Junkie Focus – Let's Be Neutral

Hello there. Our current Funkie Junkie theme is "Let's Be Neutral" with a focus on the new Tim Holtz Distress color Lost Shadow. It's another great addition to the Distress color palette!  I had fun playing with a neutral color scheme and created a desk set using Eileen Hull's Card Caddy Die for the structure.

Lisa Hoel for The Funkie Junkie Boutique - Card Caddy Desk Set  #creativejuicefreshsqueezed #eileenhull #mymakingstory #tim_holtz #thefunkiejunkieboutique #sizzix

The box holds envelopes and a couple of little notebooks:

Lisa Hoel for The Funkie Junkie Boutique - Card Caddy Desk Set  #creativejuicefreshsqueezed #eileenhull #mymakingstory #tim_holtz #thefunkiejunkieboutique #sizzix

Let's take a look at some of the how-to details…

First, these are all the neutral Distress colors I used:


Step 1 – I used Lost Shadow, Hickory Smoke and Black Soot Distress paints to color the mat board I used to cut the card caddy base from.


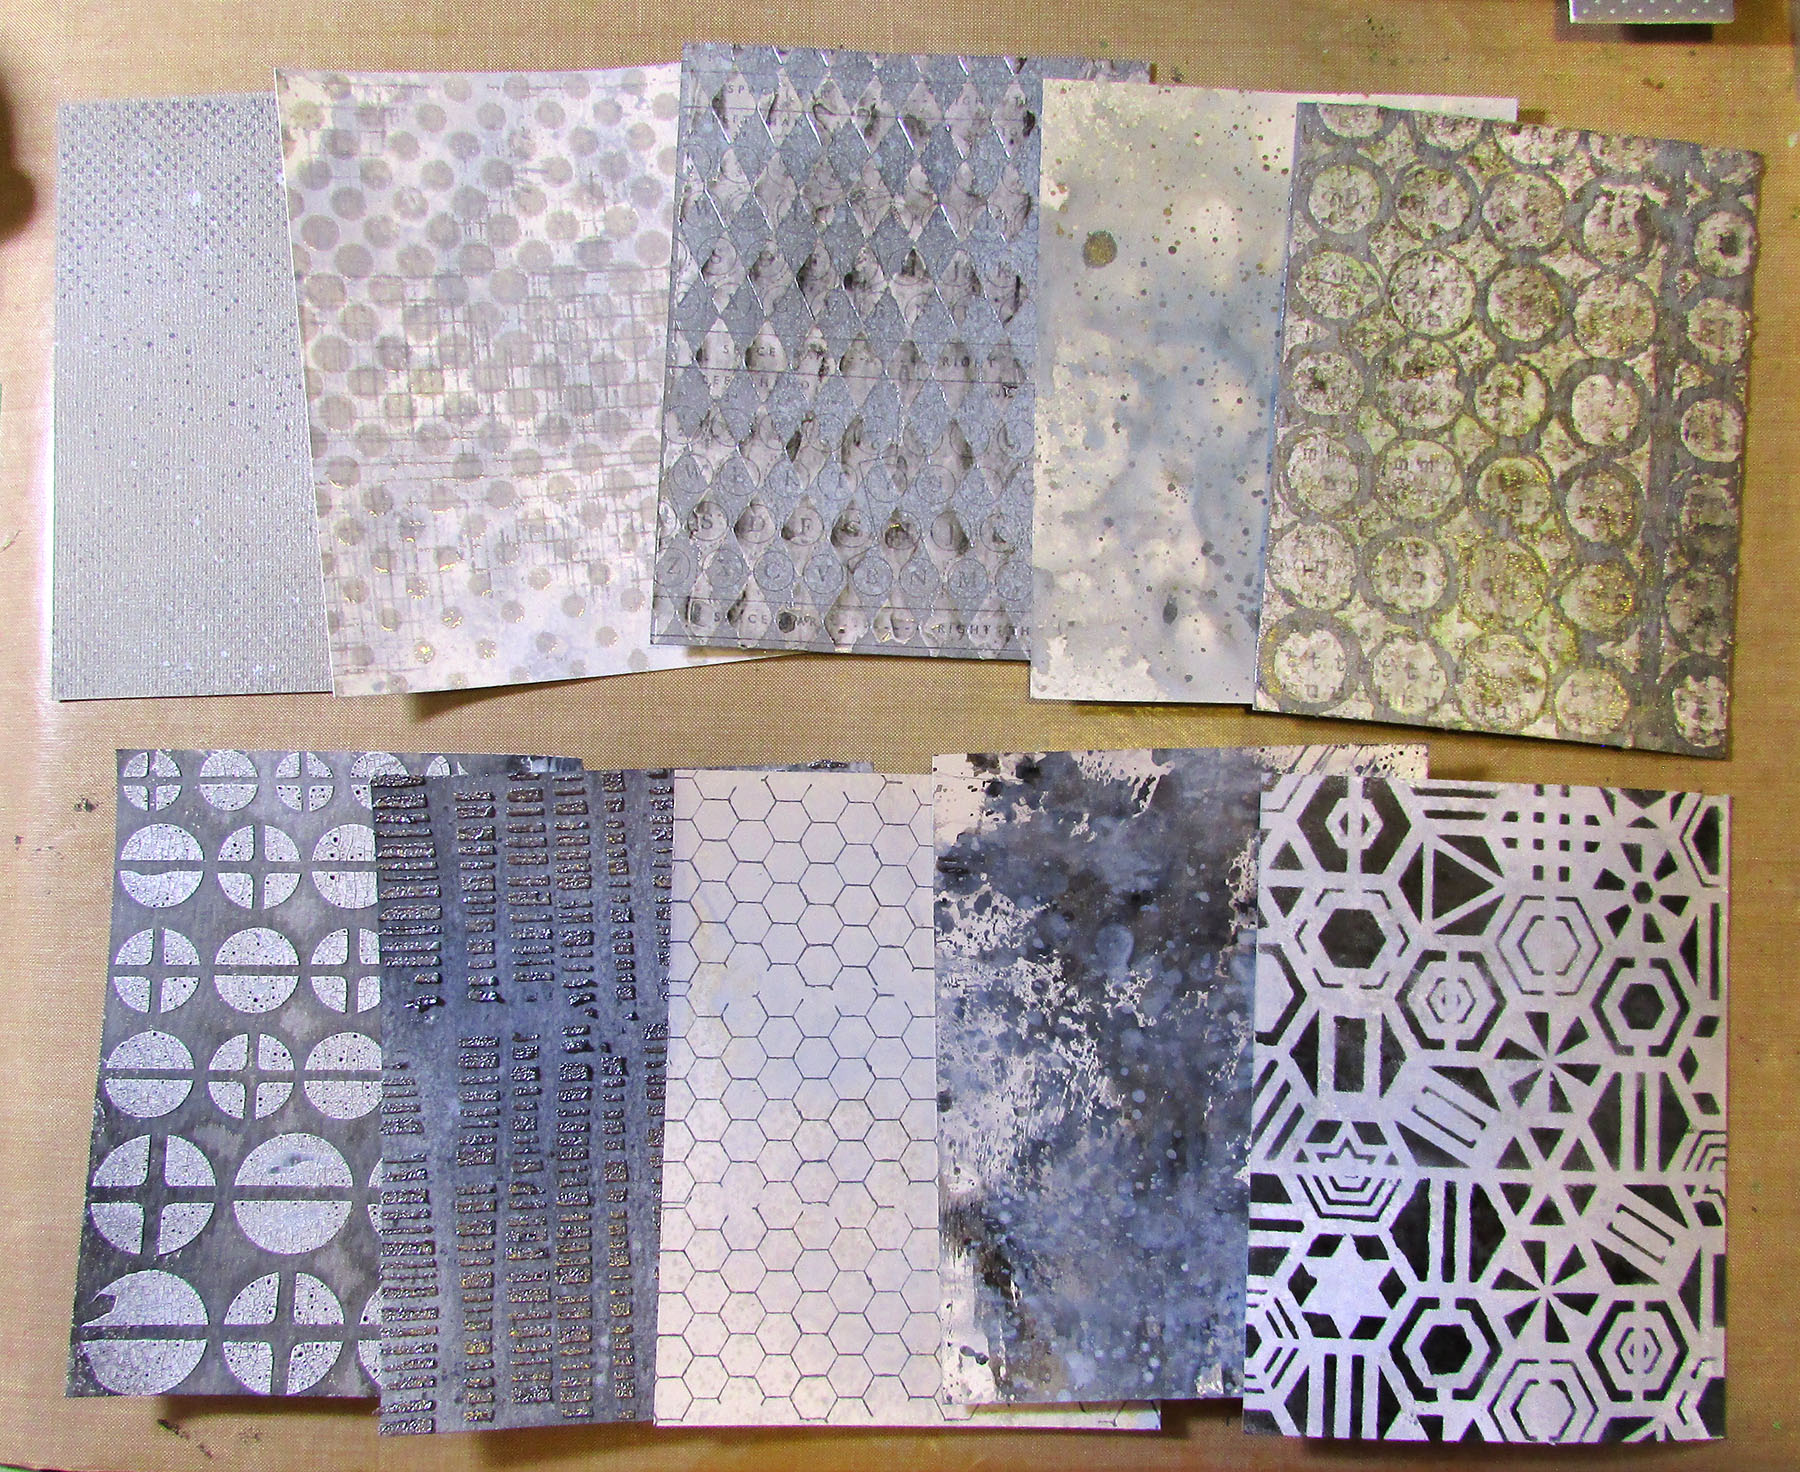
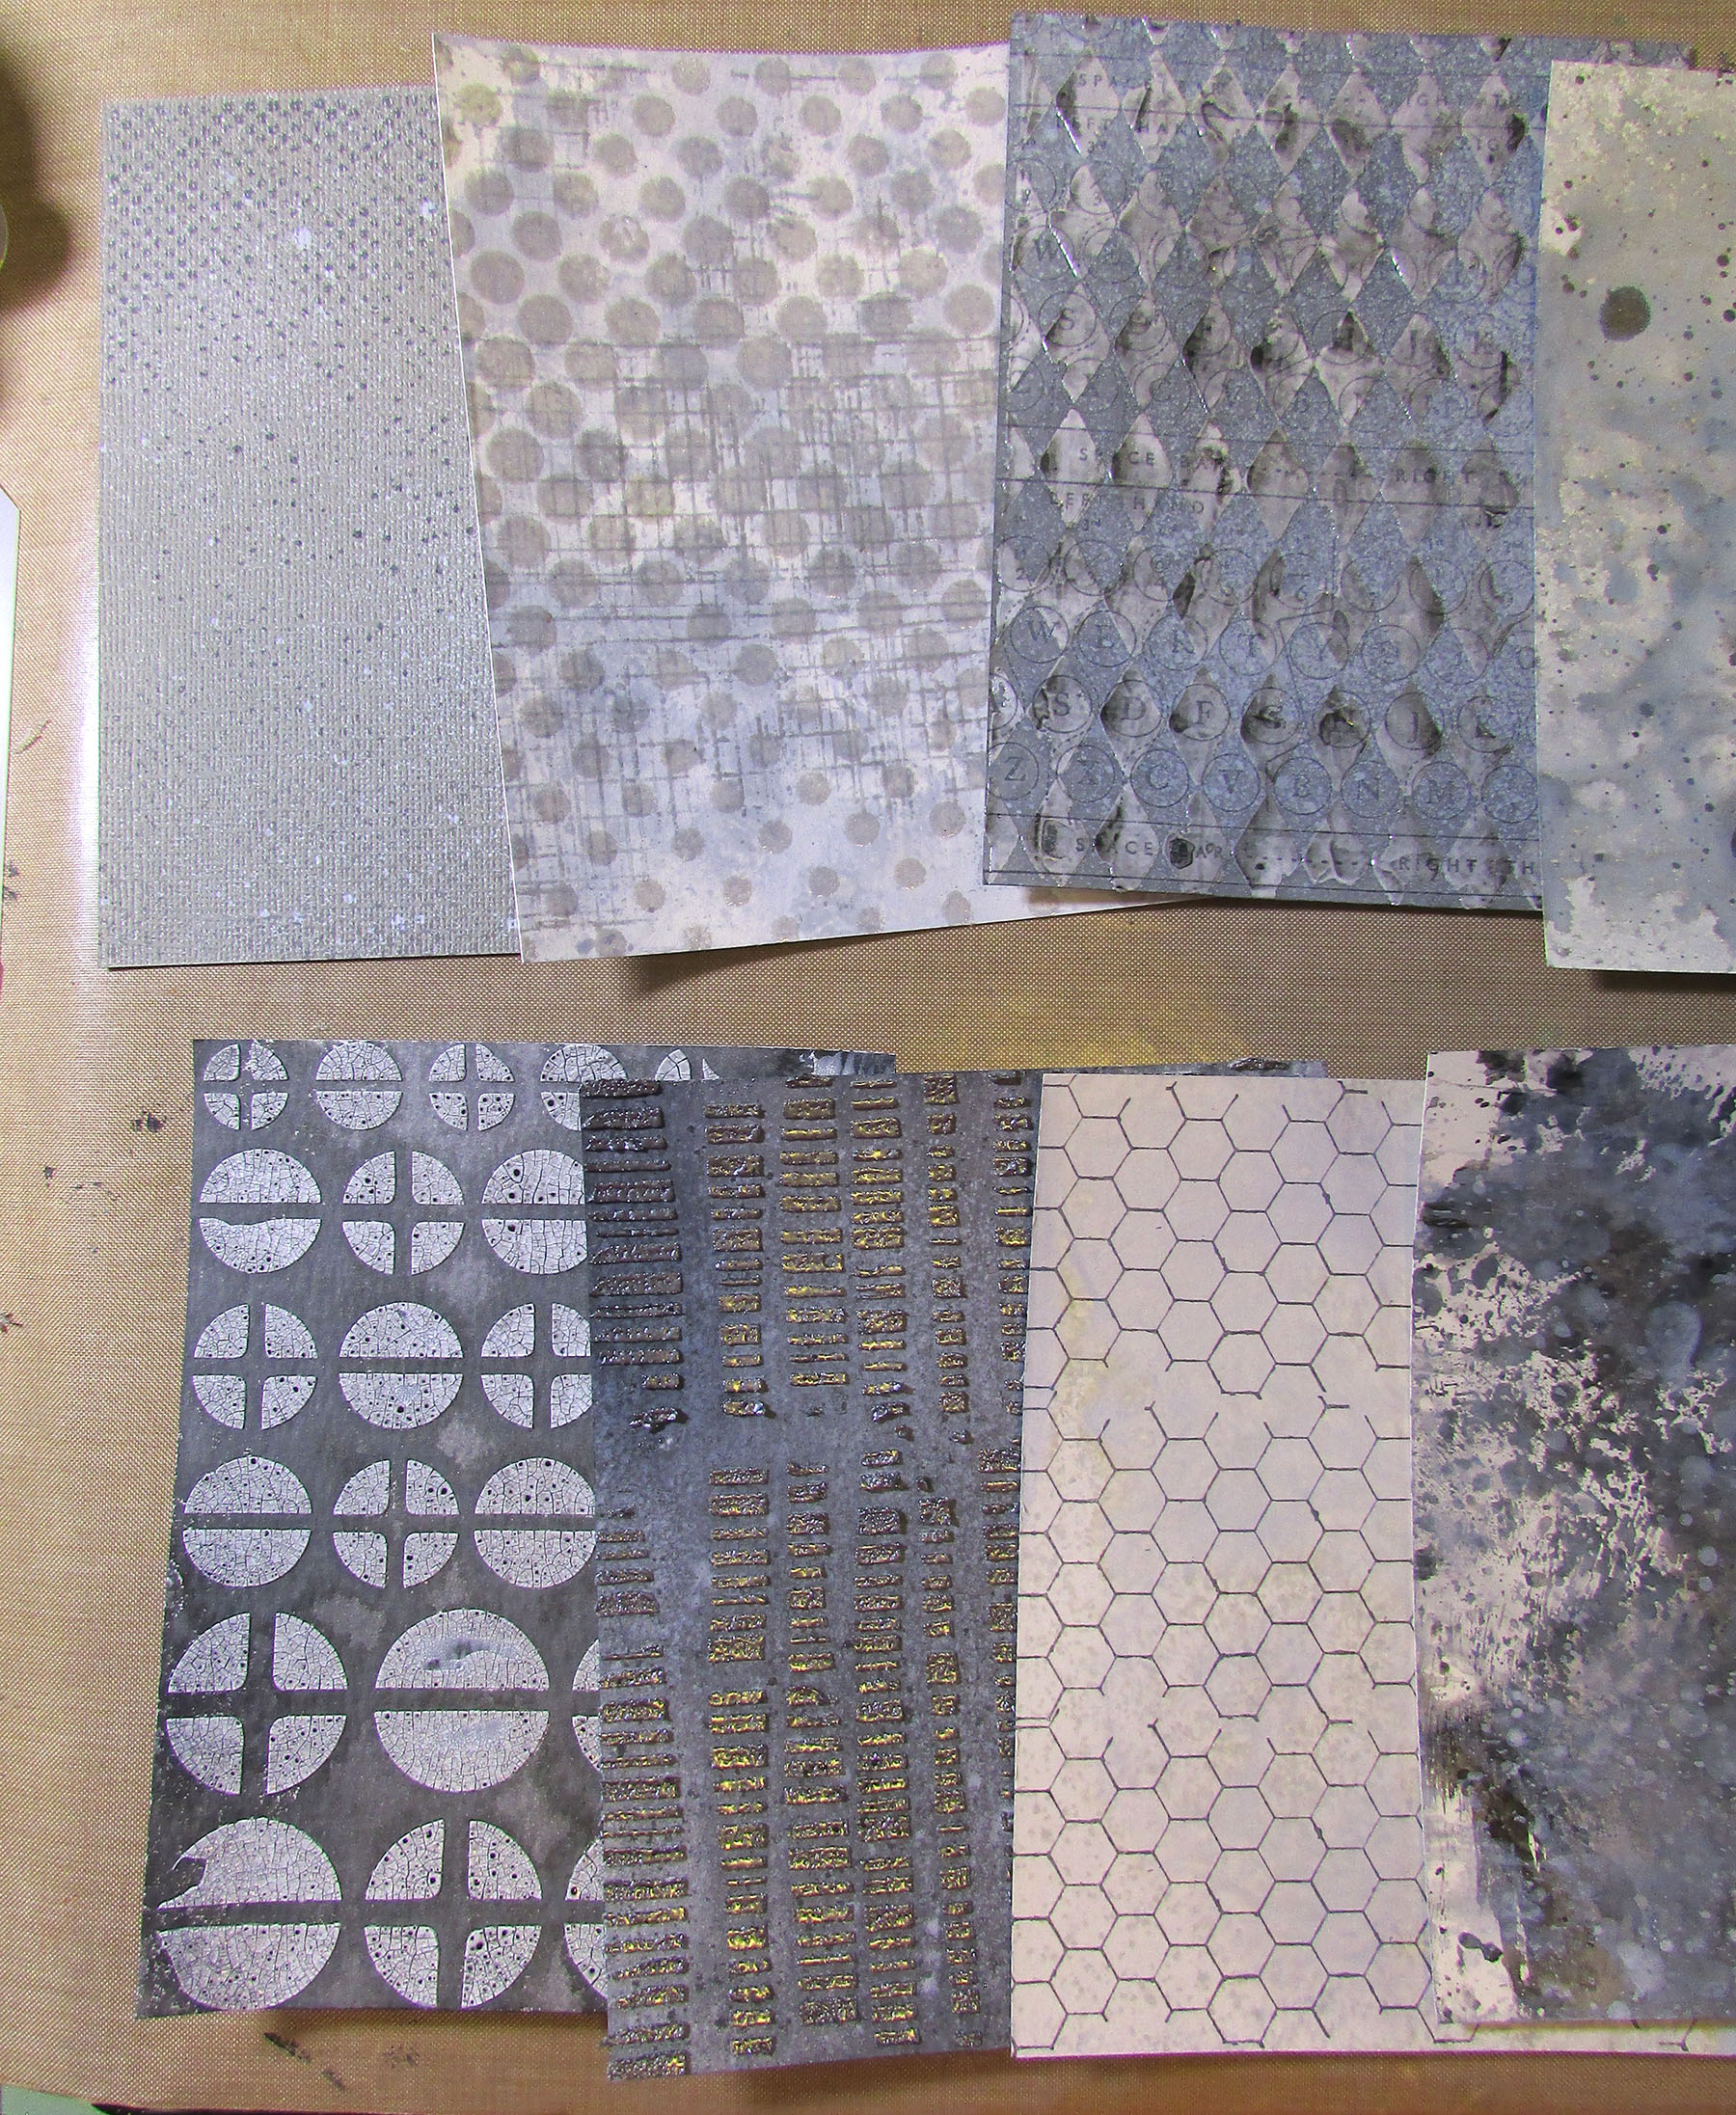
Step 2 – I went to town making all sorts of backgrounds! Using Distress Glaze on paste is always a fun technique. This one was Opaque Crackle Paste with Lost Shadow Glaze on top. Add the powder while the paste is wet, let it dry (and crackle!), then heat emboss. Fun! I added various Distress Sprays after that.


Here are all the different backgrounds I created! 


Step 3 – Making the patchwork front

I cut up the backgrounds into wonky strips.

Then arranged them.


I flipped the pieces over and taped together with washi tape.


Turned it 90 degrees and then cut strips going the other way.


Shuffled the strips and arranged in a pleasing way.


Flipped it over again to tape the new seams.


Once it was all taped up and secure I cut a piece out of it to fit onto the front of the card caddy and also a panel to put on the front of one of the little notebooks.


After that I just had to assemble the card caddy and fill it!

Thanks for stopping by. Keep an eye on the Funkie Junkie Boutique Blog, Inspiration Ave. because you are now getting regular doses of expanded (and inspiring) content each week. Don't miss it…

Supplies used:

Tim Holtz Thinlits Die Set - Bunny Stitch
Eileen Hull Die - Scoreboards Card Caddy
Tim Holtz Stamp Sets - Halftone & Rings, Documented, Mixed Media
Tim Holtz Layering Stencils - Code, Gradient Dot, Harlequin, Ringer, Screwed, Patchwork Hex

Distress Paint - Lost Shadow, Black Soot, Hickory Smoke, Pumice Stone
Distress Oxide Spray Stain - Lost Shadow
Distress Spray Stain - Lost Shadow, Pumice Stone, Black Soot, Antique Linen, Old Paper
Distress Archival Ink - Black Soot, Hickory Smoke
Distress Halloween Mica Spray - Iron Gate
Distress Glaze - Lost Shadow, Hickory Smoke
Distress Crackle Paste - Opaque
Distress Texture Paste - Opaque
Distress Texture Paste - Translucent
Distress Watercolor Cardstock
Distress Mixed Media Heavystock

Monday, March 27, 2023

Celebrate 6 With a Topflight Stamps Birthday Hop!

It's Topflight Stamps 6th birthday and to celebrate, I’ve teamed up with some great designers to showcase celebratory projects using the unique products available at Topflight Stamps. Please hop along with us and see all the beautiful talent from this group of amazing designers! There is a master list of Hop stops on the Topflight Stamps blog. We are also Hopping on Instagram! You can start at the Topflight Stamps account @topflightstamps .

Did we mention there will be prizes?
GIVEAWAY DETAILS
Of course, it wouldn’t be a birthday celebration without prizes. Topflight Stamps is giving four lucky winners $50 Gift Certificates to the store. Two winners will be chosen from commenters on the blog hop and two will be chosen from commenters on the IG hop. For a chance to win, make sure to visit the stops on the hop and leave a comment by April 1st. Winners will be announced on the Topflight Stamps blog on Monday, April 3rd. U.S.A winners only due to shipping issues. Good Luck!

Let's take a look at the card I made for our Hop:

Lisa Hoel for Topflight Stamps  #creativejuicefreshsqueezed #topflightstamps #katzelkraft #laviniastamps

I loved this Frogs stamp set from Katzelkraft and had to make them the stars of this birthday card. They are so cute! The background I created using a round Gel Press plate and Lavinia inks. (Lavinia Elements inks work really well on the Gel Press plates!)

Don't miss the sale also going on over at Topflight Stamps! There is a wide selection of fab stamps and products sourced from all over the world.


Topflight Stamp products used:
Katzelkraft stamp set - Frogs Lavinia stamp - Fern Heads AALL & Create stamp set - Everyday Sentiments Lavinia stencil - Coral Paper Favourites - Distressed Wood
Gel Press plate - round Lavinia Elements Ink - Bermuda, Blue Atoll, Russet Orange watercolors

Wednesday, March 22, 2023

Wordsoup, Tags & Pockets with Eileen Hull

Hello! All month our theme for Eileen Hull's team has been Wordsoup, Tags & Pockets. It's been fun seeing all the creative ways the designers have been interpreting it. I decided to make a funny card for my take.

Lisa Hoel for Eileen Hull - Wordsoup, Tags & Pockets snarky card   #EileenHull  #eileenhulldesigns  #sizzix #mymakingstory #TeamEileen #mysizzixstory

I incorporated words and letters in the background with stamps and diecuts. My sentiment is from the Idea-ology Snarky Small Talk sticker book. (So many funny ones included in that!)

I also used several of Eileen's 3-D Embossing Folders on the tags. (Silverware, Sweater, & Crochet Mandala) The detail and texture you can achieve with these folders is absolutely amazing! A card like this is a great way to use up scraps. I rummaged through my stash of gel prints, inky backgrounds and paper scraps to choose which to make into tags.

Lisa Hoel for Eileen Hull - Wordsoup, Tags & Pockets snarky card   #EileenHull  #eileenhulldesigns  #sizzix #mymakingstory #TeamEileen #mysizzixstory

Here's a peek at the background:


I also included an Idea-ology Paper Doll figure perched on a tag. You can easily color these fun little dolls. I used Distress Watercolor Pencils this time. You can color directly on the paper and then blend with a waterbrush. You can also briefly dip the tip of the pencil into water to soften it and then swipe color off of it with a paintbrush to load it with "paint".


Thanks for stopping by and be sure to keep an eye on Eileen's blog for more inspiration from the Educator and Inspiration Teams.

Supplies used:

Eileen Hull Die - Tile Alphanumeric  ( SizzixSBFJ  )
Eileen Hull 3-D Embossing Folder - Silverware ( SizzixSBFJ  )
Eileen Hull 3-D Embossing Folder - Sweater 
Eileen Hull 3-D Embossing Folder - Crochet Mandala ( SizzixSB )
Tim Holtz Die Set - Tag Collection ( SizzixSB , FJ  )

Eileen Hull Stamp Sets: Snail Mail - PostageMaking Plans
Gel Press plate
Idea-ology Paper Dolls
Idea-ology Design Tape - Trims
Idea-ology Snarky Small Talk

Some links in this post are affiliate links which do not affect the price you pay but allow me to earn a small percentage of a sale. Thanks! (My husband also thanks you!)

Wednesday, March 15, 2023

Funkie Junkie Focus – Spring Frolic

Hello there crafty peeps! The weeks keep flying by and spring is getting closer and closer. The theme this time around is "Spring Frolic". Everything is still grey and brown here so it was fun to create a bright and cheerful spring project. I am in love with the seasonal Idea-ology Tiny Eggs and Salvaged Rabbits (stock up!) so I knew they had to make an appearance in my project.

Lisa Hoel for The Funkie Junkie Boutique - Spring Frolic Easter basket  #creativejuicefreshsqueezed  #mymakingstory #tim_holtz #thefunkiejunkieboutique #sizzix
The base is a vintage silver plate basket I had in my stash.

Tim Holtz did a great live demo last month covering several ways to alter the Tiny Eggs and Salvaged Rabbits. (Hot tip: he now divides the videos into time stamped sections so with a single click you can get right to the part of the video you want to review. So handy!) I wanted to make a chocolate bunny and try making foiled eggs. They turned out so cute!

Lisa Hoel for The Funkie Junkie Boutique - Spring Frolic Easter basket  #creativejuicefreshsqueezed  #mymakingstory #tim_holtz #thefunkiejunkieboutique #sizzix

I also decorated the back so it's interesting from all sides. The Bunny Stitch Die Set is a new one that I love. Those bunnies will be showing up in future projects too!

Lisa Hoel for The Funkie Junkie Boutique - Spring Frolic Easter basket  #creativejuicefreshsqueezed  #mymakingstory #tim_holtz #thefunkiejunkieboutique #sizzix
Love the foiled eggs!!

The carrots are from the Bunny Stitch Die Set too and I incorporated one of the Collage Layer Frames to make that panel. Flowers are made using the Tiny Tattered Florals Die Set.

Here are a few "in process" steps.

1) Base - I hot glued a chunk of styrofoam into my vintage basket to form the base. I then hot glued some Vintage style Easter Grass over that.


2) I created a little layered collage on the back using a label from the new Idea-ology Transparent Things 2, stamping and Curator Snippets pieces with the bunny die cut. I like the effect of things underneath the transparent pieces showing through.


3) Assembling - Memo Pins hold the cards in place and stuck easily into the foam. I arranged the bunny, eggs, flowers and spun cotton mushrooms and glued them in place. This was a fun little project!


Thanks for stopping by. Keep an eye on the Funkie Junkie Boutique Blog, Inspiration Ave. because you are now getting regular doses of expanded (and inspiring) content each week. Don't miss it…

Supplies used:

Tim Holtz Thinlits Die Set - Bunny Stitch
Tim Holtz Thinlits Die Set - Tiny Tattered Florals
Tim Holtz Stamp Set - Field Notes
Tim Holtz Stamp Set - Stitches

Tim Holtz Idea-ology - Tiny Eggs
Tim Holtz Idea-ology - Salvaged Rabbits
Tim Holtz Idea-ology - Layer Frames, Collage
Tim Holtz Idea-ology - Transparent Things 2
Tim Holtz Idea-ology - Flash Cards
Tim Holtz Idea-ology - Memo Pins
Tim Holtz Idea-ology - Ephemera Snippets, Curator
Tim Holtz Idea-ology - Chit Chat Seasonal
Tim Holtz Idea-ology - Worn Wallpaper
Tim Holtz Idea-ology - Holiday Woodgrain Cardstock, Gray

Distress Paint - Walnut Stain
Distress Rock Candy Dry Glitter
Stampers Anonymous Glitter Duster
Ranger Alcohol Ink - Stream, Purple Twilight, Sunshine Yellow, Raspberry

Vintage style Easter Grass
Vintage silver plate basket
styrofoam
foil candy wrappers

Wednesday, March 1, 2023

Funkie Junkie Focus – Aren't We Lucky?

Hello there, our current Funkie Junkie Focus theme is "Aren't We Lucky?" Since it is March I decided to go all in with a St. Patrick's Day make. You would count yourself lucky indeed if you found a leprechaun's pot of gold!

Lisa Hoel for The Funkie Junkie Boutique - Aren't We Lucky? Leprechaun pot of gold  #creativejuicefreshsqueezed  #mymakingstory #tim_holtz #thefunkiejunkieboutique #sizzix

This little scene has a vintage saucer for its base (in the perfect shade of green). A Halloween Idea-ology Cauldron is a nice stand in for the 'pot of gold'. The leprechaun's wee little house stands under the shadow of four leaf clovers.

Lisa Hoel for The Funkie Junkie Boutique - Aren't We Lucky? Leprechaun pot of gold  #creativejuicefreshsqueezed  #mymakingstory #tim_holtz #thefunkiejunkieboutique #sizzix

I couldn't resist adding one of the new Salvaged Rabbits to the scene…

Lisa Hoel for The Funkie Junkie Boutique - Aren't We Lucky? Leprechaun pot of gold  #creativejuicefreshsqueezed  #mymakingstory #tim_holtz #thefunkiejunkieboutique #sizzix

Let's take a look at some of the how-to!

Step 1 was to make the pot of gold. I crammed a small styrofoam ball into a cauldron and painted it gold. To make the gold coins, I first cut 3/4" circles out of shrink plastic.

I shrank them with my heat gun so they made nice little coin shapes. Tip: flatten the coins with an acrylic stamp block while the plastic is still hot. I then painted each coin with Gilded Foundry Wax. When the wax dried, I heated each coin again with my heat gun to set the wax. It gets so shiny! (I held the coins in place with tweezers so the heat gun didn't blow them away.)


Step 2 was to form the scene base. I cut a circle of foam core to fit into the saucer. Aluminum foil was molded into the shape I wanted for the base and hot glued in place.

Then I covered the foil with plaster cloth strips. After that was dry I painted it various shades of green and covered it with moss.


Step 3 was making the lucky four leaf clovers. I colored white coffee filters with various colors of Distress Spray Stain. I like to use coffee filters because you can dye them any color you like and they look like tissue paper but are much stronger.

Heart shapes make great clover leaves! The handy thing about using the Hearts Stacked Tiles Die Set is that it comes with multiple dies of the same size. I was able to cut out all the shapes I needed in one pass.


Covered floral wire is perfect for the stems.


With a dab of low temp hot glue, I adhered the first leaf. I added each leaf with another dot of glue and compressed the leaf tips around the stem.


I hope you are feeling lucky now…


Thanks for stopping by. Keep an eye on the Funkie Junkie Boutique Blog, Inspiration Ave. because you are now getting regular doses of expanded (and inspiring) content each week. Don't miss it…

Supplies used:

Tim Holtz Thinlits Die Set - Paper Village
Tim Holtz Thinlits Die Set - Stacked Tiles, Hearts
Tim Holtz Thinlits Die Set - Funky Florals #2
Tim Holtz Thinlits Die Set - Funky Florals #3
Tim Holtz Thinlits Die Set - Small Tattered Florals 
Tim Holtz 3D Texture Fades - Mini Lumber

Tim Holtz Idea-ology - Halloween Cauldron
Tim Holtz Idea-ology - Salvaged Rabbits
Tim Holtz Idea-ology - Bouquet

Distress Paint - Lost Shadow
Distress Spray Stains - Vintage Photo, Tea Dye, Cracked Pistachio, Saltwater Taffy, Squeezed Lemonade
Distress Crayon - Walnut Stain
Distress Foundry Wax - Gilded
Distress Kraft Heavystock

Plaster cloth
shrink plastic
coffee filters
moss
floral wire
mini spun cotton mushrooms