Wednesday, March 31, 2021
Topflight Stamps Birthday Blog Hop WINNER!
Tuesday, March 30, 2021
Happy Easter! Vintage + Eileen Hull Sizzix Dies
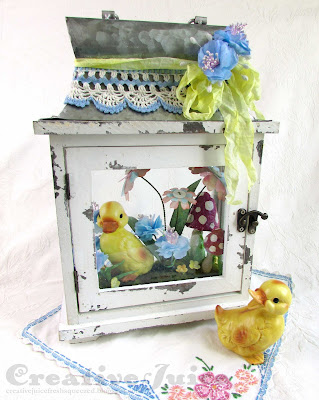
Happy Easter and springtime friends! Today I have a cute spring decor piece to share with you made with some of my favorite things. I really need to put away my St. Patrick's Day decor and get all the Easter stuff out! Let's take a look:
The lantern I found at the thrift store (I'm always keeping my eyes open for things I can create scenes in). The little Lefton duckling figurine is one I had in my stash. The flowers are created using Eileen's dies and her Sizzix Twist & Style Tool (more on how I did those later).
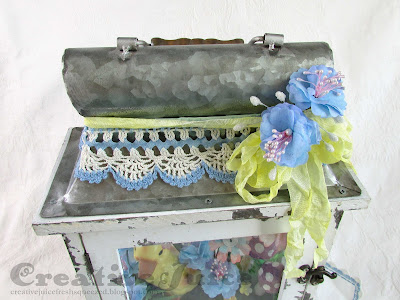
Detail of the top (the crochet lace is vintage):
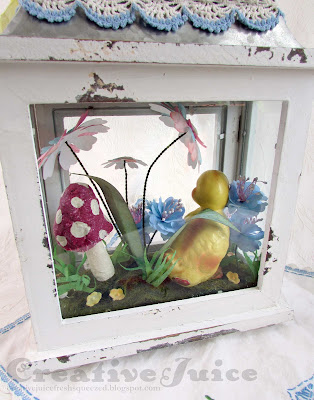
and, the back view:
This really didn't take too long to put together. Following are some tips for making the flowers.
Step 1 - I carved a foam base to fit in the bottom and hot glued it in place. I covered it with fake moss from the craft store (not shown in photo below).
Step 2 - Making flowers
I gathered my 'flower' material, patterned paper, dyed crinoline and dyed coffee filters. I cut several combinations of materials using the Heart & Soul Flower die. The stems are very easy to create using wire, buttons and Eileen's Twist & Style tool!
Hold one of the handles and twist! That's it. Keep twisting until you are happy with the tightness of your twisted wire. Disengage the tool and poke the stem through the center of your flowers. Add a dab of glue to keep everything in place and you have a flower. Easy peasy!
The second type of flowers I cut using purple dyed coffee filters and the Pansy Flower Die. I had these wired bundles of pink stamens in my stash (probably from the thrift store lol) that were perfect for the centers. I used several layers of the die cut petals and crinkled them up for dimension. Again, a dab of glue held the petals in place.
Thanks for stopping by and checking out my post. Be sure to keep an eye on Eileen's blog because April 7th is the Release Party for her Chapter 2 Sizzix Dies!
Wednesday, March 24, 2021
Topflight Stamps is 4! Let's celebrate with a Birthday Hop…
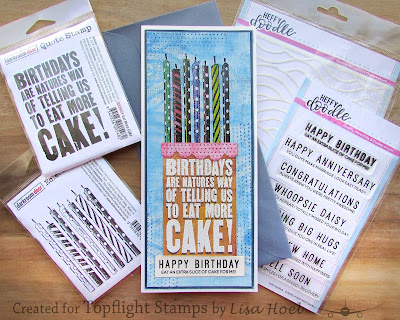
It's Topflight Stamps' 4th birthday and to celebrate, I’ve teamed up with some great designers to showcase birthday cards created using the unique products available at Topflight Stamps. Please hop along with us and see all the beautiful talent from this group of amazing designers! You should have arrived here from the Topflight Stamps blog. If not, no worries, catch the details below. My slim line birthday card for the Hop! (supply list after the Hop details)
Follow along here and if you get lost you can always start back at the Topflight Stamp Blog.
Lisa Hoel <<<----You are here
Supplies used:
Topflight Stamps Products:
Darkroom Door - Eat More Cake, Candles
Heffy Doodle - Everyday Sentiment Duos Stamps
AALL & Create - #150 Create it Grunge
Heffy Doodle Stencil - Wave to Me
Neenah Metallic Paper
embossing ink
PaperArtsy Fresco Finish Chalk Paint - Prawn, Pixie Dust, Pumpkin Soup, Mahogany, Caramel, Antarctic, Chalk, Smurf, China
cardstock
Some links in this post are affiliate links which do not affect the price you pay but allow me to earn a small percentage of a sale. Thanks! (My husband also thanks you!) If you shop at Topflight Stamps, use my coupon code LISAHOEL for 12% off your order.
Tuesday, March 23, 2021
Embroidered Folio Journal with Stitchery Kit - Eileen Hull's New Sizzix Dies!
Well, it's taken me all month but I finally finished my embroidered Folio Journal! Eileen's new Folio has SO many possibilities! I wanted to try making a "soft" journal sewn out of fabric and Pellon Ultra Firm Stabilizer. It worked! Take a look…
 |
| I had the perfect piece of vintage lace to use on the cover! |
 |
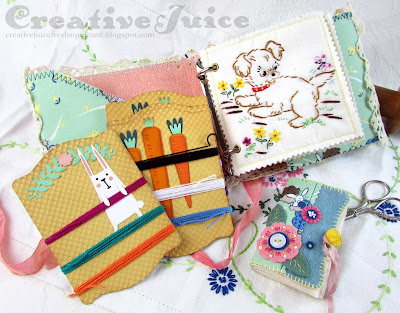
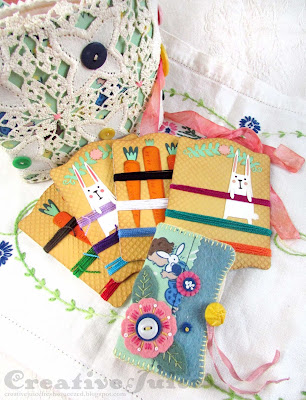
| The Folio pockets hold thread cards and a needle book. |
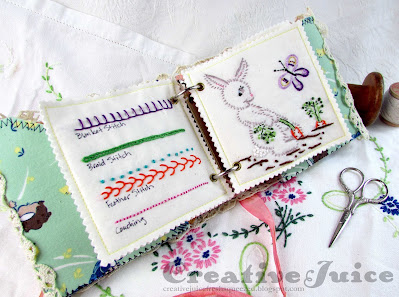
I used vintage tea towel embroidery patterns to stitch my pages:
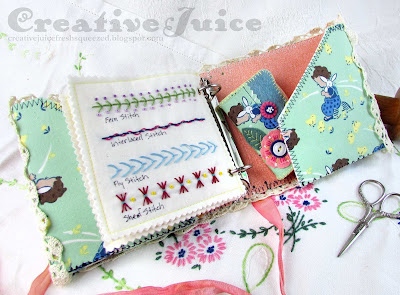 |
| I added some stitch sampler pages too! |
Let's check out the construction:
Step 1 - For the covers, first I cut two pieces of the Pellon Stabilizer (14" x 6") and fused my outside and inside printed fabrics onto each side. (Forgot to get a photo of that.) I then cut my front and back covers.
 |
| Note the piece of lace I had in my stash that was the perfect size! |
Step 2 - I sewed the covers together at the spine, stitching back and forth several times for strength.
Step 3 – I had to stop and ponder the proper order of the next steps. ;-) First I attached the ring binder hardware, and then the lace (which would have been in the way of stitching the binder clip). I knew it would be easier to tack on the lace with stitches before the pockets were folded over and sewn so that's why the lace was next.
 |
| I used strong thread and hand tacked the clip into place with several stitches. |
Step 4 – Now I could sew the pocket bottoms in place. I used a strip of super tacky tape to help hold the tab in place while I hand stitched it.
Stitching the edge was a bit tricky. I definitely needed a sharp needle and a thimble to get through all those layers. Not bad for a first effort though.
PART 2: The embroidered pages
Step 1 – I found these vintage iron on tea towel patterns at the thrift store.
 |
| Here are all my finished embroideries, ready to be made into pages. |
Step 2 – I used the page die from the Folio Page, Pocket & Flowers Die Set to trace out where the page edges should go on all the stitched panels. I did some careful pinning and made a sandwich of panels with quilt batting in the middle, then stitched around the page about 1/8" in. After that I trimmed the pages on the pen lines with my pinking shears.
Step 3 – Last step was to put eyelets in. It was super easy using my Crop-A-Dile. I even had the right size eyelets in my stash!
I guess the last, last steps were to make the matching needle book (see a similar one I made here) and the thread cards. The thread cards were cut from mat board using Eileen's Trinket Box Die front. Tip for the bunnies: I cut them out of Sizzix Surfacez White Texture Roll. It is a very durable fabric type paper like the old Paper Leather or Kraftex. I did this so the bunny arms wouldn't rip off when winding and unwinding floss around the cards.
Thanks for stopping by and checking out my LONG post. Be sure to keep an eye on Eileen's blog because April 7th is the Release Party for her Chapter 2 Sizzix Dies!
Friday, March 19, 2021
St. Patrick's Day Birthday Card
Hello, I'm a few days late but I wanted to share my Mom's St. Patrick's Day themed birthday card with you (her birthday is March 17th!) The card is made with all sorts of Tim Holtz products and techniques inspired by his recent YouTube Saturday videos. It's mounted onto a stand cut using Eileen Hull's handy Display Stand Die. This way the card can also serve as a holiday decoration.
Here's another look:
And the back with the stand mechanism popped up:
Here are some in process photos:
I cut the stand out of Sizzix mat board. The front card part I assembled completely before adhering it to the stand. (Layers: base of Woodgrain cardstock, then embossed layer, then Baseboards Lace Frame.
I used a palette of neutrals of various Distress inks, sprays and Crayons to color all the parts (Antique Linen, Pumice Stone, Hickory Smoke, Tea Dye and Vintage Photo).
I cut a multitude of flowers and foliage out of similarly colored cardstock and colored coffee filters. I ended up with a lot of extras so I'll have to make something else with those.
Thanks for stopping by! My blog has been quiet lately but I have other projects in the works! Check in early next week for the next reveal. =)


