Monday, December 20, 2021

Comfort & Joy in the Eileen Hull Fan Club


We have a special event going on right now in the Eileen Hull Fan Club! Eileen kicked off the Comfort & Joy event off with a Facebook Live in the group. She covered how the event will work and what you can expect. This event is only for Fan Club members so all of the posts/videos/lives will take place within the group. If you miss a live show, you can always watch the replay. Are you a member of the Eileen Hull Fan Club? Join over 5,ooo other members to share ideas, inspiration, sources, challenges and make some fabulous friends – make sure to answer the questions!

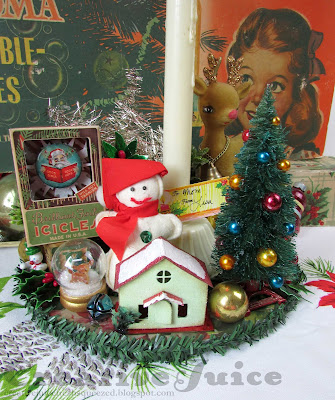
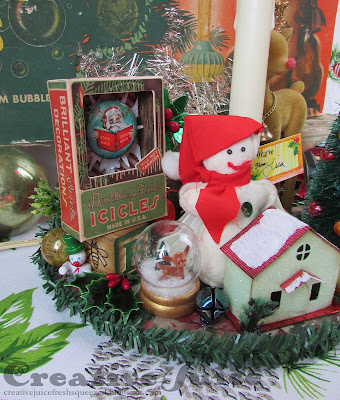
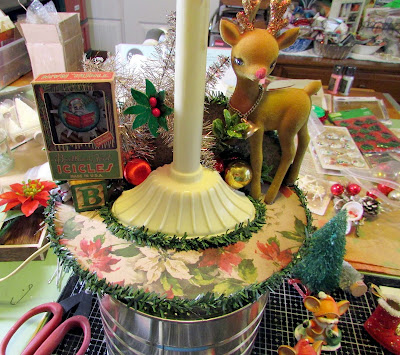
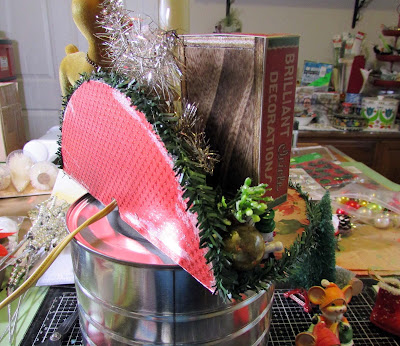
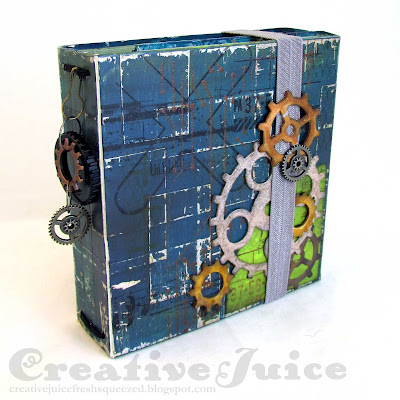
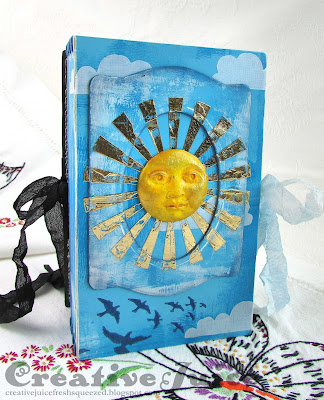
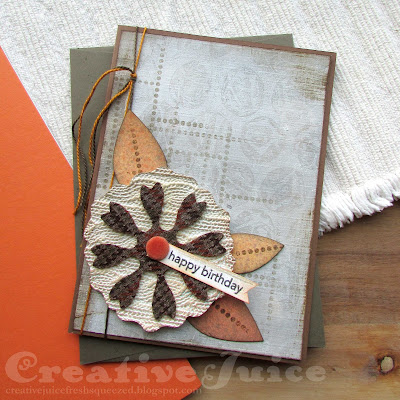
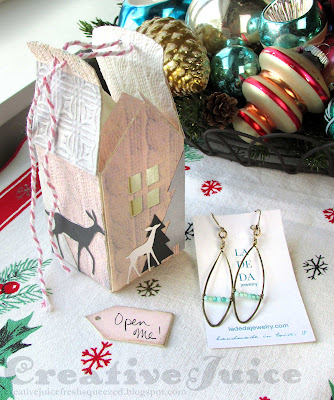
Today is my turn to contribute to the event and I used Eileen's dies to help me jazz up some of my Christmas gift giving! First up, the House Ornament Die is perfect to make a little gift box for a pair of handmade earrings and then it can live on as a tree ornament:

Lisa Hoel for Eileen Hull - Comfort & Joy Event 2021, House Ornament Die #creativejuicefreshsqueezed  #comfortandjoy2021 #eileenhull #eileenhulldesigns #eileenhullsizzix #ehinspirationteam #eheducators #Sizzix #mymakingstory #diecutting

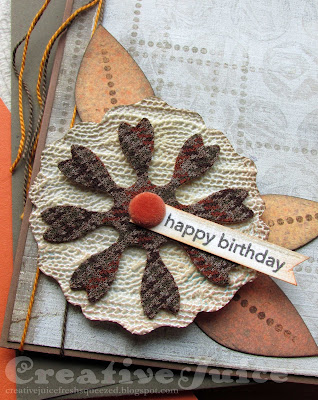
I embossed the mat board using Eileen's 3-D Sweater Embossing Folder:

Lisa Hoel for Eileen Hull - Comfort & Joy Event 2021, House Ornament Die #creativejuicefreshsqueezed  #comfortandjoy2021 #eileenhull #eileenhulldesigns #eileenhullsizzix #ehinspirationteam #eheducators #Sizzix #mymakingstory #diecutting

Lisa Hoel for Eileen Hull - Comfort & Joy Event 2021, House Ornament Die #creativejuicefreshsqueezed  #comfortandjoy2021 #eileenhull #eileenhulldesigns #eileenhullsizzix #ehinspirationteam #eheducators #Sizzix #mymakingstory #diecutting

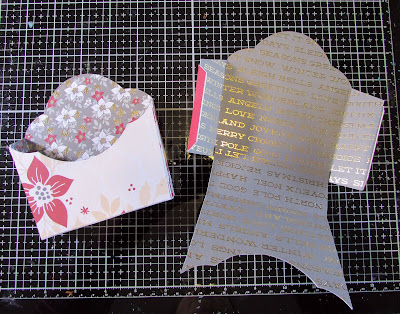
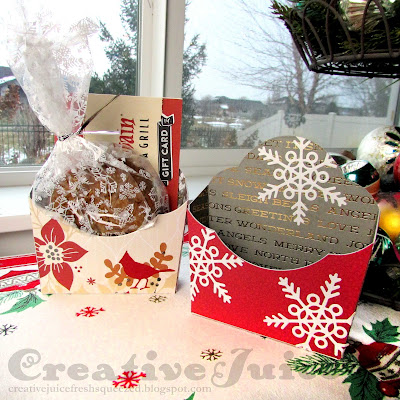
Eileen's dies came in really handy for the teacher/bus driver/class aide gifts I had to have ready for gifting on the last day of school this past Friday. Quick and easy (but stylish) was the name of the game! I used a pad of patterned Christmas paper and the retired 
Flower Pocket Die to make some holders for cookie treats and gift cards.

Lisa Hoel for Eileen Hull - Comfort & Joy Event 2021, Flower Pocket Die #creativejuicefreshsqueezed  #comfortandjoy2021 #eileenhull #eileenhulldesigns #eileenhullsizzix #ehinspirationteam #eheducators #Sizzix #mymakingstory #diecutting

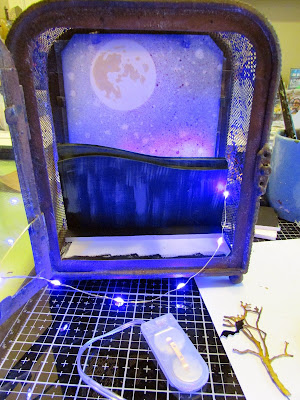
Here's some peeks at the constructions of these makes:
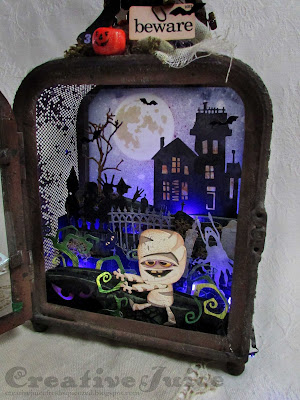
House Ornament:


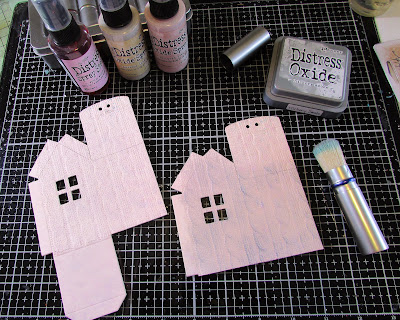
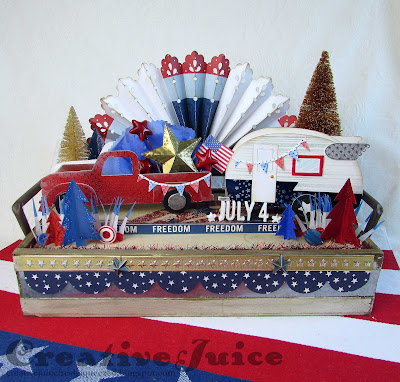
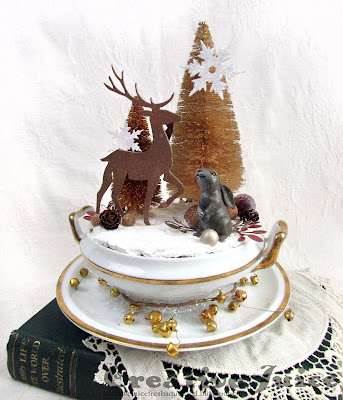
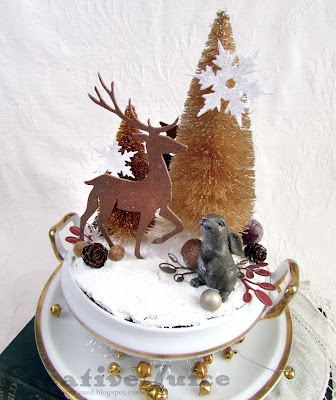
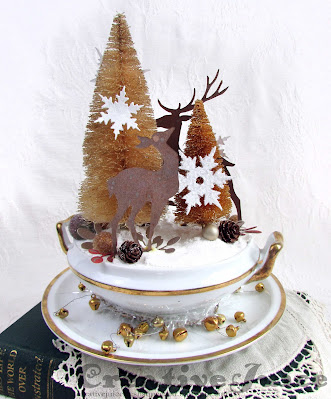
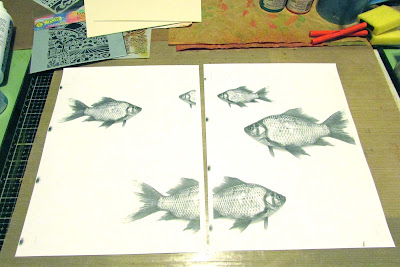
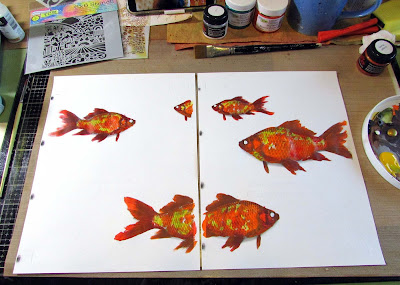
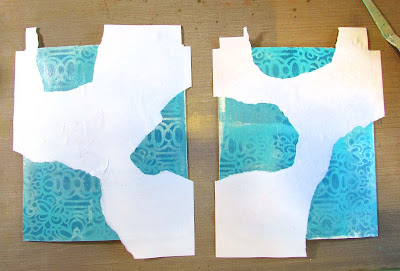
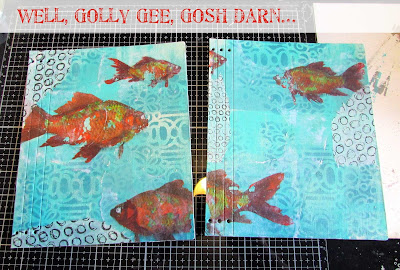
First I sprayed some mat board with Distress sprays to color it. When dry, I cut two parts with the 
House Ornament Die. On one of the pieces, cut the bottom flap off. I embossed the sides after cutting so the embossing wouldn't be crushed (by embossing first and then running it through again to cut the shapes). I highlighted the embossed texture with a brush and grey Distress ink. After assembling I added the trees (cut using the Vintage Truck Die), deer and roof panels.

Flower Pockets:

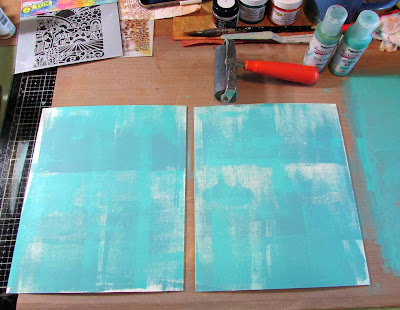
I used dry adhesive (sheets or a Xyron machine are perfect) to quickly add the patterned paper to both sides of Sizzix mat board.


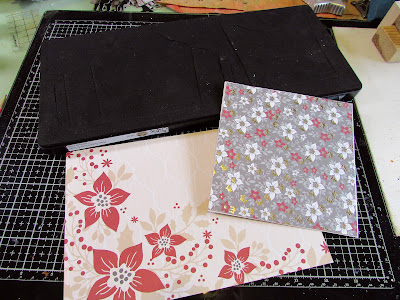
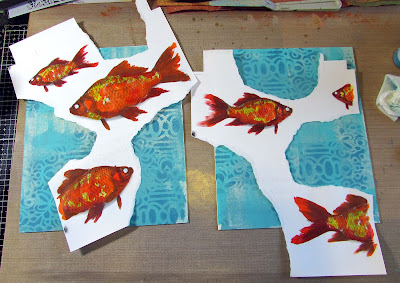
Then I cut the shapes. One pass is all you need for all your parts!

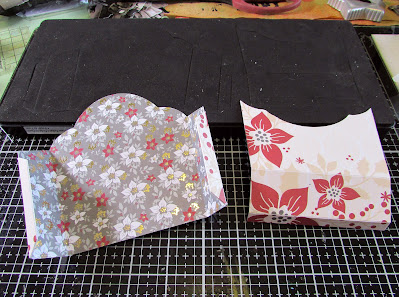
I used hot glue to attach the parts. Strong tape would work well too.


Thanks for stopping by and be sure to keep an eye on 
Eileen's blog for more inspiration from the Educator and Inspiration Teams.

Supplies used:
Dies:
Eileen Hull Sizzix 
Sweater, 3-D Textured Impressions Embossing Folder  Sizzix / SB )
Vintage Truck Die Sizzix / SB )
Starlight Embossing Folder #660337 - retired
Wreath & Snowflake Die Set  Sizzix / SB )

Tim Holtz Sizzix
Darling Deer ( Sizzix / SB )

Other:
Sizzix Mat Board (Sizzix / SB )
Distress Inks
Distress Oxide & reg Spray Stains
acrylic paint

Some links in this post are affiliate links which do not affect the price you pay but allow me to earn a small percentage of a sale. Thanks! (My husband also thanks you!) 


Wednesday, December 8, 2021

Merry Kitschmas! Guest Designer Post for The Funkie Junkie Boutique Blog

Merry Kitschmas! I am honored to be a guest designer on The Funkie Junkie Boutique Blog today with a project for their current challenge:

Yuletide Delights Let's get festive and create some Vintage Yuletide magic. Perhaps use some holiday distress colors or go full glitz with sparkles and falling snow. It is getting cold and we are thinking of sugarplums, candy canes, and holiday cheer. Create holiday cards, décor, or ornaments to show your Yuletide Delights. Have fun with your make and create some holiday magic! Happy crafting!

I love all things vintage Christmas and when my Mom mentioned her fond memories and childhood fascination with their Christmas tree bubble lights, an idea was sparked! I happened to have a stash of old bubble light bulbs and vintage candoliers in my stash that I knew would be perfect to craft-ify. I mixed truly vintage holiday bits with Tim Holtz Idea-ology and die cuts. I love how his products mix so well with the actual vintage! I hope my Mom enjoys this merry Kitschmas decoration as much as I do.

Lisa Hoel for The Funkie Junkie Boutique Blog - Merry Kitschmas! Vintage and Tim Holtz products combine for maximum nostalgia. #creativejuicefreshsqueezed #timholtz #sizzix #mymakingstory #vintagechristmas

I glued the candolier onto a base I made out of foam core; then went to town filling it with delightful Christmas details. I used both new and old supplies from my stash. (It's handy to have a stash!)

Lisa Hoel for The Funkie Junkie Boutique Blog - Merry Kitschmas! Vintage and Tim Holtz products combine for maximum nostalgia. #creativejuicefreshsqueezed #timholtz #sizzix #mymakingstory #vintagechristmas

Tim Holtz Christmas Idea-ology rounded out my vintage bits and bobs. I made sure many of my favorites made it in. I also used many of the tips that Tim Holtz shared in his recent Holiday Live on YouTube. Check it out if you haven't already!

Lisa Hoel for The Funkie Junkie Boutique Blog - Merry Kitschmas! Vintage and Tim Holtz products combine for maximum nostalgia. #creativejuicefreshsqueezed #timholtz #sizzix #mymakingstory #vintagechristmas

I couldn't resist adding a Snow Globe with a tiny little deer inside. I have a thing for snow globes. and deer. Can't you tell? ;-)

Lisa Hoel for The Funkie Junkie Boutique Blog - Merry Kitschmas! Vintage and Tim Holtz products combine for maximum nostalgia. #creativejuicefreshsqueezed #timholtz #sizzix #mymakingstory #vintagechristmas

I also have a thing for tiny houses and adding a Paper Village Putz house was definitely a box I wanted to check for this project.

Lisa Hoel for The Funkie Junkie Boutique Blog - Merry Kitschmas! Vintage and Tim Holtz products combine for maximum nostalgia. #creativejuicefreshsqueezed #timholtz #sizzix #mymakingstory #vintagechristmas

I meant to take more photos of the basic base structure but I got going and forgot until after I had already started gluing parts on. Oops! Here is a peek though to give you an idea.

I cut a large circle out of foam core board and sliced off the back third. I flipped it up to form the backboard. I covered the pieces with Tim Holtz Christmas Backdrops and Rinea Foil papers before I glued them together. I also cut a notch out of the back for the cord.


I had some wired green garland trim in my stash which covered the edges nicely. Working from back to front, I just layered in the components. My mini hot glue gun was my friend!


Thanks for stopping by! I hope you check out the fun bi-weekly challenges they have on the Funkie Junkie Boutique Blog. They are always good for sparking your creativity! You have another week to join the current challenge so I hope you give it a go.

Tim Holtz Sizzix Dies used:
Christmas Minis (tree in snow globe)
various snowflake dies

Distress Paint - Candied Apple
Distress Spray Stain - Rustic Wilderness
Ranger Alcohol Ink - Mushroom, Stream, Raisin, Red Pepper, Butterscotch
Distress Glaze - Fired Brick
Distress Glitter - Rock Candy

Some links in this post are affiliate links which do not affect the price you pay but allow me to earn a small percentage of a sale. Thanks! (My husband also thanks you!) 

Tuesday, November 30, 2021

Favorite Projects of 2021 Roundup

Is tomorrow really December? Time has really flown by! Eileen Hull's Inspiration Team is taking a look back over 2021 and picking out their three favorite projects from the year. I had fun choosing my favorites and here they are! I'll link back to the original posts so you can go see the tutorials and all the details.

#1 - The Robot Folio Journal
Eileen's Folio Journal Die debuted in February and I created this cyberpunk 'robot' journal to put it through its paces. I was very pleased with the outcome! Check out the post for LOTS of photos and a tutorial.

Lisa Hoel for Eileen Hull - Favorite projects of 2021! Robot Cyberpunk Folio Journal  #creativejuicefreshsqueezed  #eileenhull #eileenhulldesigns #eileenhullsizzix #ehinspirationteam #eheducators #Sizzix #mymakingstory #diecutting

Lisa Hoel for Eileen Hull - Favorite projects of 2021! Robot Cyberpunk Folio Journal  #creativejuicefreshsqueezed  #eileenhull #eileenhulldesigns #eileenhullsizzix #ehinspirationteam #eheducators #Sizzix #mymakingstory #diecutting

#2 - Day & Night Reversible Journal
I had an idea that I just had to try out! I wanted to make an art journal that juxtaposed two opposites and I thought making the journal reversible was an interesting format. I used the Pocket Journal Die for the covers. Check out my original post for all the details and tutorial.

Lisa Hoel for Eileen Hull - Favorite projects of 2021! Day & Night Reversible Pocket Journal  #creativejuicefreshsqueezed  #eileenhull #eileenhulldesigns #eileenhullsizzix #ehinspirationteam #eheducators #Sizzix #mymakingstory #diecutting

Lisa Hoel for Eileen Hull - Favorite projects of 2021! Day & Night Reversible Pocket Journal  #creativejuicefreshsqueezed  #eileenhull #eileenhulldesigns #eileenhullsizzix #ehinspirationteam #eheducators #Sizzix #mymakingstory #diecutting

#3 - 4th of July Decor
The Vintage Truck and Camper Dies are some of my favorite dies from this year. They are so cute and can be used so many ways! I used both of them to create a festive 4th of July decoration for my house. I did not spare the red, white and blue ha ha. Original post can be found here.

Lisa Hoel for Eileen Hull - Favorite projects of 2021! 4th of July decor Truck and Camper Dies  #creativejuicefreshsqueezed  #eileenhull #eileenhulldesigns #eileenhullsizzix #ehinspirationteam #eheducators #Sizzix #mymakingstory #diecutting

Thanks for stopping by and paying a visit! Be sure to keep your eye on Eileen Hull's blog this month for loads of inspiration from the Teams!

Tuesday, November 16, 2021

Funkie Junkie Boutique Challenge - "Living Things"

Hello! I've been trying to get a project done for the current Funkie Junkie Boutique challenge, Living Things (ending tonight ha ha). Here I am getting it done at the last minute again. ;-) I'm still counting it though. Anyway, they have the best challenge themes and I had a hankering to make something Christmas-y, glittery, and woodsy. I've also had the vintage china container sitting on my shelf for a year waiting to get up-cycled. It all came together!

Lisa Hoel - vintage up-cycling! Christmas assemblage #creativejuicefreshsqueezed #tim_holtz #Sizzix #mymakingstory #diecutting

I kept the color scheme neutral but used lots of glitter and gold. ;-)

Lisa Hoel - vintage up-cycling! Christmas assemblage #creativejuicefreshsqueezed #tim_holtz #Sizzix #mymakingstory #diecutting
The bunny is a resin figurine from the craft store.

Lisa Hoel - vintage up-cycling! Christmas assemblage #creativejuicefreshsqueezed #tim_holtz #Sizzix #mymakingstory #diecutting
Back view

Thanks for stopping by! Be sure to check out The Funkie Junkie Boutique Blog, every two weeks they have a new challenge. I think they come up with great themes. Plus their design team is top notch and you will be inspired by all the makes. 

Wednesday, November 3, 2021

Feeling Fall-ish Birthday Card with Eileen Hull

Hello and welcome to November! This month the theme on Eileen's blog is 'Seasonal Makes' which covers all the bases this time of year. I created a fall themed card for my mother-in-law's birthday next week. Take a look:

Lisa Hoel for Eileen Hull - Seasonal Makes, Fall themed birthday card #creativejuicefreshsqueezed #gelpressobsessed #eileenhull #eileenhulldesigns #eileenhullsizzix #ehinspirationteam #eheducators #Sizzix #mymakingstory #diecutting

The card background is a monoprint made using a gel plate and then stamped with one of Eileen's new stamps (Snail Mail Everyday Sentiments).

Lisa Hoel for Eileen Hull - Seasonal Makes, Fall themed birthday card #creativejuicefreshsqueezed #gelpressobsessed #eileenhull #eileenhulldesigns #eileenhullsizzix #ehinspirationteam #eheducators #Sizzix #mymakingstory #diecutting

I used some of Eileen's retired flower and leaf dies to cut the parts for the embellishment. The big flower on the bottom I embossed using her fabulous (seriously one of my favorite 3-D Embossing Folders) new Sweater folder.  I used a double sided adhesive sheet to attach the plaid fabric to a piece of cardstock before cutting out the center flower. This helps stabilize the shape and prevents fraying at the edges. 

There you go, this is a clean and simple card for me lol.

Thanks for stopping by and be sure to keep an eye on Eileen's blog for more inspiration from the Educator and Inspiration Teams.

Supplies used:
Dies:
Eileen Hull Sizzix 
Sweater, 3-D Textured Impressions Embossing Folder  Sizzix / SB )
Romance Flower Die #661110 - retired
Leaves Die - retired
Heart & Soul Flower Die #661108 - retired

Other:
Eileen Hull Maker Forte stamp set - Snail Mail Everyday Sentiments
Archival (permanent) inks
Distress Inks
acrylic paint
fabric

Some links in this post are affiliate links which do not affect the price you pay but allow me to earn a small percentage of a sale. Thanks! (My husband also thanks you!) 

Wednesday, October 27, 2021

Giggling Ghouls, Guest Designer for The Funkie Junkie Boutique

Happy Halloween! I am honored to be a guest designer on The Funkie Junkie Boutique Blog today with a project for their current challenge:

Grunge, Ghouls or Giggles – Halloween is just around the corner and this week we are getting our hands dirty. Will your makes be frightful and ghoulish or will they be cute and get giggles? Add a touch of grunge to your makes. Cards, décor, scrapbook pages, journal spreads, we want to see it all. We will be most Distressed if you miss out on the spooky cute Halloween fun! Happy crafting!

This is such a great theme and I had the perfect idea for a project to make!

Lisa Hoel for The Funkie Junkie Boutique Blog Halloween challenge #creativejuicefreshsqueezed #tim_holtz #Sizzix #mymakingstory #diecutting

I had a grungy decor lantern that I had picked up at a garage sale… I just knew it would be perfect for a spooky project.

Lisa Hoel for The Funkie Junkie Boutique Blog Halloween challenge #creativejuicefreshsqueezed #tim_holtz #Sizzix #mymakingstory #diecutting

I had the idea to make a layered perspective scene inside utilizing my Tim Holtz Halloween dies! Of course I had to add some purple Tiny Lights:

Lisa Hoel for The Funkie Junkie Boutique Blog Halloween challenge #creativejuicefreshsqueezed #tim_holtz #Sizzix #mymakingstory #diecutting
spoooooooky!

I embellished the top with more die cuts and Idea-ology from my stash:

Lisa Hoel for The Funkie Junkie Boutique Blog Halloween challenge #creativejuicefreshsqueezed #tim_holtz #Sizzix #mymakingstory #diecutting

So much fun! I tend to go for spooky cute in my Halloween makes so this fits the bill nicely. I have some 'behind the scenes' peeks so you can see a bit of my process.

1. After thinking about what dies to use and sketching out the sizes and placements of the die cuts, I began creating the layers. First was the background inked on a piece of plain vellum. I used the smallest moon in the new Moon Mask Set and inked with regular Distress Inks to maintain the translucency of the vellum. A spritz of Hocus Pocus Mica Stain added some nice glimmer.
 

2. Referring to my sketches, I cut out the pieces of foam core to create the bases for each layer. I painted them black and dry brushed green over the tops.


3. I created all my die cut elements. For the ones that would sit on "top" of a piece of foam core, I glued a piece of stiff wire on the back so I could just poke it into the foam.


4. I had to be strategic in my building because the bigger base pieces were a bit tricky to get into the lantern. I also hot glued in the light strand as I went

back layers first!

Working my way to the front:


Thanks for stopping by! I hope you check out the fun bi-weekly challenges they have on the Funkie Junkie Boutique Blog. They are always good for sparking your creativity! You have another week to join the current challenge so I hope you give it a go.

Tim Holtz Sizzix Dies used:
Twisted Edge

Some links in this post are affiliate links which do not affect the price you pay but allow me to earn a small percentage of a sale. Thanks! (My husband also thanks you!) 

Project on Scrapbook .com


Wednesday, October 13, 2021

Something's Fishy! Collaboration with The Crafter's Workshop & Eileen Hull

Lisa Hoel for Eileen Hull - Something's Fishy! mixed media cover made using her new Full Size Journal die  #tcwstencillove #creativejuicefreshsqueezed #eileenhull #eileenhulldesigns #eileenhullsizzix #ehinspirationteam #eheducators #Sizzix #mymakingstory #diecutting

Hello Eileen Hull fans! Did you catch the Chapter 4 Release party and blog hop on October 1st? If so, then you know that Eileen's latest release is awesome! Here's what she had to say about it:

"The Chapter 4 Sizzix Release is exciting for so many reasons – there are two never-done-before designs! One is the Full Size Journal which is a Bigz Pro size – you will need a machine with at least a 9" throat to cut this die- like a Big Shot Plus or Pro. Not to worry, if you don't have that machine, Eileen will have the pre-cut pieces available in her Etsy store for you to work with. The other new technology is a 3-D Embossing Folder! It's called Sweater and is oh so cozy. Also new this release is a Bigz Notepad Die with lots of options for materials and uses, and a Heart Mandala Thinlits Die to decorate with! "


Today I'm sharing the tutorial for the mixed media Full Size Journal cover I made. We're doing a collaboration this month with The Crafter's Workshop so I've incorporated some of their fantastic stencils and other products into my make.

Lisa Hoel for Eileen Hull - Something's Fishy! mixed media cover made using her new Full Size Journal die  #tcwstencillove #creativejuicefreshsqueezed #eileenhull #eileenhulldesigns #eileenhullsizzix #ehinspirationteam #eheducators #Sizzix #mymakingstory #diecutting
Front of the cover…

Lisa Hoel for Eileen Hull - Something's Fishy! mixed media cover made using her new Full Size Journal die  #tcwstencillove #creativejuicefreshsqueezed #eileenhull #eileenhulldesigns #eileenhullsizzix #ehinspirationteam #eheducators #Sizzix #mymakingstory #diecutting
… and the back!

Let's take a look at how I did this and also how I saved it from a big oopsie. (ug)

I used a fun image transfer technique to apply those goldfish to my cover:
Step 1 - I'm kind of anal about how my images lay out so I "composed" them in a graphic layout program (Adobe Illustrator) on my computer.


I printed out the sides in black and white using my laser printer (important to use a laser printer or copier!) Also VERY IMPORTANT is to print out your images REVERSED.


I took into account the spine overlap for the placement of my fish images. The plan was to have the halves line up across the spine when the cover was assembled.

Next step is to paint over the toner images with acrylic paint. This painted layer will show through once the image is transferred!


Step 2 - Prepping the covers; I used a brayer and Fresco paint to lay down some color. (Other side of mat board for the insides of the cover were collaged with marbled paper and text pages from a fishing book.)


I also stenciled on the fronts:


Step 3 - Now for the transfer! I tore away the excess paper from the images.


I applied a layer of gel medium to the cover and then laid the images face down into it, squishing out any air bubbles. You need to make sure you have a good layer of medium on your substrate. I think mine was a little thin and was drying too quickly which led to an incomplete transfer of the fish images. You'll see later.


Once it was all dry, it was time to remove the backing paper. This part is a bit of a pain but patience is the key. Spritz sections of the paper with water and then gently rub off the soggy paper, revealing the image! You'll see areas of the fish where I didn't have enough medium so the image didn't stick and rubbed away with the paper. It definitely more of a distressed look!


Step 4 - Cutting out the cover parts. If you have a 'directional' pattern, you need to be careful about how you position your matboard when you cut the cover. If it's not flipped the right way, things like this happen:

I made two "front" covers. grrrr

In Eileen's recent Facebook Live, she shows how to put together the Full Size Journal Die and how you mark up your die so you don't make mistakes like this! Obviously I need to do that. You can watch the video here.

I really didn't want to redo the cover so I came up with an (imperfect) fix. The spine sections are supposed to overlap but I cut the back cover the wrong way. So, I just lopped off the scored spine section from the back cover.


At this stage, I also coated the cover with Gloss Varnish to
brighten the image and get rid of the 'paper residue haze'
from the image transfer.

Of course now my planned overlap of the fish images across the spine was completely screwed up but what are you going to do? I decided to live with it. ;-)

On the inside of the cover I taped the two pieces together with cloth book repair tape. It is flexible and has strong adhesive. I could also add more paint accents over it to make it blend in. I used my Crop-a-dile to punch through the tape that covered the holes in the spine for binding.


Once fixed, I continued decorating the cover.


I added some paint marks and used a stencil to add some TCW Turquoise Stencil Butter accents. It goes on really smoothly and has a beautiful metallic shine. I also used the Stencil Butter through the Flying Kitty stencil on the front. I lightly sprinkled it with some black embossing powder while it was wet. Once it was dry, I heated it to emboss the powder. You could still see hints of the turquoise through but the black made the cat much more of a focal point. I also stamped the words with paint and foam stamps as a final step.

Whew, that was long! I hope you give the image transfer technique a try. It's a fun one to have in your box of tricks. Thanks for stopping by and be sure to keep an eye on Eileen's blog for more inspiration from the Educator and Inspiration Teams.

Also keep an eye on The Crafter's Workshop blog to see how their Design Team utilized Eileen's dies in their projects this month!

Supplies used:

Dies:
Eileen Hull Sizzix 
Full Size Journal Die  Sizzix / SB )

The Crafter's Workshop supplies:

Other:
mat board
brayer
Lavinia stamp - Shoal of Fish
Tim Holtz Cling Foam Stamps - Block Lower & Upper case sets
lots of different acrylic paints from my stash
Paper Artsy Fresco chalk paint - Cloud 9, Paua Shell, Bora Bora, Caribbean Sea, Captain Peacock, Caramel
Archival (permanent) inks
black embossing powder
DecoArt Media Gloss Varnish
Dina Wakley Collage Paper (tissue)
Sakura Souffle pens

Some links in this post are affiliate links which do not affect the price you pay but allow me to earn a small percentage of a sale. Thanks! (My husband also thanks you!)