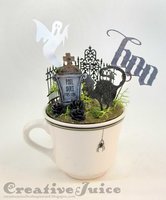
Wednesday, October 31, 2018

Halloween Eileen Hull Journal

Hello and Happy Halloween!! I have a final treat for you today; no tricks I promise! I whipped up a spooktacular little book using Eileen Hull's ever so versatile Journal Die and lots of Tim Holtz dies and stamps.

BOO!!


The journal covers I first colored with multiple colors of Distress Oxide Inks in yellows, oranges and greens. I really love how the Oxides blend and react with water. Spritzing, sprinkling and dabbing got me the texture I desired. For the front cover overlay, I cut a piece of mixed media paper to fit so it was inset a bit from the edges. I used black, purple and grey inks to blend the background and make it gradate from dark to light. The Tim Holtz Stamping Platform made it easy to position the haunted house, tree etc. stamps and ensure even stamping coverage. I then cut the eyes and word out with the Frightening Faces and Alphanumeric, Cutout Lower die sets before glueing it onto the journal front.


The back has stamping and a cutout from the Cobweb die for embellishment.

Thanks for stopping by. Be sure to visit Eileen's blog and check out the other posts for this month! All month the Inspiration Team has been sharing fall and Halloween projects. =) I am also adding this journal to the October Mini Album Makers Challenge.


Dies:
Eileen Hull Sizzix
Journal ( Sizzix / SB )

Tim Holtz - Frightening Faces Sizzix / SB )
Tim Holtz - Alphanumeric, Cutout Lower Sizzix / SB )
Tim Holtz - Cobweb Sizzix )

Other:
Tim Holtz stamp set - Mini Halloween 2
Tim Holtz stamp set - Haunted House
Tim Holtz stamp set - Halloween Cutouts
Ranger Archival Ink - Jet Black, Orange Blossom
Distress Inks - Black Soot, Dusty Concord
Distress Oxide Inks - Black Soot, Shaded Lilac, Weathered Wood, Spiced Marmalade, Wild Honey, Crushed Olive, Twisted Citron, Fossilized Amber, Squeezed Lemonade
Distress Spray Stain - Fossilized Amber, Twisted Citron
Sizzix mat board
Halloween Idea-ology charms (from a few years ago)
A Jillian Vance Design Pear Pins
elastic
gold embossing powder
Versamark Ink Pad (for embossing moon)

Sizzix and Scrapbook.com links in this post are affiliate links which do not affect the price you pay but allow me to earn a small percentage of a sale. Thanks! (My husband also thanks you!)

Tuesday, October 30, 2018

Jane Davenport Journal with Topflight Stamps

Hello! Today I'm sharing a Topflight Stamps project with you. I used Eileen Hull's Wrapped Journal die to make a mini art journal full of Jane Davenport stamps. I love her Relaxed Narwhal stamp ("inhale" "exhale" lol) and wanted to make it a focal image on the front.


In keeping with the ocean theme, I used some Lavinia stamps to add some more sea life on the back…


… and used mermaid fabric to cover the inside of the journal cover!


I custom made the four signatures. They include watercolor paper and sketch paper.


The journal is very easy to bind. The die punches holes in the spine when you cut it out and I just thread elastic through to create the binding. The signatures slip under the elastic.

Thanks for stopping by! Below is a list of supplies I used. Be sure to check out the Topflight Stamps blog for more inspiration. There is always something fun to see there! Have a great week. =)

I am also adding this journal to the October Mini Album Makers Challenge.


Topflight Stamps Products:
Jane Davenport - Relaxed Narwhal
Jane Davenport - Crafty Minx
Lavinia - Forest Spruce
Lavinia - Sea Creatures
That's Crafty Dinky Stencil - Burst


Other:
Eileen Hull Sizzix Die - Wrapped Journal ( Sizzix / SB )

Ranger Archival Ink - Jet Black
Distress Inks - Chipped Sapphire
Distress Oxide Inks - Chipped Sapphire, Milled Lavender, Mowed Lawn
watercolors
Derwent Inktense watercolor pencils
Ranger Distress Collage Medium - matte
Tim Holtz Typed Tokens
A Jillian Vance Design Pear Pins
elastic

Scrapbook.com and Sizzix links in this post are affiliate links which do not affect the price you pay but allow me to earn a small percentage of a sale. Thanks! (My husband also thanks you!)

Wednesday, October 24, 2018

Eileen Hull Halloween Projects Round Up!

Hello there! Well October has just flown by hasn't it? I can't believe that Halloween is next Wednesday! If you've been keeping an eye on Eileen Hull's blog this month you've seen all the wonderful fall and Halloween inspired projects the rest of the Inspiration Team has been sharing. I'm doing a little round up of some of my favorite past projects to share with you today.

First up, this little treat box was one of the first projects I made for Eileen using her classic Candy Box Drawer Die. You can see the original post here.

Fun in a box! Now that's a treat!

Next is a ghosty bouquet. The container is made using the 3-D Vase Die and the flowers were created using Eileen's versatile Twist & Style Tool and her Romance Flower Die to make the wire stems. You can find a complete tutorial on the original post.

Isn't it boo-tiful?

The third project is a treat holder made with the Flower Pocket Die and Stampotique stamps (love their stamps!) You can see the original post with the how-to here.

You can fit a lot of chocolate in there!

Last is a favorite of mine – a Train Case bursting with Halloween fun! The Train Case Die is a versatile one that you use to hold all sorts of goodies in a little scene like this or to use as a hinged box to contain whatever bits and bobs you want to organize. You can find the original blog post here.

This really was no trouble to make at all.

Thanks for stopping by! Be sure to head on over to Eileen’s blog and check out all the projects the team has been sharing all month long. We’d love to have you join the Eileen Hull Fan Club on Facebook too. It's a friendly group with lots of sharing by members and inspiration galore! Have a great rest of the week and see ya soon.


Affiliate links in this post do not affect the price you pay but allow me to earn a small percentage of a sale. Thanks! (My husband also says thanks!)

Tuesday, October 23, 2018

Halloween Brew

Howdy all! Since life without coffee would be downright scary, I thought using a pair of vintage diner coffee mugs I thrifted for Halloween decorations would be a perfect idea. (Especially filled with Tim Holtz die cuts and Idea-ology bwhahahaha…)

Behold, mug number one:

I love how the cups had the black lines around the rim.

And a closer look:


I used the Village Graveyard, Witchcraft set cat and Vintage Spirits dies to create this little scene. I love how the Halloween Remnant Rubs have inscriptions that fit the Idea-ology Tombstones. I used Clearly for Art Modeling Film as the substrate for the ghost. This film becomes pliable when heated and then holds its shape when it cools down. It's great for making 'fluttery' ghosts! Painted texture paste gives the ground a nice rough surface. I spread that onto the cardboard circle I cut to fit the top of the mug.

Mug number two:

ahhhh, mini pumpkins!!! I love them so.
And a detail:


The Remnant Rubs also have little faces you can put on the pumpkins! How cute is that?? I couldn't resist. I also couldn't resist the little domes with bats on top I found at Michaels. They were sold glued shut (really Michaels???) but a heat gun softens the glue and you can pop the dome and base apart. I glued little bats inside.

Seriously, can you stand it? Love. It.

Thanks for stopping by! I am entering this project into the Frilly and Funkie Haunted Halloween challenge. (Getting in by the skin of my teeth ha ha.) They always have fun challenges; check them out!

Dies:
Tim Holtz Village Graveyard - Sizzix
Tim Holtz Silly Monsters - retired
Tim Holtz Witchcraft - Sizzix
Tim Holtz Vintage Spirits - Sizzix
Tim Holtz strip die - Halloween Shadows - retired

Other:
Emerald Creek Allure Embossing Powder - Onyx Frost
Prima Glass Glitter - Copper
Wendy Vecchi Modeling Film Clearly for Art - Whiteout
Tim Holtz Idea-ology Halloween Remnant Rubs
Tim Holtz Idea-ology Tombstones
Tim Holtz Idea-ology Mini Pumpkins
Tim Holtz Idea-ology Halloween Adornments (2017)
Tim Holtz Idea-ology Halloween Clippings Stickers
Tim Holtz Idea-ology Halloween Ephemera
Tim Holtz Idea-ology Memo Pins
Distress Paint - Black Soot, Walnut Stain, Forest Moss
Ranger Texture Paste
Distress Collage Medium - Matte, Vintage
landscaping foam, lichen


Sizzix & Scrapbook.com links in this post are affiliate links which do not affect the price you pay but allow me to earn a small percentage of a sale. Thanks! (My husband also thanks you!)


Also viewable in my gallery on Scrapbook.com:


Monday, October 22, 2018

AJVD Sneak Peek…

I made another one! Can you guess? ;-) Head on over to the A Jillian Vance Design blog to see what I made:


Thanks for stopping by and have a great week!

Tuesday, October 9, 2018

Say Happy Birthday with Topflight Stamps!

Hello there, today I'm sharing a whimsical card I made for a friend of the family who turned 13! That is certainly a milestone birthday and deserves a special card.


I enjoy making cards with the humorous Katzelkraft stamps and the lion from the Jungle Animals set seemed perfect for a dignified birthday greeting lol. I stamped, watercolored and then fussy cut it out to pop him up from the card base with foam squares. I used other stamps and stencils to layer the background with a combination of Distress and Distress Oxide Inks.

Thanks for stopping by! Below is a list of supplies I used. Be sure to check out the Topflight Stamps blog for more inspiration. There is always something fun to see there! Have a great week. =)

Topflight Stamps Products:
Katzelkraft - Les Jungles
Katzelkraft - Holiday Quotes
Studio Light - Cats & Girls MB06
That's Crafty, Magda Polakow stencil - Clouds & Hearts
Alexandra Renke, washi tape - Little Gold Stars

Other:
Tim Holtz stamp set - Crazy Talk
Tim Holtz Layering Stencils - Numbered
Ranger Archival Ink - Jet Black
Distress Inks - Crushed Olive, Aged Mahogany
Distress Oxide Inks - Crushed Olive, Twisted Citron, Aged Mahogany
watercolors

Scrapbook.com and Sizzix links in this post are affiliate links which do not affect the price you pay but allow me to earn a small percentage of a sale. Thanks! (My husband also thanks you!)

Monday, October 8, 2018

AJVD Fall Card Sneak Peek!

Hello, I have a pretty fall card I'm sharing over on the A Jillian Vance Design blog today. Here's a peek:


Head on over to see the whole thing. ;-) Thanks for stopping 
by and have a great week!

Friday, October 5, 2018

Gingerbread Houses for Halloween??

Back in ye olden 'Christmas in July' times I created a Village Gingerbread house Christmas decor piece set in a mixing bowl and accented with various 'cookery' bits and bobs. You can see that here. I especially loved adding vintage cookie cutters to it – I have quite a stash and they are easy to find at thrift stores. What are much less common are Halloween themed cookie cutters! About a month or so later at a thrift store I found this:


Super cool! What could I do with it? Another mixing bowl project?? What classic fairy tale involves a house made of tasty gingerbread and sweets and a witch? You got it, the story of Hansel and Gretal! I thought it was all a perfect fit for a Halloween themed mixing bowl project. I picked a 'fall colored' vintage bowl out of my collection and…


There is a lot going on in this bowl so better check out some detail photos:


I printed out a scan from a vintage illustration of our sibling duo and fussy cut them out. I was also inspired by Tim's new Fresh Baked cookie dies to make some Halloween 'cookies' to add to my bowl.  I used die cuts from Pumpkin Patch and Witchcraft as the 'frosting' and cut around them to form the cookie after I had glued them onto a suitable 'cookie' paper base. Glossy accents and glitter completed the iced cookie look.


I already had an owl shaped cookie cutter – perfect!


There is my fabulous thrifted witchy cutter!


I chose more 'fall colors' for the decorating of this gingerbread house.

Thanks for stopping by! I am entering this project into the 'Autumn Splendour' challenge over at A Vintage Journey because the fall color palate and natural elements fit right in. The witch's tempting cottage was located deep in the woods after all. ;-)

Dies:
Tim Holtz Village Dwelling - (Sizzix / SB )
Tim Holtz Village Gingerbread - (Sizzix / SB )
Tim Holtz Witchcraft - Sizzix
Tim Holtz Pumpkin Patch - Sizzix
Tim Holtz Tattered Leaves (Sizzix /  SB )

Other:
Archival Ink - Potting Soil
Paper Artsy Fresco Finish Paint - various "fall Necco" colors
Ranger Texture Paste ("frosting")
Distress Collage Medium - Matte
Distress Dry Glitter - Rock Candy
Distress Glitter - Spiced Marmalade
Distress Glitter - Black Soot
Glossy Accents


Sizzix & Scrapbook.com links in this post are affiliate links which do not affect the price you pay but allow me to earn a small percentage of a sale. Thanks! (My husband also thanks you!)


Also viewable in my gallery on Scrapbook.com:

Tuesday, October 2, 2018

Katzelkraft Halloween Cards

Hello! I hope you aren't getting tired of Katzelkraft stamps yet. ;-) They tickle my funny bone and you can do so much with them. Today the kitties are getting into the spirit of Halloween…

This guy spies a tasty treat peeking at him from the jack-o-lantern!


Uh-oh, busted!

Thanks for stopping by! Below is a list of supplies I used. Be sure to check out the Topflight Stamps blog for more inspiration. There is always something fun to see there! Have a great week. =)

Topflight Stamps Products:
Katzelkraft - Les Chats
Katzelkraft - Pilgrim
Katzelkraft - Funny Accessories

Dies:
Sizzix - Layered Jack-o-lantern (Sizzix )
Sizzix - Witchcraft (Sizzix )
Sizzix - Cobweb (Sizzix )

Other:
Tim Holtz stamp set - Crazy Talk
Tim Holtz Layering Stencils - Birch, Shatter, Bats
Ranger Archival Ink - Jet Black
Distress Inks - Black Soot, Antique Linen, Pumice Stone, Rusty Hinge, Dusty Concord
Distress Oxide Inks - Crushed Olive, Forest Moss, Seedless Preserves, Shaded Lilac, Mustard Seed, Fossilized Amber
watercolors

Scrapbook.com and Sizzix links in this post are affiliate links which do not affect the price you pay but allow me to earn a small percentage of a sale. Thanks! (My husband also thanks you!)