Hello! Today I have a guest post over on the AJVD blog and I'm showing you how to stretch your die collection by using them to make stamps! I hope you will hop on over there and check it out. =)
Friday, January 30, 2015
Thursday, January 29, 2015
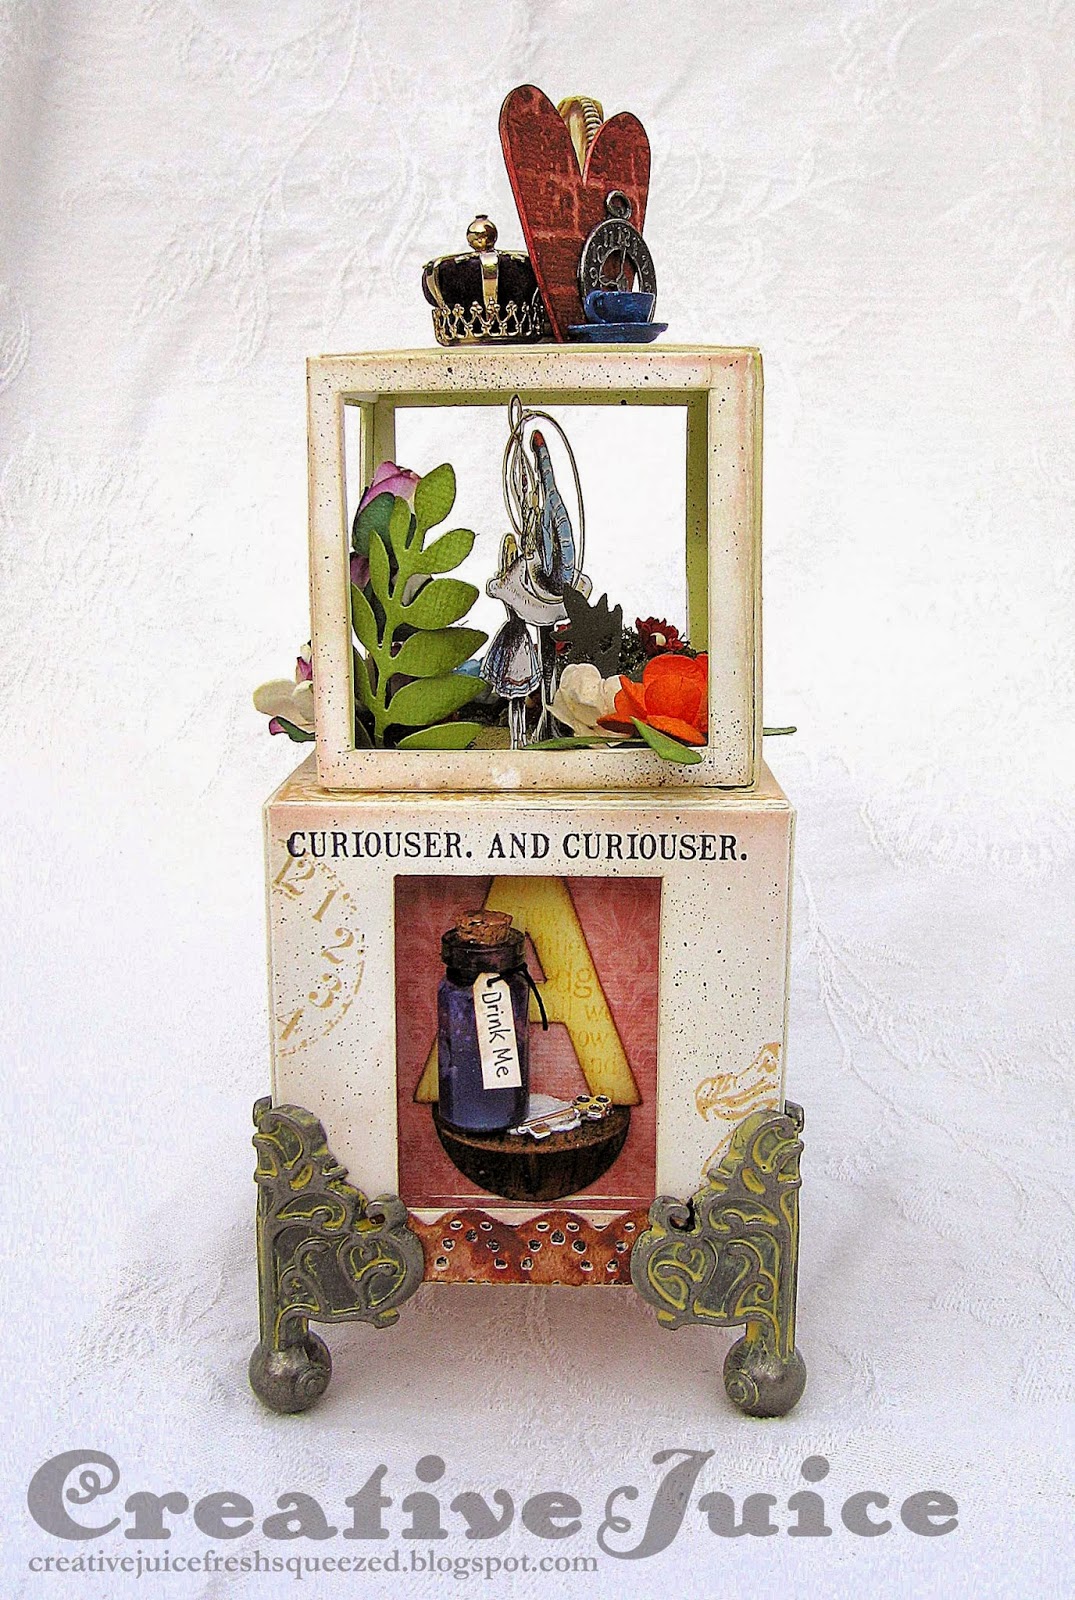
Alice in Wonderland ATB
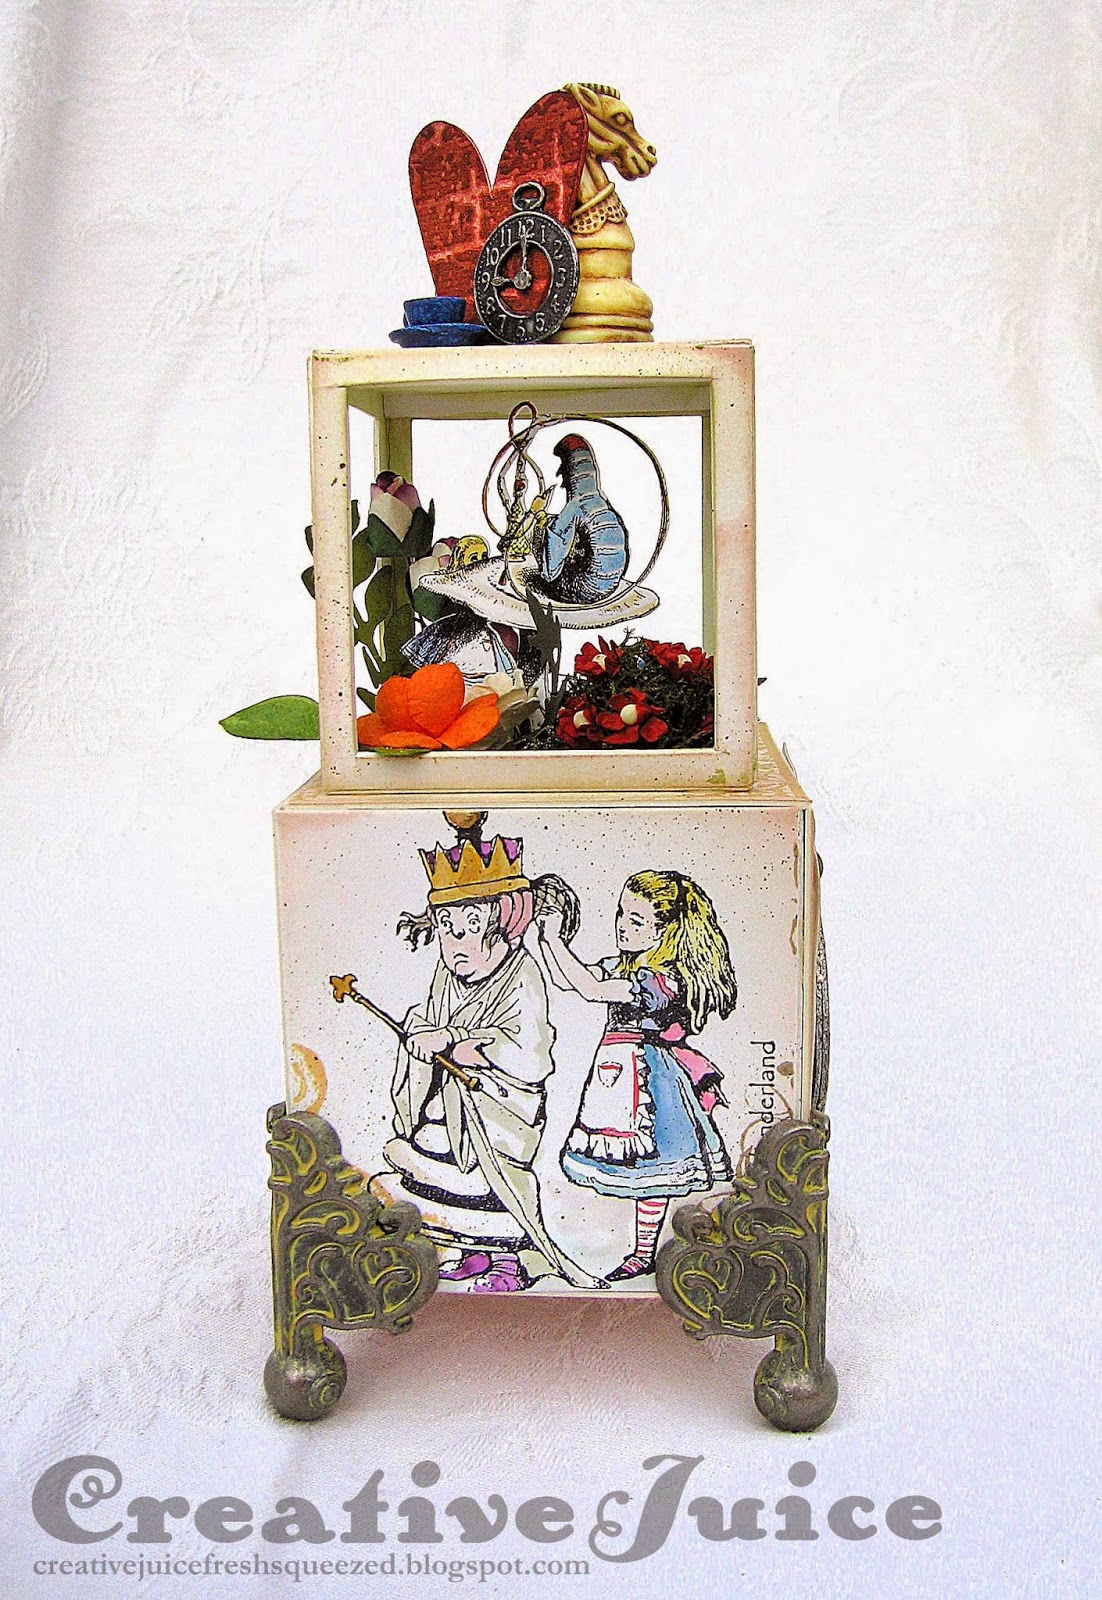
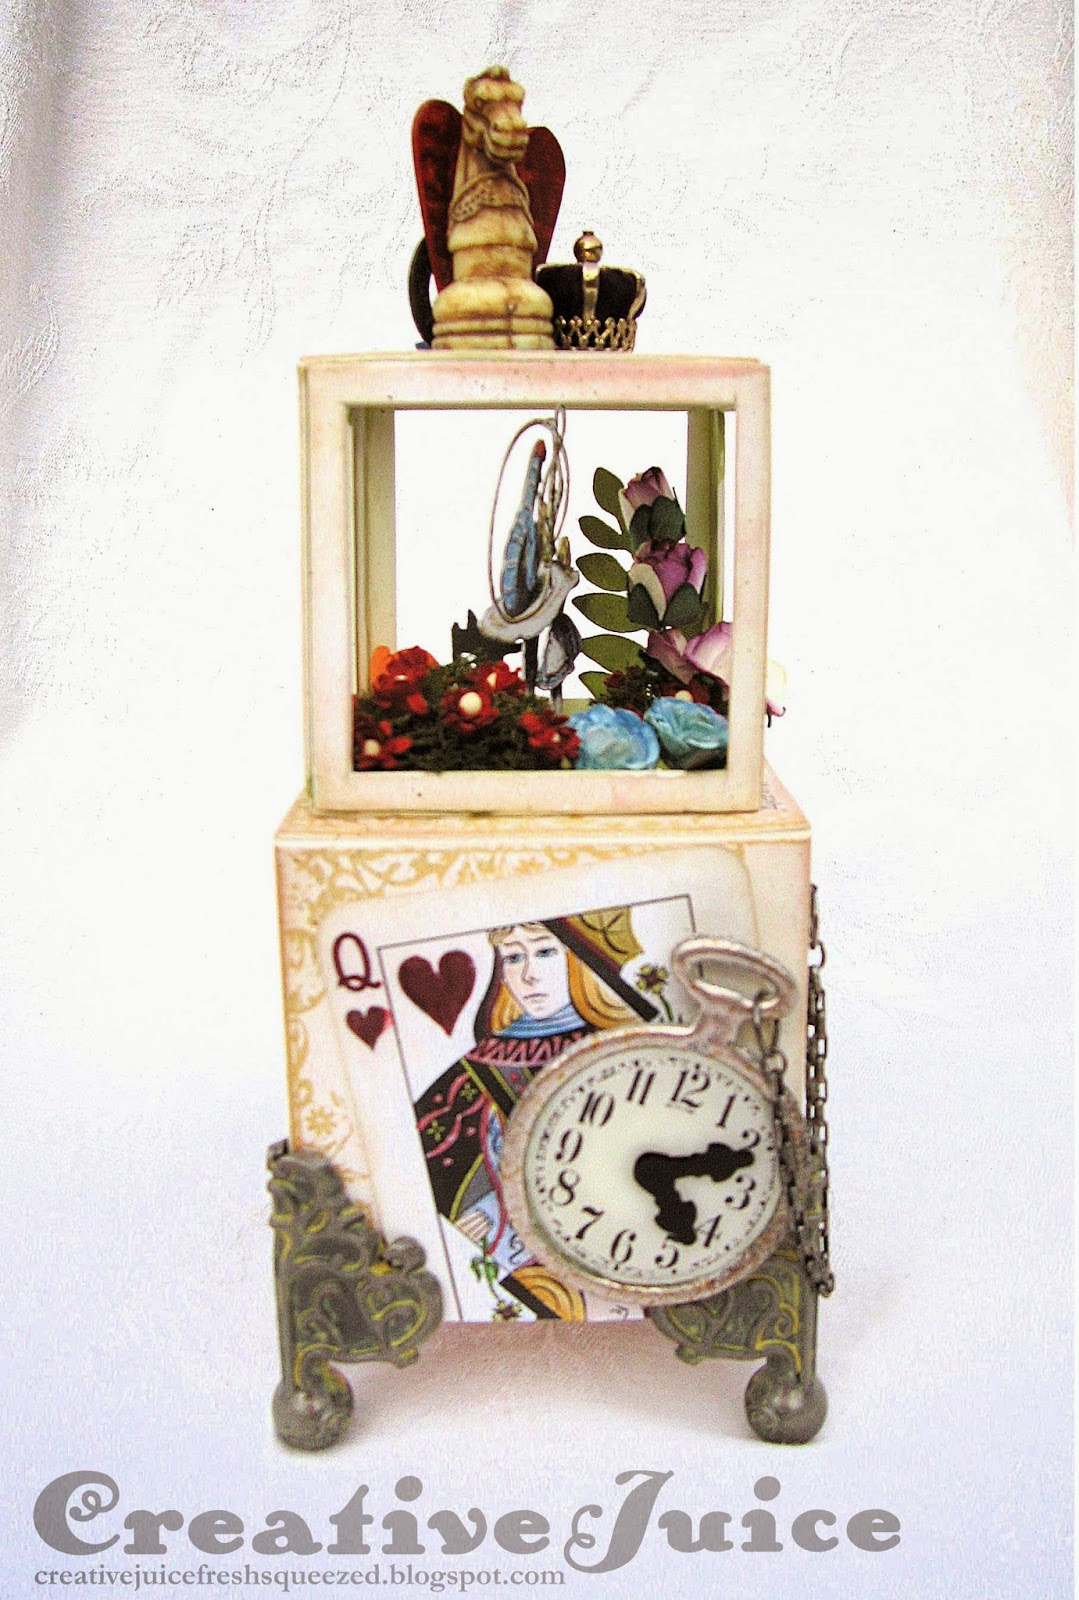
If you are a fan of Alice in Wonderland, I think this project is going to be your cup of tea! I created a whimsical Artist Trading Block tower using the fabulous Artistic Outpost stamp set Wonderland Collage. This is also a project for the ongoing Compendium of Curiosities 3 challenges over at the Studio L3 blog. On page 40 of Tim Holtz's book A Compendium of Curiosities Vol. 3 he outlines the Distress Watercoloring technique that is the focus of Challenge 20. Now, let's get on with the photos! (Lots of them! You have been warned. ;-) )
On the table is the mysterious potion Alice drank to get herself small enough to get through the tiny door into Wonderland. If only she hadn't left the key on the table before she drank it!
The playing card here is actually a scan of a real card printed out in black and white on cardstock. I then used the watercoloring technique to add color back in. I tried using a real card but it just looked too "slick" and didn't match the feel of the rest of the project. Also, by happy coincidence, the clock face stamp from the AO set fits the pocketwatch die perfectly!
Top detail:
I wanted to pick things that were symbolic of the stories to put on the top. I had everything in my stash! On the other side is a chess piece and a crown.
To make the garden in the top cube, I carefully cut out the sides of the flat panels with a craft knife. I had to be very careful when assembling the cube so I didn't bend the thin side pieces. I really wanted Alice talking to the caterpillar in there so I scanned the original illustration from my book and sized it to fit the space. I then flipped a copy of it so I would have a mirror image. That way I could glue the printouts back to back and then fussy cut it out. I'm glad I have a light table! It was tricky lining them up.
You might be wondering how I made the shadowbox in side 2. It is really easy! I used a rectangle die from the Movers & Shapers Rectangle set to cut a window in the cube. The shadowbox is cut using the Matchbox die. It makes it really easy to assemble. I glued the box behind the window cut out. Details (pardon the photo quality please ack!):
Thanks for sticking with me this far! I encourage you to check out The Artists on the Block for more ATB inspiration. Also be sure to go take a look at the Studio L3 blog - there is a ton of inspiration there too! And thanks to The Funkie Junkie Boutique for sponsoring Challenge #20!
For yet MORE inspiration, head on over to the Mixed Media Monthly "New to You Challenge". I'm entering this in the challenge because I used my brand spanking new Wonderland Collage stamp set all over this project. =)
Hold the phone, there is more fun to be had! The Artistic Outpost blog is also having a Show Us Your AO Art challenge. Good thing this project is covered in AO stamps lol.
Most of the supplies I used for this ATB can be found at Inspiration Emporium. Follow the links below and use my code JUICE to save 10% if you go shopping. I will also point out that US shipping is always $5 and international shipping is just $10. ;-)
 |
| side 1 |
 |
| side 2 (more details on inset shadowbox later) |
 |
| side 3 |
 |
| side 4 |
Top detail:
I wanted to pick things that were symbolic of the stories to put on the top. I had everything in my stash! On the other side is a chess piece and a crown.
To make the garden in the top cube, I carefully cut out the sides of the flat panels with a craft knife. I had to be very careful when assembling the cube so I didn't bend the thin side pieces. I really wanted Alice talking to the caterpillar in there so I scanned the original illustration from my book and sized it to fit the space. I then flipped a copy of it so I would have a mirror image. That way I could glue the printouts back to back and then fussy cut it out. I'm glad I have a light table! It was tricky lining them up.
You might be wondering how I made the shadowbox in side 2. It is really easy! I used a rectangle die from the Movers & Shapers Rectangle set to cut a window in the cube. The shadowbox is cut using the Matchbox die. It makes it really easy to assemble. I glued the box behind the window cut out. Details (pardon the photo quality please ack!):
 |
| Matchbox glued to the back of the cube panel |
 |
| It fits just right! |
Thanks for sticking with me this far! I encourage you to check out The Artists on the Block for more ATB inspiration. Also be sure to go take a look at the Studio L3 blog - there is a ton of inspiration there too! And thanks to The Funkie Junkie Boutique for sponsoring Challenge #20!
For yet MORE inspiration, head on over to the Mixed Media Monthly "New to You Challenge". I'm entering this in the challenge because I used my brand spanking new Wonderland Collage stamp set all over this project. =)
Hold the phone, there is more fun to be had! The Artistic Outpost blog is also having a Show Us Your AO Art challenge. Good thing this project is covered in AO stamps lol.
Most of the supplies I used for this ATB can be found at Inspiration Emporium. Follow the links below and use my code JUICE to save 10% if you go shopping. I will also point out that US shipping is always $5 and international shipping is just $10. ;-)
Wednesday, January 21, 2015
National Squirrel Appreciation Day
Did you know that today is National Squirrel Appreciation Day? How we have survived without knowing about this holiday is beyond me ha ha! I thought it would be fun to make my Dad a card for the occasion. He and the neighborhood squirrels have had a looooong running battle. When we had nut trees in the yard they would make the HUGEST mess and of course eat most of the nuts. One day, years ago, my Mom and I got home from running errands and found my Dad engaged in cutting down the walnut tree in a defensive move. Take that squirrels! Now they attack the apricot trees when the fruit is getting ripe. The battle continues…
Closeups:
I am entering this card into the Craft Hoarders Anonymous January "Choose Your Challenge". You have to choose at least one thing from each category in the chart and incorporate that into your project.
I managed to get quite few:
Coloring Medium: Ink (everywhere!), Spray Mist, Paint
Fiber: fabric scalloped border, stitched buttonhole twist thread
Technique: lots of stamping; die cut branches, arrows and card mechanism, front sentiment; folding in card and pop up part
Texture: sanded to distress, cut branches out of chipboard
Embellish: bling using Stickles on front, ephemera - page torn out of old dictionary
Most of the supplies I used for this card can be found at Inspiration Emporium. Follow the links below and use my code JUICE to save 10% if you go shopping. I will also point out that US shipping is always $5 and international shipping is just $10. ;-)
 |
| I think my Dad liked the card even though I got a big eye roll when I gave it to him LOL! |
 |
| I love the Karen Burniston pop up dies. They make to so easy to animate cards. |
 |
| The squirrels are fussy cut from an old fall-themed pad of K&Co paper I have. |
 |
| I carefully positioned the dictionary page when I diecut the arrows. |
I managed to get quite few:
Coloring Medium: Ink (everywhere!), Spray Mist, Paint
Fiber: fabric scalloped border, stitched buttonhole twist thread
Technique: lots of stamping; die cut branches, arrows and card mechanism, front sentiment; folding in card and pop up part
Texture: sanded to distress, cut branches out of chipboard
Embellish: bling using Stickles on front, ephemera - page torn out of old dictionary
Most of the supplies I used for this card can be found at Inspiration Emporium. Follow the links below and use my code JUICE to save 10% if you go shopping. I will also point out that US shipping is always $5 and international shipping is just $10. ;-)
Subscribe to:
Comments (Atom)


