
Hello there, our new challenge at the Funkie Junkie Boutique Blog is live and you won't want to miss out! Our hostess is Teri Wilson and the theme is Stamped with Love.
Here is what Teri has to say, "Look through your collection of Tim Holtz stamps - old and new - and choose one of your favorites to create whatever you imagine with it. Your entry could be a card, a vignette, a layout, or something even more amazing!"
I made a journal using Eileen Hull's new Card Caddy Die and used some of my favorite Tim Holtz stamps to decorate it. I also couldn't resist utilizing some Sizzix 3-D embossing folders. The detail you get with them is amazing!

Here's a view of the back:


The little notebooks I used for the signatures I found at a thrift store (handy!)
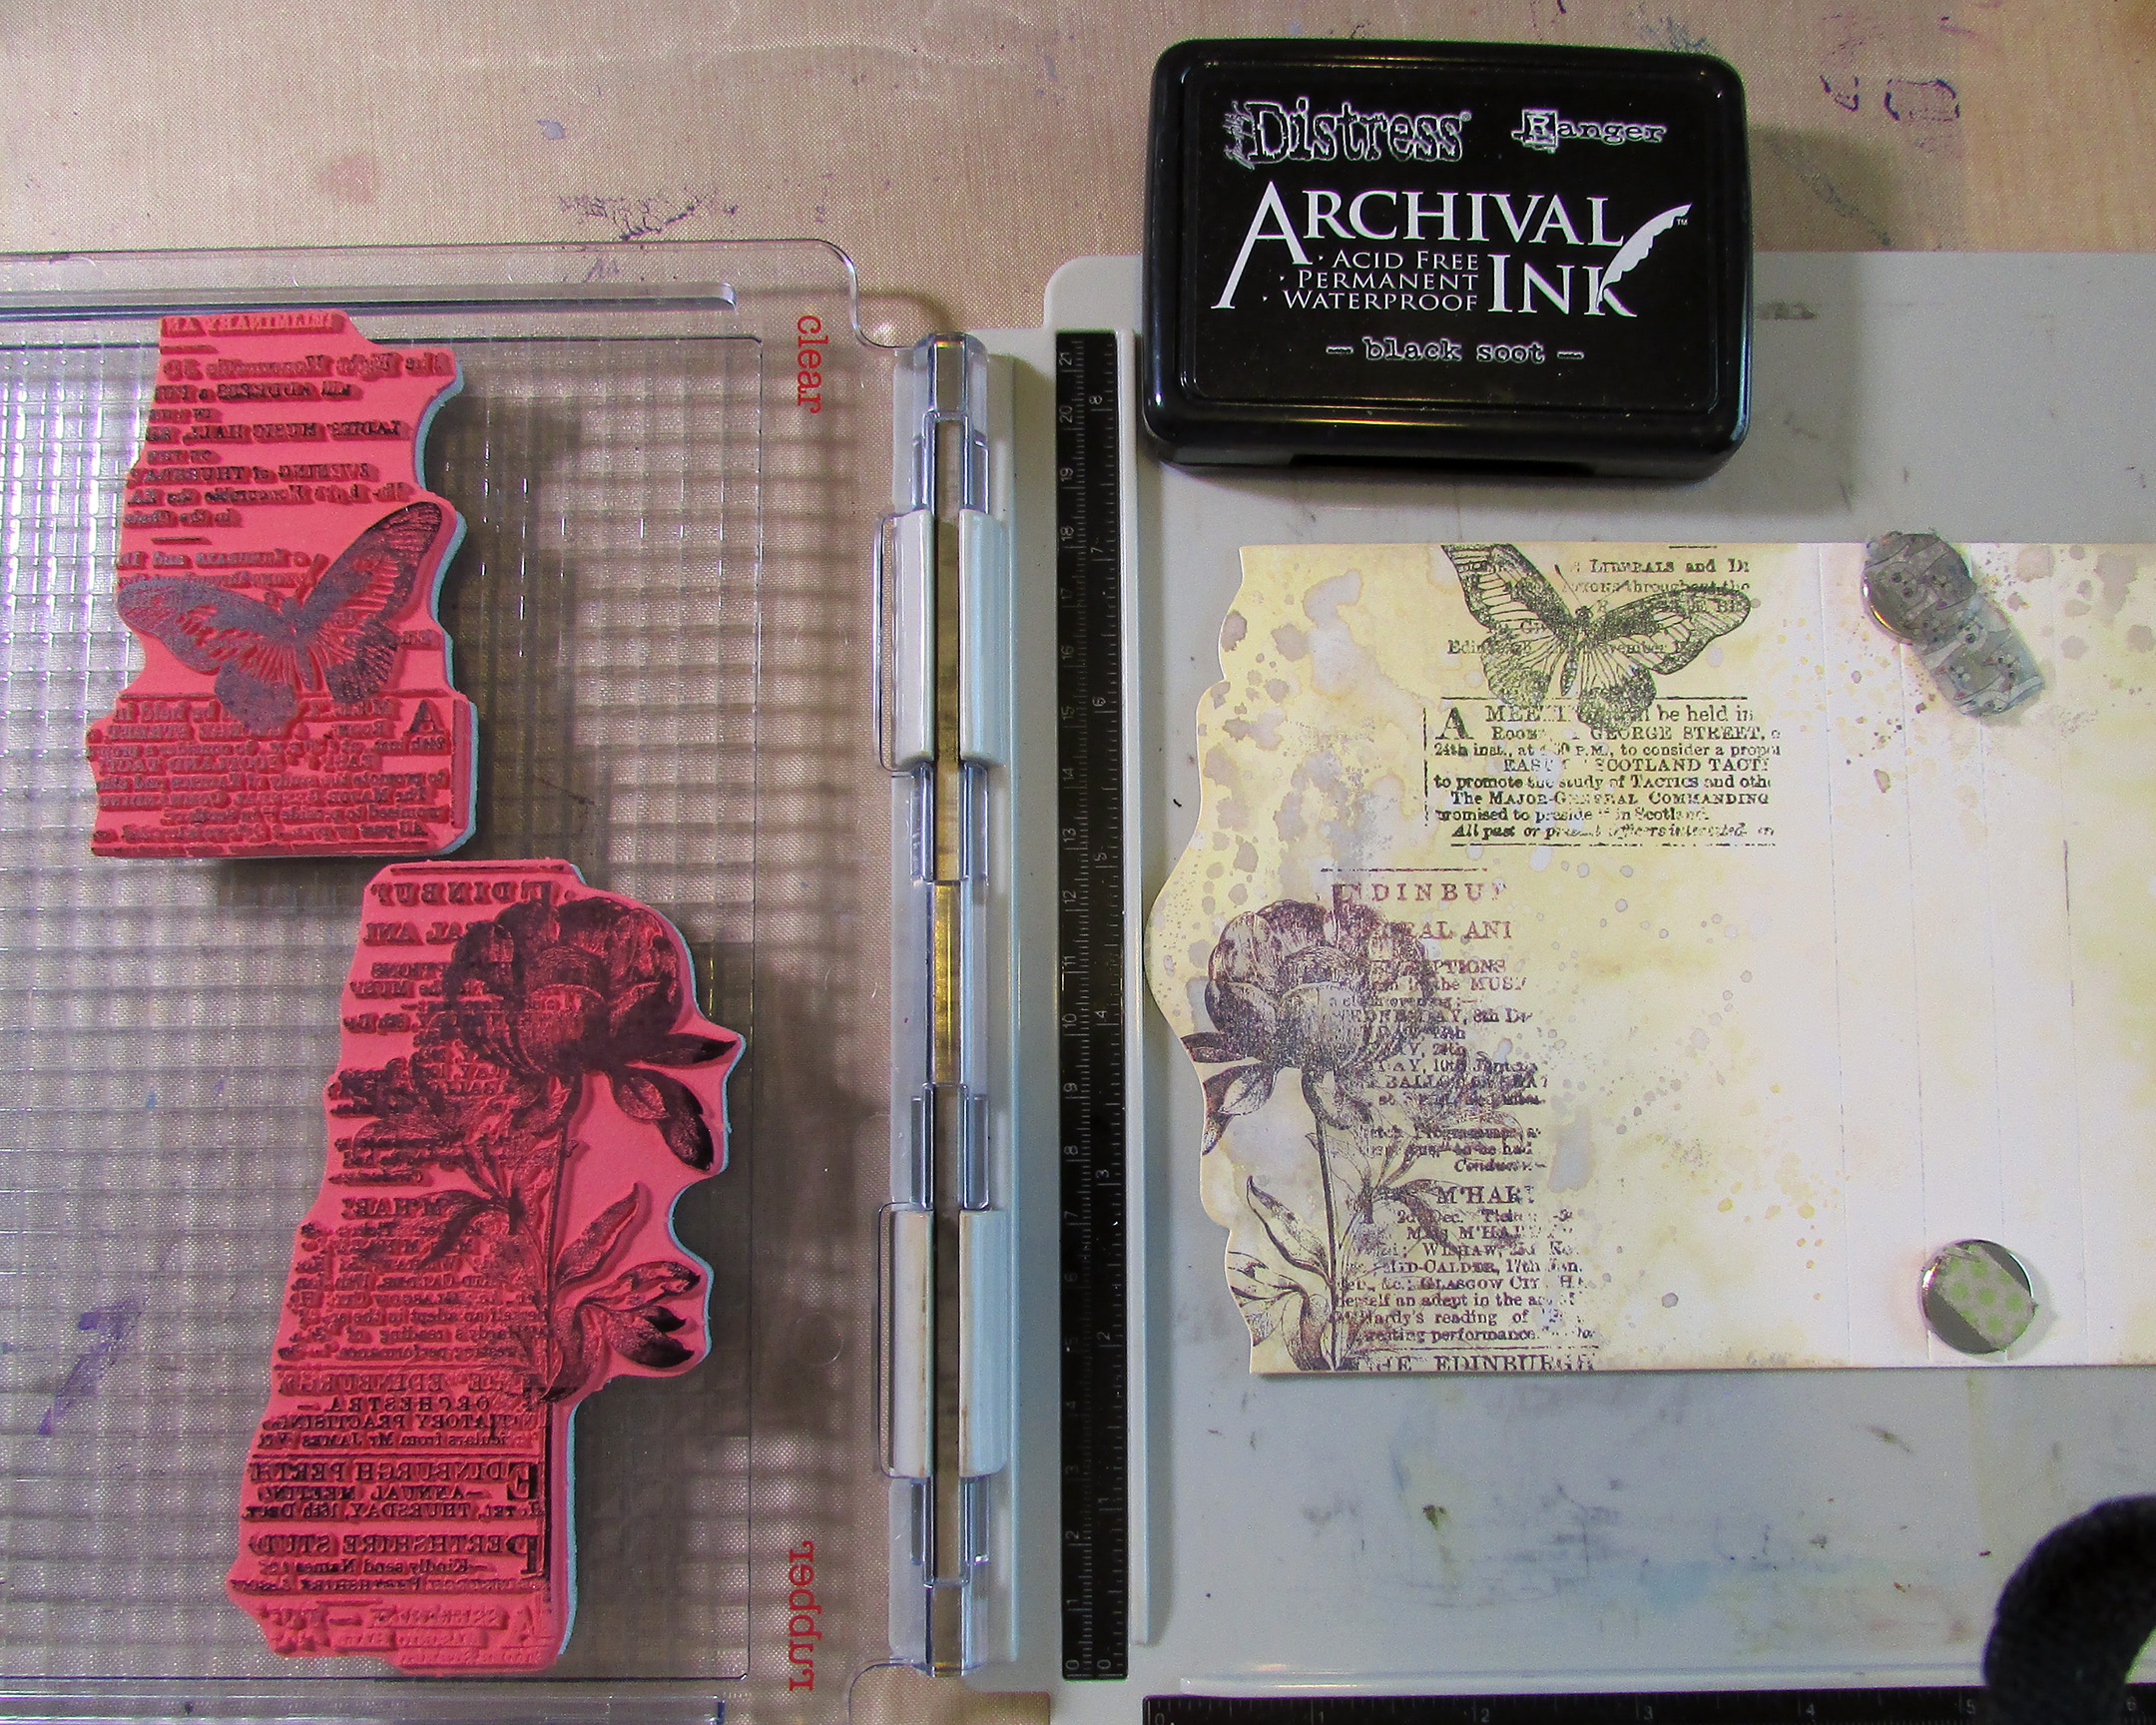
Let's take a look at the how-to:
1) I first cut the cover out of Sizzix matboard and prepped the outside of the cover by blending/dabbing on layers of Distress ink. Then came the stamping! I used a stamping platform to try out a double stamping technique. First I stamped some under-colors with Distress Ink.

Without moving the stamps, I stamped on top of the colored images with Archival Black Ink. I think it looks pretty cool! It gives the image a hint of color underneath.
2) For the inside covers, I first used the Card Caddy Die to cut the end papers to shape. Then I embossed each paper. One of my favorite 3-D folder techniques is to rub the "deboss" side of the folder with an archival ink pad. When you then emboss, the ink gets down into all the nooks and crannies and really makes the design pop!


3) After gluing on the embossed spine cover, I used my Crop-A-Dile to cut notches in the edges. These hold the elastic bands in place.

Notches:

I tied elastic tightly around the spine and slipped the signature notebooks in place.
Thanks for stopping by! I hope you check out the fun challenges we have on the Funkie Junkie Boutique Blog. They are always good for sparking your creativity! You have two weeks to join the current challenge so I hope you give it a go.
Supplies used:
Eileen Hull die - Card Caddy
Eileen Hull 3-D embossing folder - Crochet Mandala
Tim Holtz 3-D embossing folder - Doily
Tim Holtz stamp set - Tiny Toadstools
Tim Holtz stamp set - Botanic Collage
Tim Holtz stamp set - Flutter
Distress Ink - Vintage Photo, Saltwater Taffy, Peeled Paint, Pumice Stone, Shabby Shutters
Distress Oxide Ink - Picket Fence, Antique Linen, Old Paper
Distress Stain - Saltwater Taffy, Vintage Photo
Ranger Archival Inks - Black Soot, Frayed Burlap
Sizzix matboard
elastic cord
No comments:
Post a Comment
Thank you so much for leaving a comment. I appreciate it!