
Hello there, time for a new challenge! Suzanne Czosek is our hostess this go around. Here is what she has to say about the theme "Stuck in the Middle":
For this challenge I want you to showcase something in the middle. It can be a pop up card with a surprise in the middle, it can be a mini journal with pages inside, it can be anything that highlights the middle of something!
I created a Father's Day card for my husband with a computer theme and "things in the middle".

The base is a piece of mat board with a shaker card front mounted on it. (Shaker bits - in the middle #1 part) The background is a piece of 3-D embossed cardstock ( Circuit ) and I filled it with 1's and 0's, glitter and metal gears. There is another surprise though, the shaker flips open to reveal…

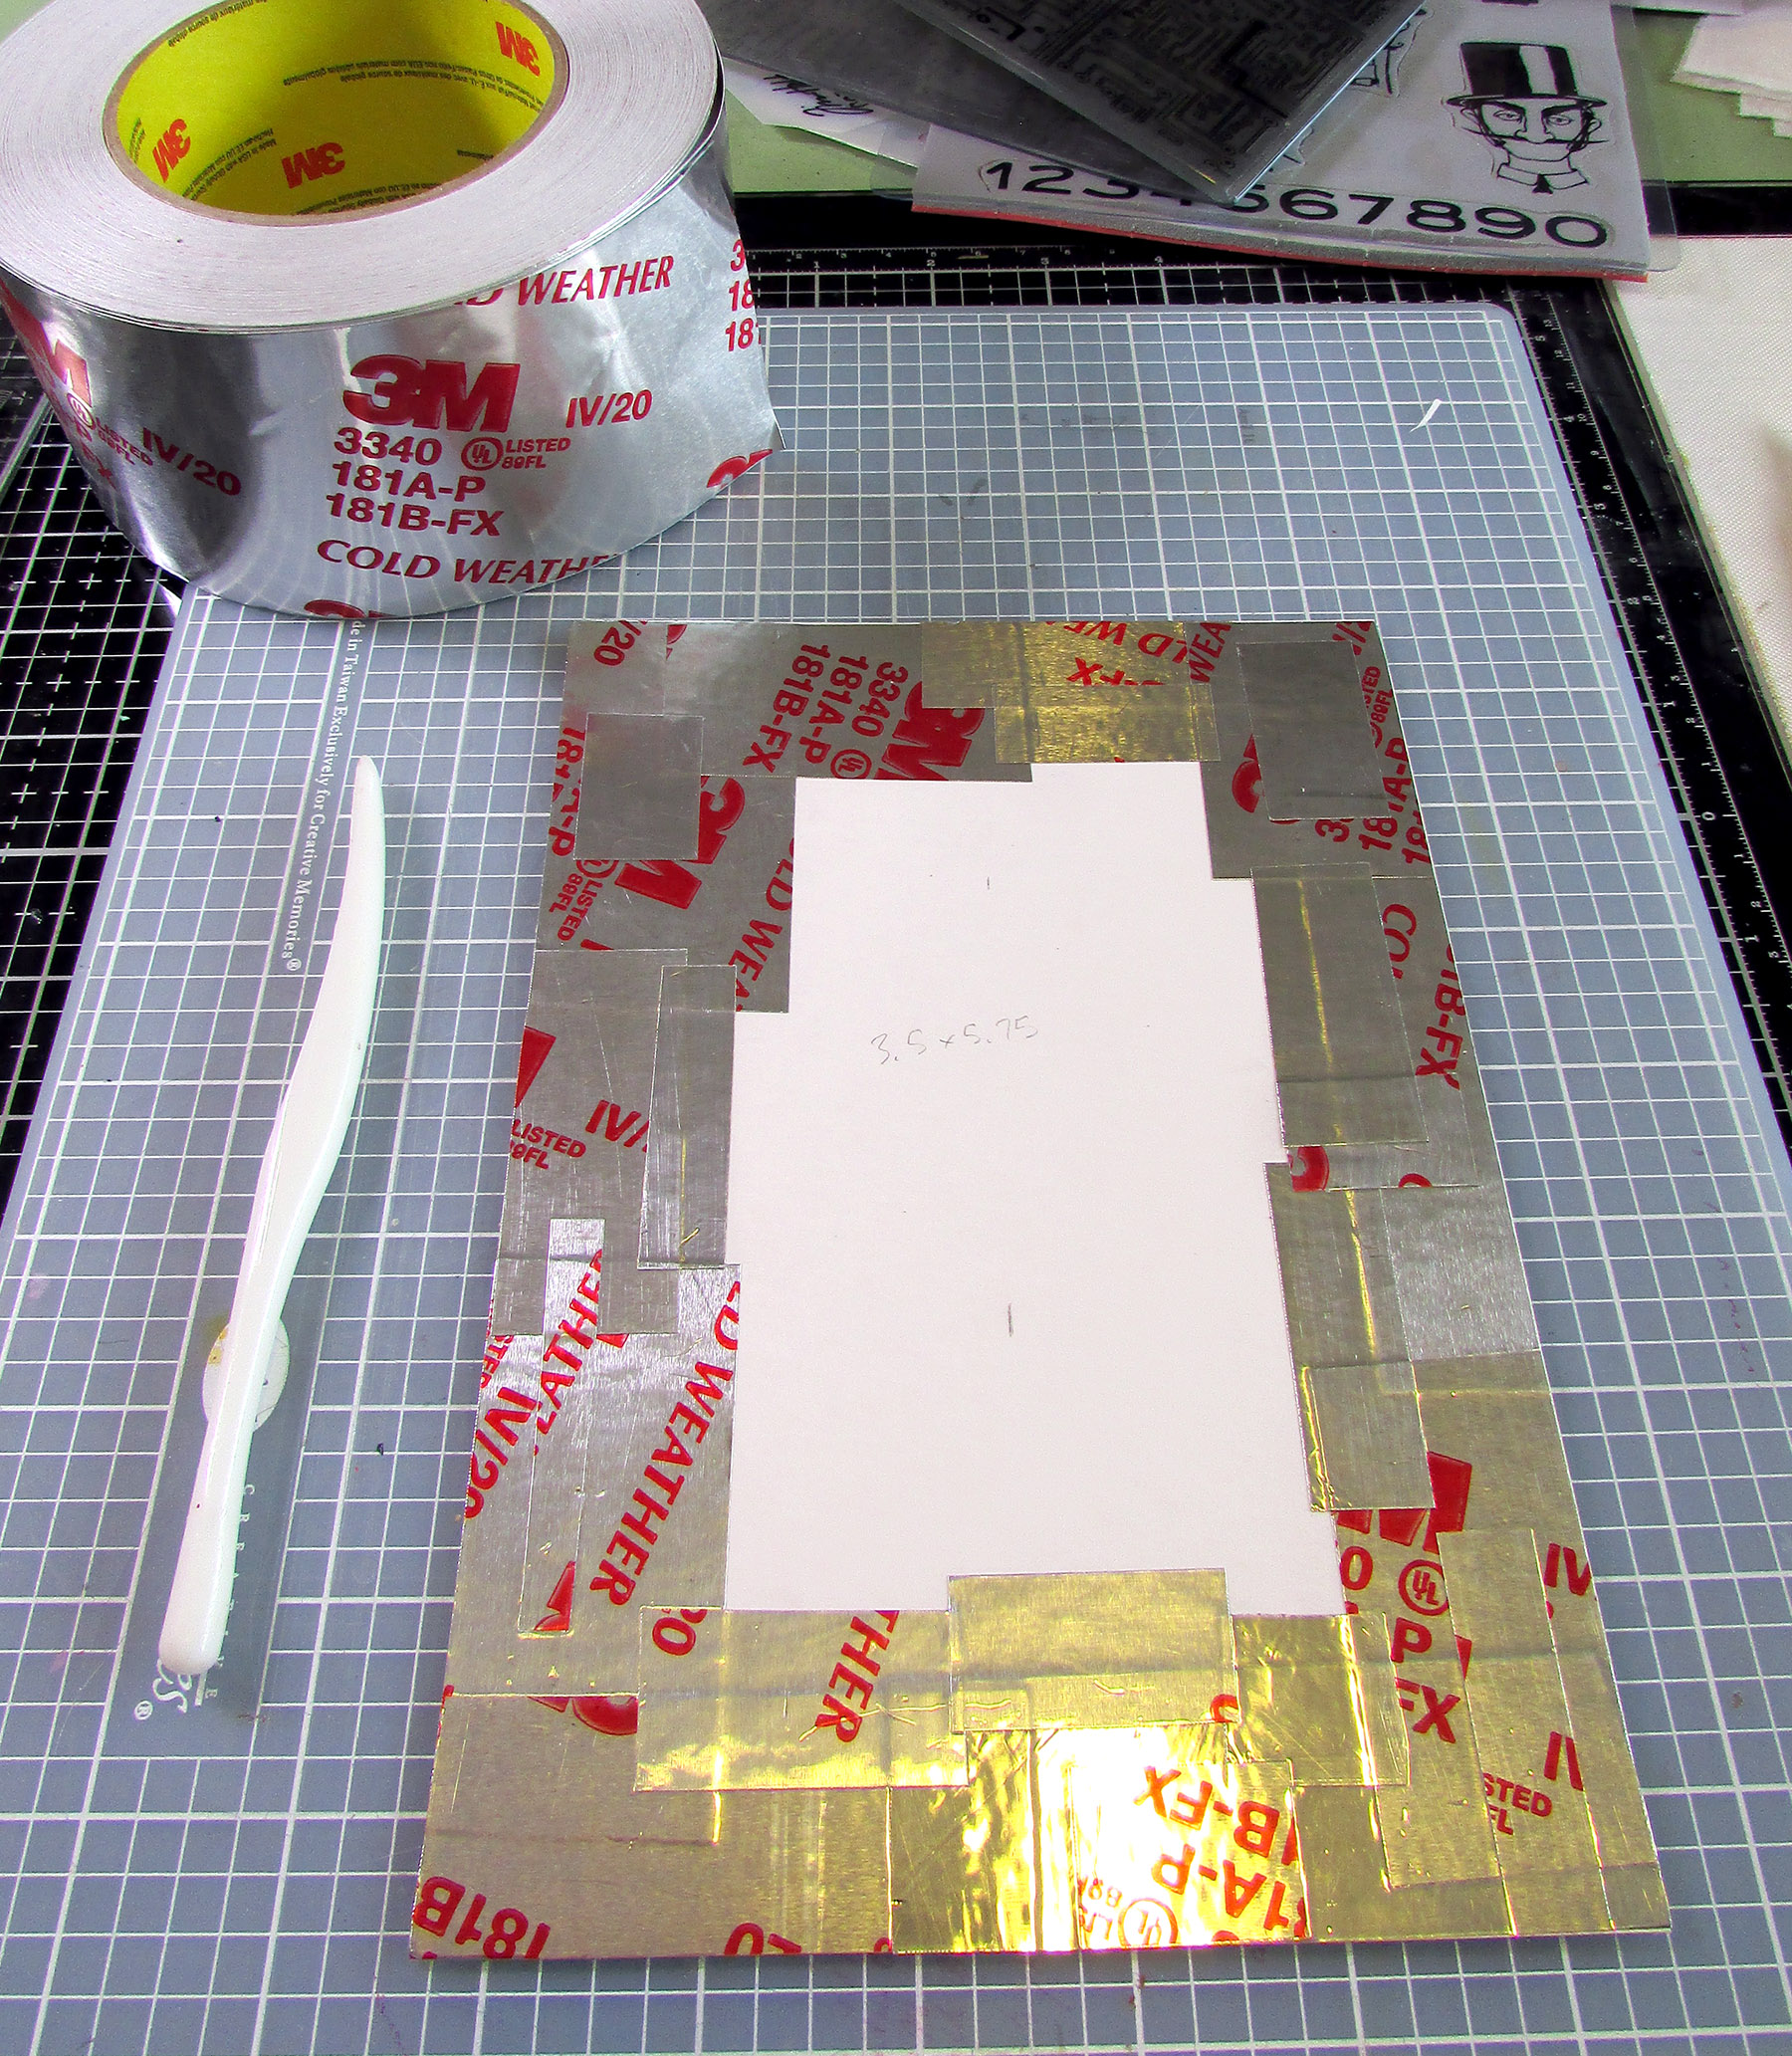
Step 1 - I started by adhering pieces of aluminum tape to the base of mat board. I discovered my new roll of tape has printing on the whole thing which is a bit of a bummer. Good thing I was adding a painted layer to this.
Step 2 - Painting! I base coated with different colors of Distress Paint and let it dry.


Step 3 - Backgrounds done:

Step 4 - I used Foundry Wax to highlight the raised areas of the circuit background. The Wax is fun to play with and looks amazing when you heat set it! I need to experiment more with it. You can find out how to use it from Tim Holtz's thorough video.

Step 5 - I cut a frame of foamcore board so I'd have plenty of depth in the shaker box. I also embossed a piece of matboard using the 3-D Foundry embossing folder and dry brushed on Mined Foundry Wax to highlight the details.


Step 6 - Ready for assembly! Note that on the mat board base I added (with stencils) a final layer of copper embossing powder covered Transparent Gloss Texture Paste. I glued the shaker box to the front of the inside card and then glued that to the mat board base.

Thanks for stopping by! I hope you check out the fun challenges we have on the Funkie Junkie Boutique Blog. They are always good for sparking your creativity! You have two weeks to join the current challenge so I hope you give it a go.
Supplies used:
Tim Holtz die set - Alphanumeric Bold
Tim Holtz 3-D Embossing Folder - Circuit
Tim Holtz 3-D Embossing Folder - Foundry
Tim Holtz stamp sets - Inquisitive, Glitch 1, Glitch 2, Mini Glitch
Distress Ink - Vintage Photo, Black Soot
Distress Oxide Ink - Crackling Campfire
Ranger Archival Inks - Crackling Campfire, Black Soot
Distress Spray Stains - Mowed Lawn, Forest Moss
Distress Paint - Black Soot, Pumice Stone, Iced Spruce, Weathered Wood, Twisted Citron
Copper embossing powder
Tim Holtz Hitch Fasteners
wobbler
metal tape
foamcore board
mat board
clear acrylic sheet for shaker box window
Fantastic card! Love all the fun shakety bits on the inside.
ReplyDeleteBrilliant idea! What is more stuck in the middle than all those bits in the shaker!
ReplyDelete