Showing posts with label shaker card. Show all posts

Wednesday, September 9, 2026

Halloween Shaker Card with Topflight Stamps

Hello there! This week at Topflight Stamps our theme is "Halloween/Fall". AALL & Create has a great new Halloween collection out and I decided to make a whimsical shaker card using the Frightful Fun die set and Boosentials stamp set. 

Lisa Hoel for Topflight Stamps #creativejuicefreshsqueezed #topflightstamps

The background is a heavy piece of cardstock I inked and stamped on. I also gave it a light spritz of green mica spray from the Lindy's Haunted Halloween Starburst Sprays set. I glued in some die cuts from the Frightful Fun set (although I did leave one ghost loose to shake around inside). The edges have walls of foam tape to contain all the shaker bits.

Thanks for stopping by and be sure to check out the Topflight Stamps store for a wide selection of different and hard to find stamps, stencils and other paper crafting supplies from all around the world! Also keep an eye on the Topflight Stamps blog. There is new inspiration posted often!

Topflight Stamps Supplies Used:

AALL & Create stamp set - Boosentials
AALL & Create die set - Holey Fun
AALL & Create die set - Frightful Fun
Lindy's Starburst Sprays - Haunted Halloween
Lavinia Elements Ink pads - Violet Chalk, Lime Punch, Sundance
Versafine Clair ink - Nocturne
foam tape
various shaker bits


Wednesday, January 22, 2025

Fairy Shaker Card with AALL & Create Dies

Hello, this week at Topflight Stamps our product focus is on AALL & Create Dies. Topflight Stamps carries a wide selection of these fun, quirky mix & match die sets! I decided to create a shaker card using a few different sets.


Lisa Hoel for Topflight Stamps #creativejuicefreshsqueezed #topflightstamps

The card background is composed of various Lavinia stamps (Rue, Trailing Ivy, Forest Spruce). I also incorporated flower and leaf die cuts from the Garden Grace #55 and Rustling Retreat #54 sets. The black frame shape is from Skycrossed Paradise #34.

Thanks for stopping by and be sure to check out the Topflight Stamps store for a wide selection of different and hard to find stamps, stencils and other paper crafting supplies from all around the world! Also keep an eye on the Topflight Stamps blog. There is new inspiration posted daily!


Topflight Stamps Supplies Used:

AALL & Create Die Set - Garden Grace #55
AALL & Create Die Set - Skycrossed Paradise #34
AALL & Create Die Set - Rustling Retreat #54
Lavinia Stamp - Rue
Lavinia Stamp - Trailing Ivy
Lavinia Stamp - Forest Spruce
Versafine Pigment Ink Pad - Onyx Black
Lavinia Elements Ink Pads - Confetti, Russet Orange


Tuesday, July 23, 2024

Eileen Hull July Blooms Shaker Card

Hello again Eileen Hull fans! This month the Inspiration Team is playing more with Eileen's new Sizzix releases – the Watercolour Florals & Lattice Stencil Set with the Painterly Blooms & Background Thinlits die set that will easily cut out the stenciled flowers. I have an additional project to share with you. 

Lisa Hoel for Eileen Hull - 2024 June Sizzix Collection Release  #creativejuicefreshsqueezed #EileenHull  #eileenhulldesigns  #sizzix #mymakingstory #TeamEileen #mysizzixstory

I had extra die cut white flowers from my vignette project and I couldn't let them go to waste! I decided to make a shaker card because who doesn't love an interactive shaker card? I also utilized the Watercolour Florals & Lattice Stencil Set. Below you can see some "in progress" photos.

Flash back to the white flowers:
I spritzed white coffee filters with pearl mist and when dry, die cut several layers of flowers. I had some yellow flower stamens that I glued in the middle after poking a hole with a die pick. Easy!

For the card base, I used the lattice stencil and Peacock Feathers Distress Glaze to create the pattern.


I used the flower stencil layers and the Sizzix Stencil & Stamp Tool to decorate the shaker frame and background. The sentiment is stamped using Eileen's Wonderful World of Flowers stamp set.


Thanks for stopping by and be sure to keep an eye on Eileen's blog for more inspiration from the Educator and Inspiration Teams.

Supplies used:

Eileen Hull Die Set - Painterly Blooms & Background 
Eileen Hull Stencil Set - Watercolor Flowers & Lattice 
Eileen Hull Stamp Sets - Wonderful World of Flowers

Distress Glaze - Peacock Feathers
Distress Spray Stain - Cracked Pistachio, Twisted Citron
Distress Oxide Ink - Cracked Pistachio, Fossilized Amber, Picked Raspberries, Seedless Preserves, Rustic Wilderness


Some links in this post are affiliate links which do not affect the price you pay but allow me to earn a small percentage of a sale. Thanks! (My husband also thanks you!)


Wednesday, August 30, 2023

Funkie Junkie Focus – Cut It Out

Hello Funkie Junkie fans! Our latest theme is "Cut It Out" – using Tim Holtz's latest collection of Sizzix dies. The new ones are so cool! Let's see what I created…

a shaker card made using the Artsy Leaves and Layered Dots Die Sets!

Lisa Hoel for The Funkie Junkie Boutique  #creativejuicefreshsqueezed  #mymakingstory #tim_holtz #thefunkiejunkieboutique #sizzix
Lovin' the Artsy Leaves!

First I started by having a play with Distress Sprays and Distress Mica Sprays (old and new colors.) For color inspiration, I looked to a new pottery coffee mug I recently acquired. I love the glaze colors on it. I used the backgrounds I created for the card base and to cut leaves out of.


Bonus card! I created so many leaves that I had enough to create an extra card.

Lisa Hoel for The Funkie Junkie Boutique  #creativejuicefreshsqueezed  #mymakingstory #tim_holtz #thefunkiejunkieboutique #sizzix

Here are a few behind the scenes pics and a technique you can use to increase the uses you can get out of your dies.

1 – This is a classic trick but it never hurts to get a reminder. ;-) Cut shapes out of fun foam (adhesive backed foam is especially convenient). Apply the foam to scrap plastic packaging and use it to stamp. I made two stamps from the Layered Dots set and stamped the backgrounds of both cards using Distress Oxide Inks. (Paint works well too!)


2 – Here's a peek of the shaker "insides" and how I laid out the foam tape.


3 – I added hand stitching with thin string around the edges. I punched the holes first with the template in the Tim Holtz ruler and then stitched.


Thanks for stopping by. Keep an eye on the Funkie Junkie Boutique Blog, 
Inspiration Ave. because you are now getting regular doses of expanded (and inspiring) content each week. Don't miss it…

Supplies used:

Tim Holtz Thinlits Die Set - Layered Dots
Tim Holtz Thinlits Die Set - Artsy Leaves
Tim Holtz Die Set - Bold Text #1
Tim Holtz Die Set - Decorative Trims

Distress Archival Ink - Black Soot
Distress Mica Spray - used many, old and new!
Distress Spray - so many of them!
Distress Oxide Spray - so many of them!
Distress Oxide Ink Pads - Bundled Sage, Antique Linen
Ranger Distress Heavystock - White

fun foam
foam tape
clear plastic
sequins

Wednesday, July 13, 2022

Funkie Junkie Challenge - Moving Parts

Our new Funkie Junkie Boutique is a fun one and I'm the hostess this time around. We want to see your projects with 'Moving Parts'!

Life can be busy and complicated with lots of moving parts. Sometimes we need to get really creative to make it all work! We would like to see you get creative with this theme and either treat it as a metaphor for something happening in your life or you can literally make parts that move as part of your project. Get crafty!

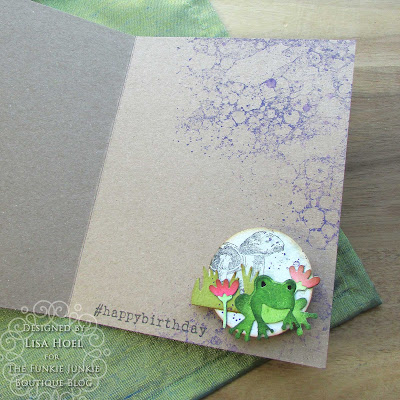
You can't beat the fun of shaker cards, so I created another shaker card for a birthday. The Cathedral Window is full of shakety bits and there is an additional pop up element inside!

Lisa Hoel for The Funkie Junkie "Moving Parts" Challenge #creativejuicefreshsqueezed #tim_holtz #sizzix #mymakingstory #thefunkiejunkie #thefunkiejunkieboutique #frillyandfunkie

a peek inside:

Lisa Hoel for The Funkie Junkie "Stencil Mania" Challenge #creativejuicefreshsqueezed #tim_holtz #sizzix #mymakingstory #thefunkiejunkie #thefunkiejunkieboutique #frillyandfunkie
Wobbler for the win!

A few details of how I constructed the shaker card front:

I cut the front of the window and then cut five additional windows out of chipboard. I used a craft knife to cut the chipboard insides out so just the outside frame was left.  I then stacked and glued those frame parts together.


I hand cut a thin piece of plastic for the shaker window and glued that on top of the stacked frame. Finally I could glue the decorative front window on top.


Here's a look at the background before I glued the shaker part on. 


Thanks for stopping by! I hope you check out the fun challenges we have on the Funkie Junkie Boutique Blog. They are always good for sparking your creativity! You have two weeks to join the current challenge so I hope you give it a go.

Supplies used:
Tim Holtz die set - Cathedral Window
Tim Holtz die set - Vintage Labels
Tim Holtz die set - Funky Foliage
Tim Holtz die set - Entomology
Eileen Hull die - Grass (retired)

Tim Holtz stamp set - Bubbles
Tim Holtz stamp set - Tree Line
Tim Holtz stamp set - Field Notes
Tim Holtz stamp set - #Hashtags
Tim Holtz stamp set - Tiny Toadstools
Tim Holtz stamp set - Entomology

Distress Ink - Vintage Photo, Rustic Wilderness, Black Soot
Distress Oxide Ink - Villainous Potion, Weathered Wood, Hickory Smoke
Ranger Archival Inks - Black Soot, Hickory Smoke
Distress Oxide Spray Stains - Weathered Wood
Distress Glaze - Peeled Paint

wobbler
shakety bits


Wednesday, June 15, 2022

Stuck in the Middle - Another Funkie Junkie Challenge!

Hello there, time for a new challenge! Suzanne Czosek is our hostess this go around. Here is what she has to say about the theme "Stuck in the Middle":

For this challenge I want you to showcase something in the middle. It can be a pop up card with a surprise in the middle, it can be a mini journal with pages inside, it can be anything that highlights the middle of something!

I created a Father's Day card for my husband with a computer theme and "things in the middle".

Lisa Hoel for The Funkie Junkie "Stuck in the Middle" Challenge #creativejuicefreshsqueezed #tim_holtz #sizzix #mymakingstory #thefunkiejunkie #thefunkiejunkieboutique #frillyandfunkie

The base is a piece of mat board with a shaker card front mounted on it. (Shaker bits - in the middle #1 part) The background is a piece of 3-D embossed cardstock ( Circuit ) and I filled it with 1's and 0's, glitter and metal gears. There is another surprise though, the shaker flips open to reveal…
Lisa Hoel for The Funkie Junkie "Stuck in the Middle" Challenge #creativejuicefreshsqueezed #tim_holtz #sizzix #mymakingstory #thefunkiejunkie #thefunkiejunkieboutique #frillyandfunkie

… a pop up sentiment on a wobbler spring inside! (in the middle part #2) I had a lot of fun making this card. Let's take a look at the how to.

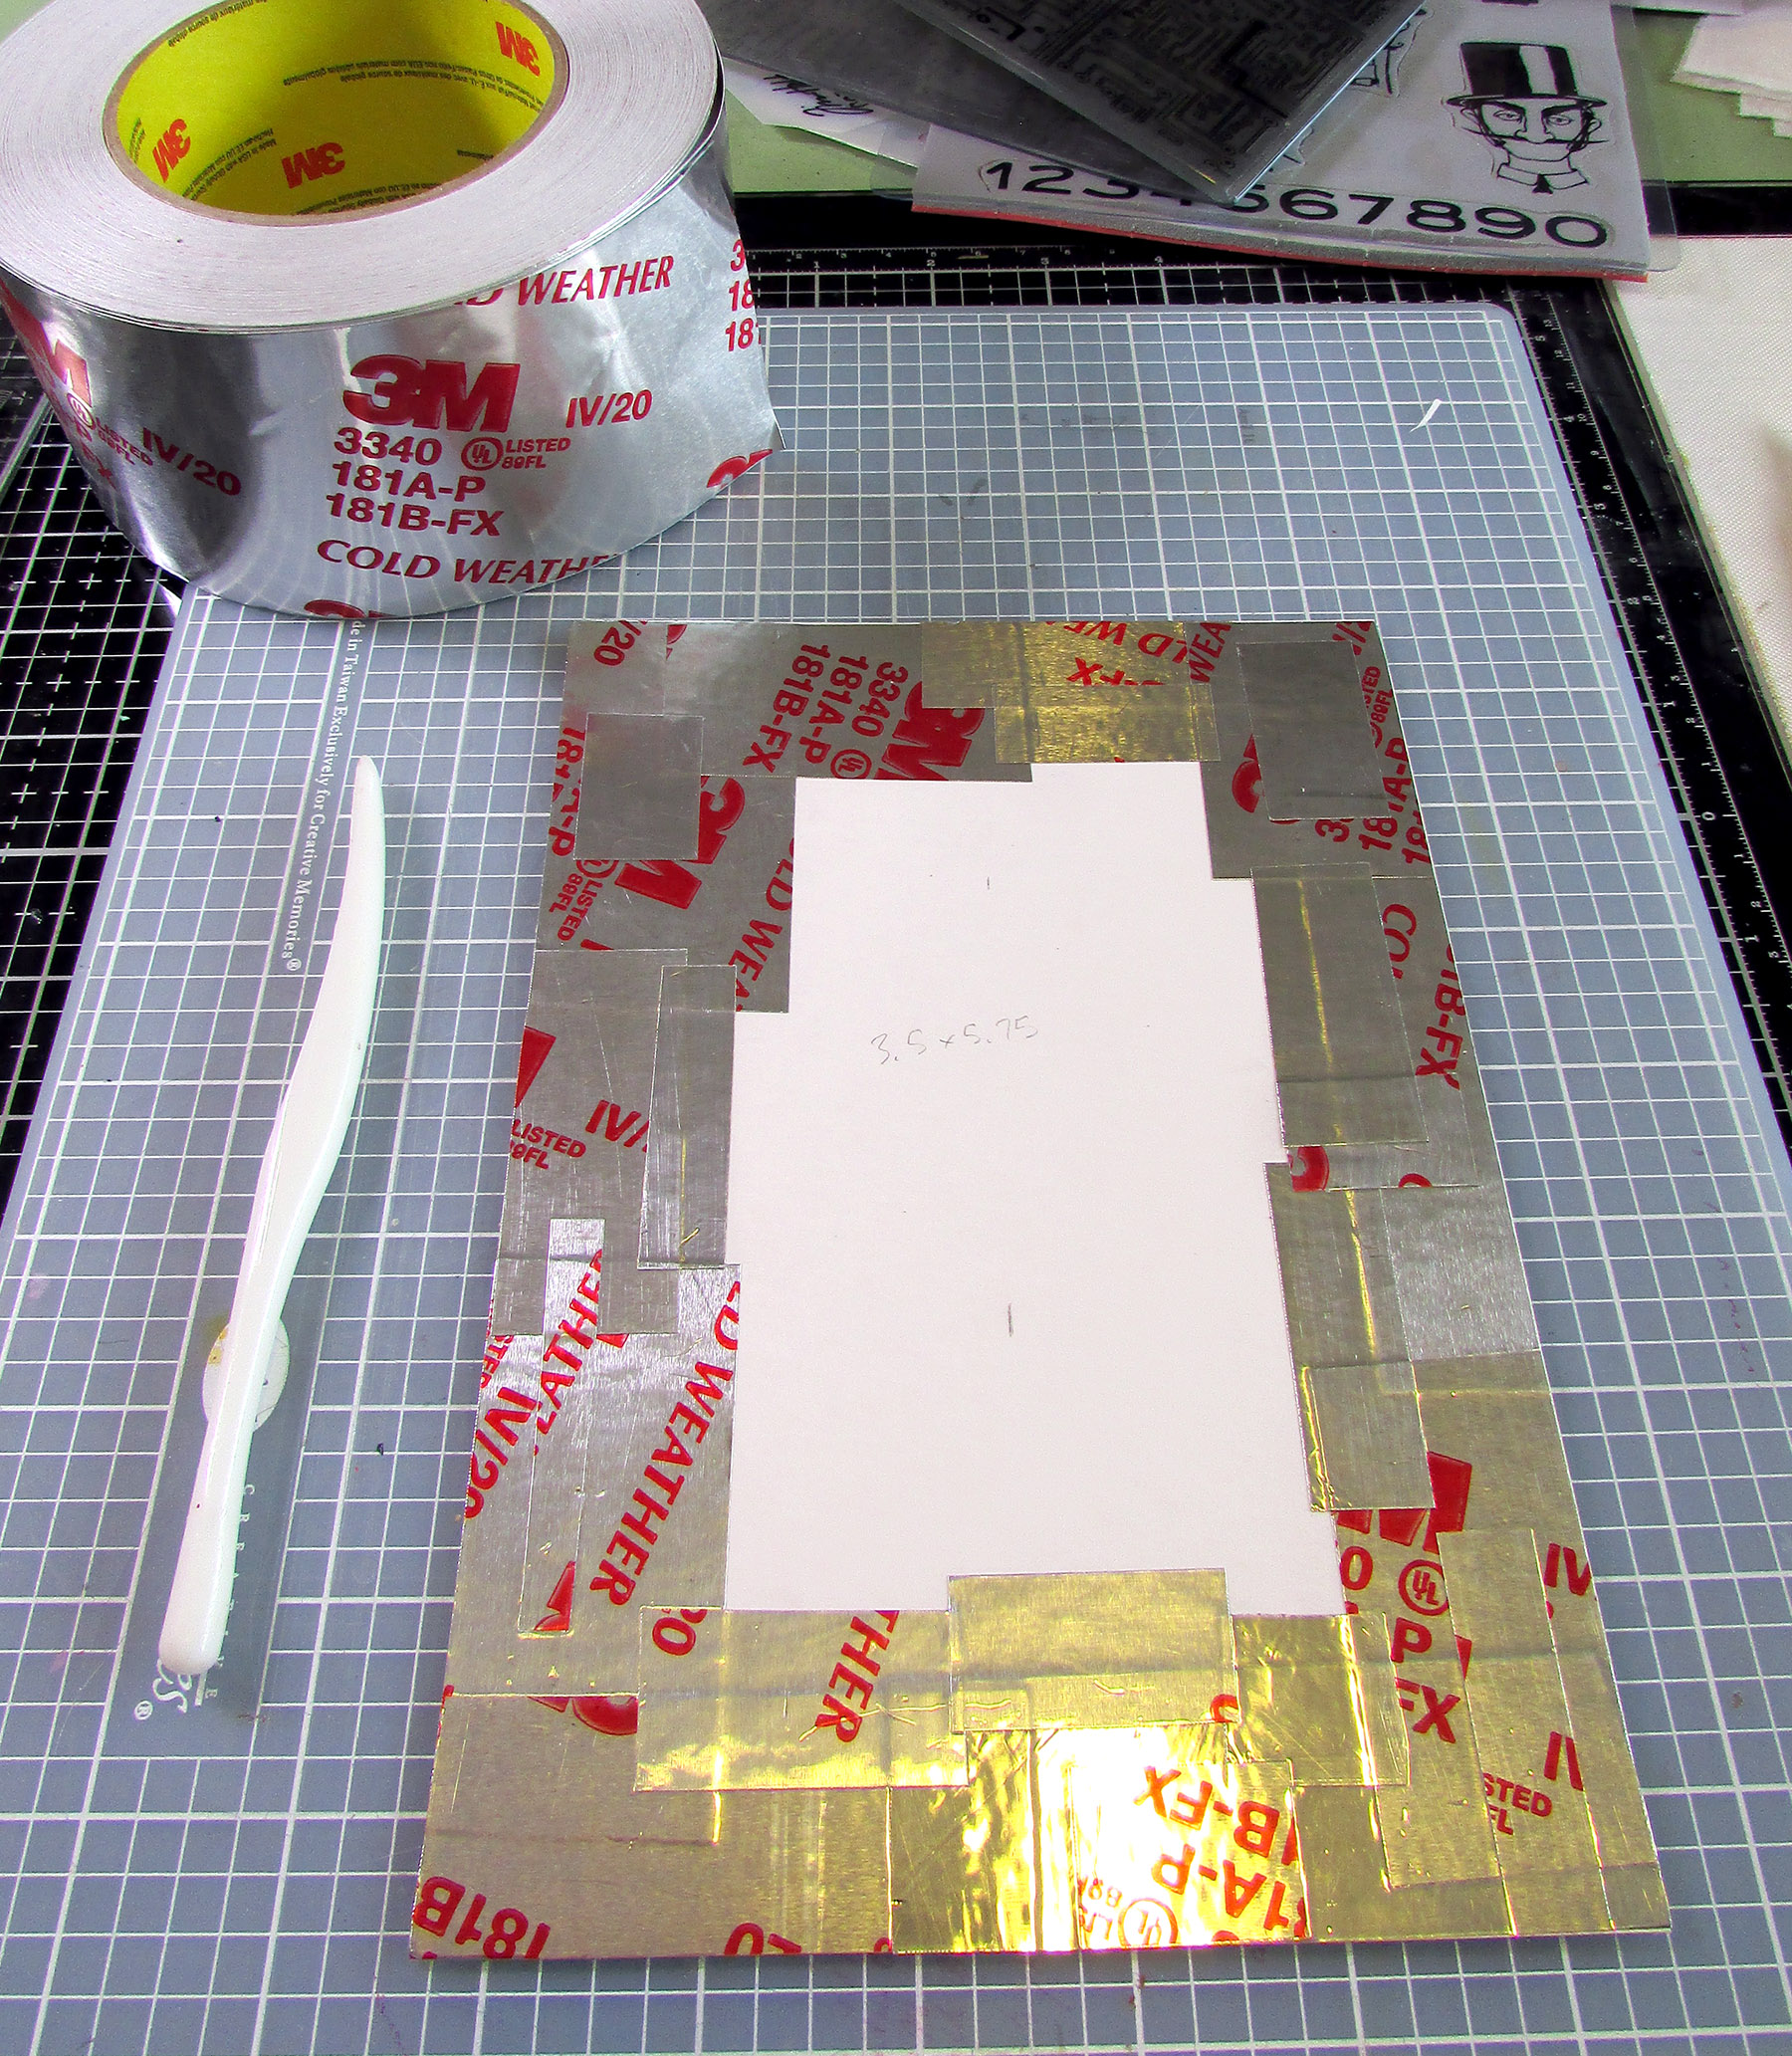
Step 1 - I started by adhering pieces of aluminum tape to the base of mat board. I discovered my new roll of tape has printing on the whole thing which is a bit of a bummer. Good thing I was adding a painted layer to this.


Step 2 - Painting! I base coated with different colors of Distress Paint and let it dry.


Added some washes of black and rusty red:


Added some distressing with a sanding block to reveal the metal underneath.


Step 3 - Backgrounds done:


Step 4 - I used Foundry Wax to highlight the raised areas of the circuit background. The Wax is fun to play with and looks amazing when you heat set it! I need to experiment more with it. You can find out how to use it from Tim Holtz's thorough video.


Step 5 - I cut a frame of foamcore board so I'd have plenty of depth in the shaker box. I also embossed a piece of matboard using the 3-D Foundry embossing folder and dry brushed on Mined Foundry Wax to highlight the details.


I glued a piece of clear plastic behind the embossed topper frame and then glued and filled the shaker.


Step 6 - Ready for assembly! Note that on the mat board base I added (with stencils) a final layer of copper embossing powder covered Transparent Gloss Texture Paste. I glued the shaker box to the front of the inside card and then glued that to the mat board base.


Thanks for stopping by! I hope you check out the fun challenges we have on the Funkie Junkie Boutique Blog. They are always good for sparking your creativity! You have two weeks to join the current challenge so I hope you give it a go.

Supplies used:
Tim Holtz die set - Alphanumeric Bold
Tim Holtz 3-D Embossing Folder - Circuit
Tim Holtz 3-D Embossing Folder - Foundry
Tim Holtz stamp sets - Inquisitive, Glitch 1, Glitch 2, Mini Glitch
Tim Holtz layering stencils - Digits, Circuit

Distress Ink - Vintage Photo, Black Soot
Distress Oxide Ink - Crackling Campfire
Ranger Archival Inks - Crackling Campfire, Black Soot
Distress Spray Stains - Mowed Lawn, Forest Moss
Distress Paint - Black Soot, Pumice Stone, Iced Spruce, Weathered Wood, Twisted Citron
Foundry Wax - Mined, Statue
Copper embossing powder

Tim Holtz Hitch Fasteners
wobbler
metal tape
foamcore board
mat board
clear acrylic sheet for shaker box window

Saturday, October 31, 2020

Happy Halloween from Topflight Stamps!

Happy Halloween! I wanted to share a fun little shaker card made Topflight Stamps style! I posted it off to my nephews earlier this week and I hope it gets there in time. My crafting time keeps getting squeezed. (bother!)

Lisa Hoel for Topflight Stamps - Halloween shaker card

I loved the fun papers in the Polkadoodles Halloween paper pad and picked out two contrasting ones to use for the card base and the shaker top. The plastic is scrap from some packaging (it pays to save it!) and I stamped on it with the Fairy Web stamp and archival ink. The shaker bits are from my extensive craft stash. I couldn't resist the super cute cat die set from Swirlcards and I think it adds the perfect focal point to the card. Some Hunkydory Diamond Sparkles add a finishing touch of bling.


Thanks for stopping by! I hope you can have a safe Halloween celebration and have a chance to get crafty too this weekend.

Supplies used:

Topflight Stamps Products:

Lavinia - Fairy Web stamp
Swirlcards die set - Cats
Polkadoodles Halloween paper pad
Versafine Ink - Onyx Black
Hunkydory foam adhesive squares
Hunkydory Diamond Sparkles - Precious Purples

Dies:

Tim Holtz Sizzix
Postage Stamp Frame - retired
Movers & Shapers Rectangles - retired
Labels ( Sizzix / SB )

Tim Holtz stamp set - Scared Silly

Some links in this post are affiliate links which do not affect the price you pay but allow me to earn a small percentage of a sale. Thanks! (My husband also thanks you!) If you shop at Topflight Stamps, use my coupon code LISAHOEL for 12% off your order.

Monday, March 23, 2020

Mermaid Garden Shaker Card with Eileen Hull

What a month this has been! At least we can continue to look outside and see spring unfold. I've been working hard in my yard getting all the spring cleanup done. I'm eager to see some flowers start to bloom. All this month on Eileen Hull's blog the Inspiration Team has been busy creating and sharing lovely projects celebrating spring. I created a mermaid's garden shaker card mounted on a base cut with Eileen's new Display Stand Sizzix Die. I made it as a birthday card for my sister-in-law Katie who is a fellow lover of mermaids.


The shaker front is a sample from the January Creativation show. We R Memory Keepers was demoing one of their new (very cool!!) machines, a Mold Press. (see the short demo video here) It is basically a mini vacuum form machine and you can mold a sheet of hot plastic over pretty much everything! They had a scallop shell and foam stick on letters so I got the bright idea to make one with my SIL's name so I could use it later for a card. (Thinkin' ahead I was!!) So check out the video. I'm not gonna lie, I'm coveting one of those machines lol.

I applied a bit of gold paint to the inside of the letters to make them stand out.

The Display Stand has a built in stand that you can pop up and down so you can fold it flat for mailing (although this one isn't very flat ;-) I mailed it popped up in a box along with her present.


Here are a few peeks at how I put this together:

Step 1 - I inked up a sheet of Mat board with the blue background and then cut out my stand. Then I stamped a bit in the background. I figured out how the shaker front was going to fit onto the front and traced the cut lines with a sharpie marker. It was easy to cut with sharp scissors.


I prepared my mermaid and sea horse die cuts and also painted a bit of gold paint on the inside of the letters of her name to make them stand out.

Step 2 – Filling the shaker was a little tricky. I carefully made a little pile of the shaker bits in the middle of the area under the shell. I then applied Glossy Accents to the back of the plastic front and carefully laid it onto the front of the card. I pressed it down tightly with my hands and held it in place for a few moments until it started to hold. Then I weighted it down until it was totally dry.


When it was dry, I embellished the front with my die cuts and a layer of Dirty Sand embossing powder for the ocean floor.

It it is a little confusing on how to fold the Display Stand at first. Eileen Hull has created a short video on how to do it! Feel free to watch it several times. ;-)


Thanks for stopping by! Check out Eileen's blog and if you are not already a member, join the Facebook Eileen Hull Fan Club group. It is a warm, supportive group with lots of inspiration and sharing going on. You'll just have to answer a few simple questions when asking to join (to keep out spammers) and then you'll be added. ;-)


Dies:
Eileen Hull Sizzix
Display Stand ( Sizzix / SB )

Tim Holtz Sizzix
Holiday Greens Mini ( Sizzix / SB )
Crochet ( Sizzix / SB )

Dream Mermaid ( Sizzix / SB )

Other:
Eileen Hull Embossing Powder by Emerald Creek - Aqua Splash
Eileen Hull Embossing Powder by Emerald Creek - White Wonder
Eileen Hull Clearsnap Blends Ink - Clear
Sizzix Mat board
Lavinia Stamps - Sea Creatures, Seaweed 2
Baked Texture Embossing Powder - Dirty Sand
Glossy Accents
cardstock
various beads and sequins for shaker
shell mold press shaker front

Some links in this post are affiliate links which do not affect the price you pay but allow me to earn a small percentage of a sale. Thanks! (My husband also thanks you!) If you shop at Topflight Stamps, use my coupon code LISAHOEL for 12% off your order.

Tuesday, January 14, 2020

Creativation 2020 and NEW Eileen Hull Sizzix Dies!!


It's that time of year, the annual Association For Creative Industries tradeshow CREATIVATION! Chock full of manufacturers with all their new and shiny products, it is the place to be! I am very blessed to be able to go again this year and be a part of the excitement. Eileen has four new Sizzix dies that are debuting. Two are available now and two more will be a part of the Chapter 2 release in April. Today I am sharing a project made with the new Display Stand Die. (available now)

Display Stand Die - so many uses for it!

I decided to make a winter-themed shaker card/decor piece! It was easy and looks really cute:

Shake, shake, shake… shake that glitter…
It folds flat for mailing or storage:


There is a clever little folding stand that make it stand up (don't worry, there is a video on how to fold and engage it!):


On to the tutorial…

First I cut the main body out using white matboard. I also cut just the front panel out again from heavy white cardstock. I used one of the frames from the Hearts Journaling Cards Die Set to cut the center out of that panel to form a frame.


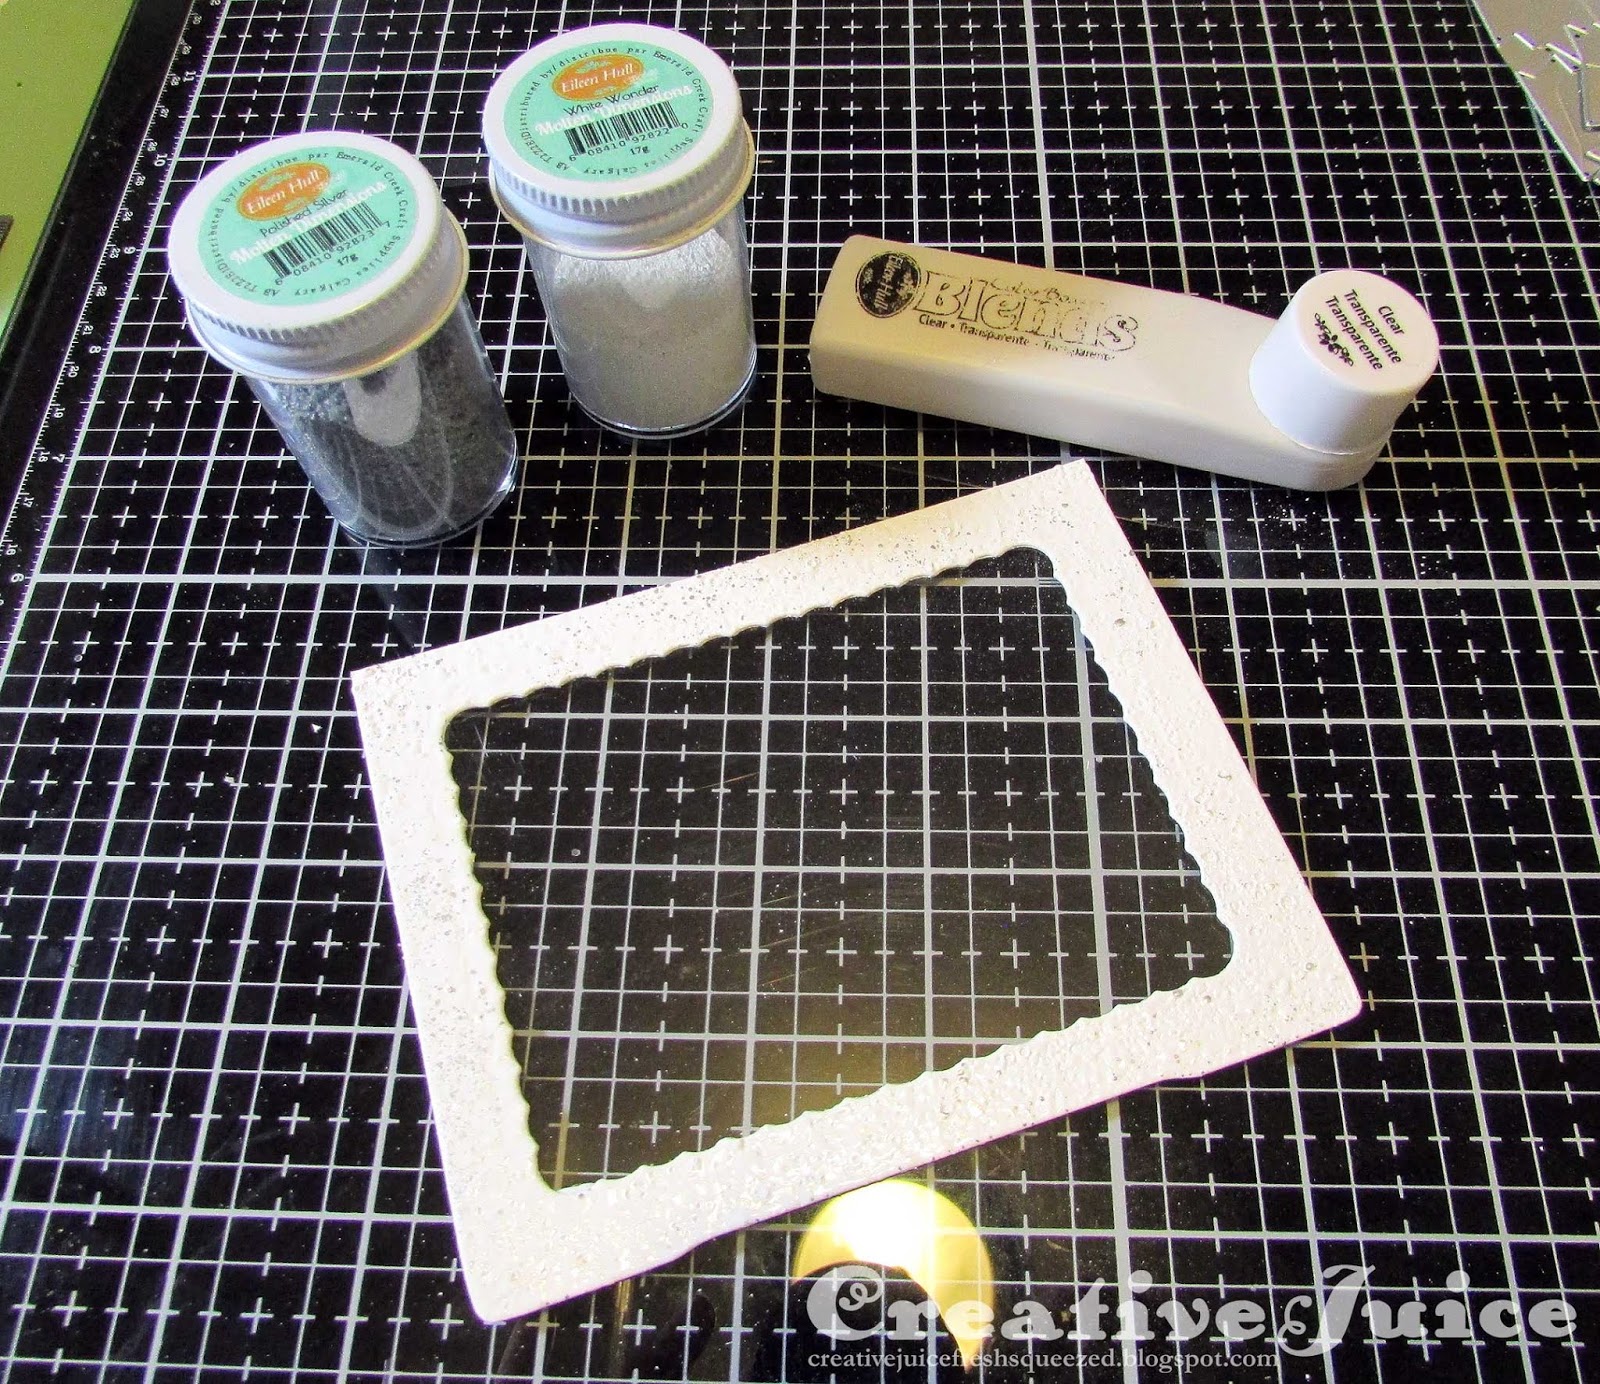
Next I embossed the front of the frame with Eileen's White Wonder Molten Dimensions Embossing Powder. As I was melting it with my heat tool, I would sprinkle a tiny bit of her Polished Silver Embossing Powder into the White Wonder before it cooled. It made a neat speckled effect! After embossing, I glued a piece of clear plastic (from recycled packaging) onto the back of the frame.


Step three is to build up the area that is going to hold the shaker parts (in this case glitter and mini die cut snowflakes). (This is after I created the background scene with Distress Ink and die cuts.)


I cut foam tape into strips so they would fit behind the frame. Three layers of tape made the recess deep enough. You have to make sure you have no gaps at the corners or there will be glitter leakage! Carefully pour the glitter etc. in and then carefully peel off the tape liner. Be very careful you don't jar it or you will get glitter and bits bouncing up onto the surface of the tape. Carefully stick the frame over the top and you are done! (Careful is the key word here. You definitely don't want to sneeze.)

I added more die cuts to the frame for embellishment and also a snowman on the "ground". This front part I also covered with snow texture paste and glitter.

It it is a little confusing on how to fold the Display Stand at first. Eileen Hull has created a short video on how to do it! Feel free to watch it several times. ;-)


Thanks for stopping by! Check out Eileen's blog and if you are not already a member, join the Facebook Eileen Hull Fan Club group. It is a warm, supportive group with lots of inspiration and sharing going on. You'll just have to answer a few simple questions when asking to join (to keep out spammers) and then you'll be added. ;-) ALSO, Eileen and those of us going to Creativation will be sharing sights from the show and other crazy goings on in the group! You won't want to miss any action. ;-)

I also created this project with the Funkie Junkie Challenge Blog's Tic Tac Toe challenge in mind. I think the only square I didn't cover was 'ribbon' so it's very nearly a blackout. (wait, that's bingo. Oh well LOL) Check out their challenges; they are always fun!

Dies:
Eileen Hull Sizzix
Display Stand ( Sizzix / SB )
Journaling Cards - Hearts ( Sizzix / SB )

Tim Holtz Sizzix
Alpine ( Sizzix / SB )
Paper Snowflakes, Mini ( Sizzix / SB )
Winter Wonderland - retired
Snowglobe (1st) - retired
Mini Christmas Things - retired
Holiday Words - Script ( Sizzix / SB )

Other:
Eileen Hull Embossing Powder by Emerald Creek - Polished Silver
Eileen Hull Embossing Powder by Emerald Creek - White Wonder
Eileen Hull Clearsnap Blends Ink - Clear
Sizzix Sizzles Matboard
Ranger Dry Glitter - Rock Candy
DecoArt - Snow-Tex
Distress Oxide Inks
cardstock

Some links in this post are affiliate links which do not affect the price you pay but allow me to earn a small percentage of a sale. Thanks! (My husband also thanks you!) If you shop at Topflight Stamps, use my coupon code LISAHOEL for 12% off your order.