Wednesday, May 31, 2023

Die Cut Mania with Eileen Hull!

Hello there Eileen Hull fans. During the month of May, Eileen's designers have been been sharing techniques and tricks for all things die cutting. Practical tips, unusual materials and out of the box thinking have all been shared for your inspiration. If you've been out of the loop, check out the May posts on Eileen's blog to catch up!

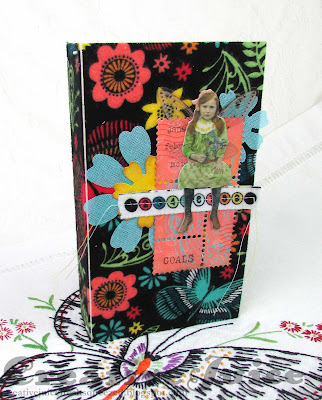
I decided to show some ways to incorporate fabric for my project. I had a piece of colorful flannel that I thought would make a great journal cover. (For some past journal projects made incorporating fabric and felt check out the posts here, here and here.)

Lisa Hoel for Eileen Hull - Die Cut Mania, tips and techniques #EileenHull  #eileenhulldesigns  #sizzix #mymakingstory #TeamEileen #mysizzixstory

The journal is made using the Skinny Mini Book Box Die. This is a versatile die that can made up as a container or a journal.

Lisa Hoel for Eileen Hull - Die Cut Mania, tips and techniques #EileenHull  #eileenhulldesigns  #sizzix #mymakingstory #TeamEileen #mysizzixstory

I also used a different material for the blue die cut flowers. It's called crinoline, a stiffened open weave fabric used for facings or millinery. It comes in white but you can dye it any color you want. It's perfect for die cutting and adds a great texture.

Lisa Hoel for Eileen Hull - Die Cut Mania, tips and techniques #EileenHull  #eileenhulldesigns  #sizzix #mymakingstory #TeamEileen #mysizzixstory

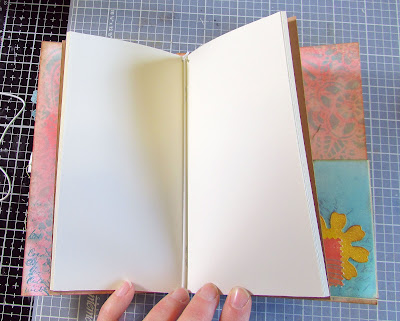
I also used the pocket from the Frame Pocket Journal Die to add inside. Mixing and matching parts from different dies is fair game!

Lisa Hoel for Eileen Hull - Die Cut Mania, tips and techniques #EileenHull  #eileenhulldesigns  #sizzix #mymakingstory #TeamEileen #mysizzixstory

Now on to the how-to:

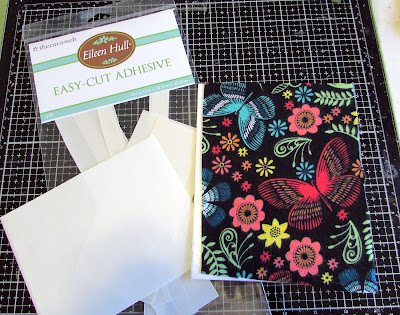
Step 1 – Adhesive sheets are the best thing to use to adhere fabric to board. Wet adhesive can soak through the fabric although I have had success using Distress Collage Medium (a 'non-gloopy' wet adhesive) with a thicker fabric.


I first applied sheets of adhesive to the pieces of mat board and then carefully smoothed the fabric over it. (Watch out for wrinkles!) I die cut the covers after applying the fabric.


Step 2 – The steel rule Scoreboards dies easily cut through both the fabric and mat board. I made sure to leave the fabric off of the spine part on the back cover so there would be less bulk and a better gluing surface on the spine.


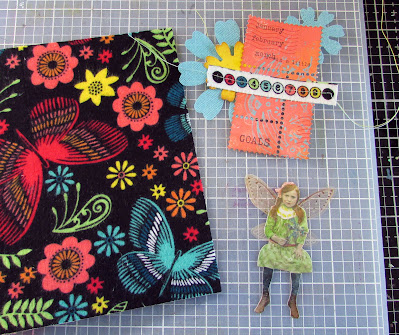
Step 3 – Here's a closer look at the flowers cut from the dyed crinoline:


Step 4 –  parts for the embellishment on the front


Step 5 – Mix and match parts from all your different dies! Here I used the pocket from the Frame Pocket Journal Die in the back of this journal.


Step 6 – I punched holes into the spine so I could string elastic in to bind in the two signatures.


All you have to do is slip each signature under one of the elastic straps. Easy!


Thanks for stopping by and be sure to keep an eye on Eileen's blog for more inspiration from the Educator and Inspiration Teams.

Supplies used:

Eileen Hull Die - Skinny Mini Book Box ( SizzixSB , FJ )
Eileen Hull Die - Frame Pocket Journal ( SizzixSB )
Eileen Hull Die - Flower, Heart & Soul (retired)
Eileen Hull Thinlits Die Set - Snail Mail ( SizzixSB , FJ )
Tim Holtz Stamp Set - Ledger Script
Tim Holtz Layering Stencil - Doodle Art 2 ( SB, FJ )
Eileen Hull Stamp Sets - Making Plans, Snail Mail Postage

Distress Archival Ink - Black Soot, Garden Patina, Vintage Photo
Distress Oxide Ink - Salvaged Patina, Speckled Egg
Distress Stains - Saltwater Taffy, Salvaged Patina
Distress Oxide Stains - Speckled Egg
Distress Crayons
Sizzix Mat board

Tim Holtz Idea-ology:
Paper Dolls
Transparent Wings

Some links in this post are affiliate links which do not affect the price you pay but allow me to earn a small percentage of a sale. Thanks! (My husband also thanks you!)


Wednesday, May 24, 2023

Funkie Junkie Focus – Americana

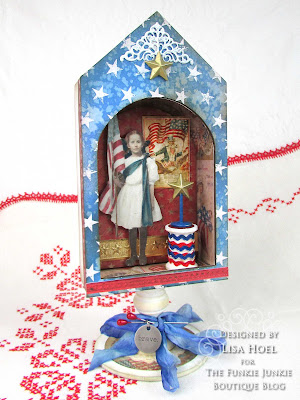
Hello there! Our current theme over at the Funkie Junkie Boutique's blog Inspiration Ave. is "Americana". I thought this was a great opportunity to raid my stash and combine old and new Tim Holtz products into a patriotic red white and blue make.

Lisa Hoel for The Funkie Junkie Boutique - Americana   #creativejuicefreshsqueezed  #mymakingstory #tim_holtz #thefunkiejunkieboutique #sizzix

The new Etcetera Facades are perfect to use with Vignette Boxes! There are a variety of sizes and styles in the pack.

Lisa Hoel for The Funkie Junkie Boutique - Americana   #creativejuicefreshsqueezed  #mymakingstory #tim_holtz #thefunkiejunkieboutique #sizzix

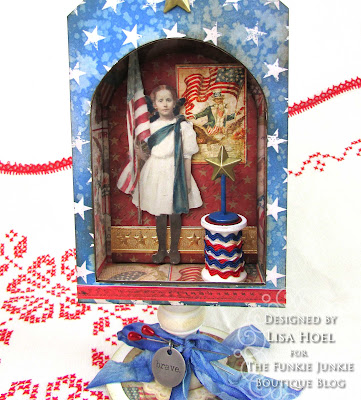
I love making little scenes in the Vignette Boxes!

Lisa Hoel for The Funkie Junkie Boutique - Americana   #creativejuicefreshsqueezed  #mymakingstory #tim_holtz #thefunkiejunkieboutique #sizzix

I decorated the back too!


Let's take a look at some of the how-to!

Step 1) I have a long retired 12 x 12 Paper Stash pad (Seasonal) that was perfect for lining the Vignette Box!


Step 2) Also in my collection is a Paper Stash pad called Motif that consists of white and kraft papers with resist patterns printed on them. I chose the 'star' pages and colored them with Distress Ink.


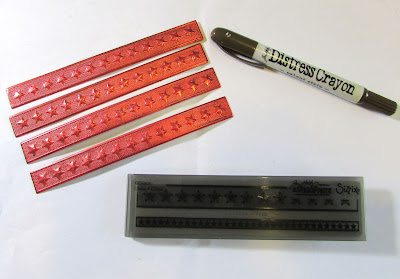
Step 3) I love all the Impresslits Embossing Folders that Tim has designed. I used the Star Trim and Medallion folders for this project. (both retired) Metallic Cardstock works really well!

I used a brown Distress Crayon to add a little grunge.

Step 4) The base is a finial and the round cut out from the Etcetera Facades pack.


Step 5) Using Distress Watercolor Pencils is now my favorite way to color Idea-ology Paper Dolls. 


Step 6) I took the cut out from the facade I used to create a panel to glue into the back of the box.


Step 7) Another fun new Idea-ology product is the set of Figure Stands. Of course the star was perfect for this project! I used Gilded Foundry Wax to color the star gold and Distress Paint on the stand part.

Thanks for stopping by. Keep an eye on the Funkie Junkie Boutique Blog, Inspiration Ave. because you are now getting regular doses of expanded (and inspiring) content each week. Don't miss it…

Supplies used:

Tim Holtz Impresslits -  Star Trim, Medallion (retired)
Tim Holtz stamp set - Typography

Tim Holtz Idea-ology: 
Kraft Stock - Metallic Colors, Metallic Classics
Paper Stash 12 x 12 - Motif, Seasonal (retired)
Grey Two-tone Woodgrain Cardstock
Vignette Boxes
Etcetera Facades
Figure Stands
Paper Dolls
Finial Set
Salvage Stickers - Seasonal
Crinkle Ribbon
Metal Adornments, Stars

Corner Filigree Metal Piece

Distress Collage Medium Matte
Distress Archival Ink - Black Soot
Distress Paint - Picket Fence, Prize Ribbon

Distress Spray Stains - Prize Ribbon, Blueprint Sketch
Distress Ink Ink Pads - Blueprint Sketch, Antique Linen, Prize Ribbon, Vintage Photo, Lumberjack Plaid, Crackling Campfire
Distress Crayon - Walnut Stain
Foundry Wax - Gilded
Distress Watercolor Pencils

Wednesday, May 10, 2023

Funkie Junkie Focus – Mother's Day Cards

Hello there Funkie Junkie Boutique fans! Our current theme is "We Love You Mom!" and I chose to make cards for my Mom and Mother-in-law.

Lisa Hoel for The Funkie Junkie Boutique - Mother's Day Cards   #creativejuicefreshsqueezed  #mymakingstory #tim_holtz #thefunkiejunkieboutique #sizzix

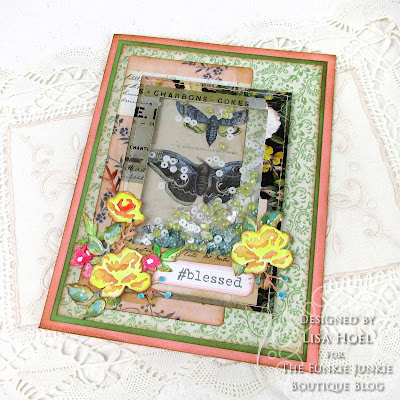
One is a shaker card (always lots of fun):

Lisa Hoel for The Funkie Junkie Boutique - Mother's Day Cards   #creativejuicefreshsqueezed  #mymakingstory #tim_holtz #thefunkiejunkieboutique #sizzix

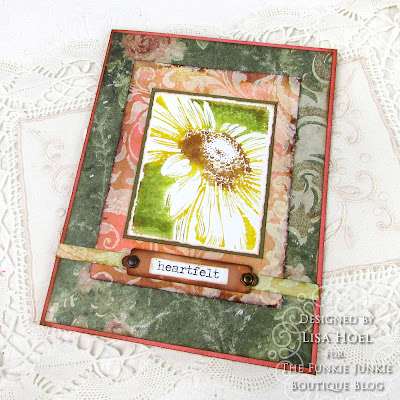
The other features watercolor stamping using the new Bold Botanicals Tim Holtz stamp set:

Lisa Hoel for The Funkie Junkie Boutique - Mother's Day Cards   #creativejuicefreshsqueezed  #mymakingstory #tim_holtz #thefunkiejunkieboutique #sizzix

Here are a few looks at the "in process"…

Shaker Card:

1 - Using Idea-ology Collage Layer Frames and Pocket Cards made it quick and easy to construct the shaker part of the card. I just had to add a piece of clear acetate and some foam tape to the back of one of the Layer Frames and adhere it over a Pocket Card on my card base.


I filled it with various sequins and beads from my stash.

2 - I also enjoyed breaking out a new die set, the Mini Brushstroke Flowers. They added a wonderful finishing touch to the card. I cut the flowers out of Distress Watercolor Cardstock and then watercolored them afterwards.


Bold Botanicals Card:

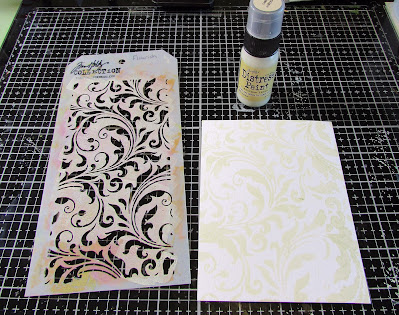
1 - I used a paint resist technique for one of my layers. I sponged Antique Linen Distress Paint through the Flourish stencil onto Distress Watercolor Cardstock.

When the paint was dry, I sprayed it with various Spray Stains and a little water to blend it. The paint resists the spray and the design pops right through.


2 - card base layers:

Patterned paper is from Backdrops Volume #5,
so many lovely papers in it!

3 - The Bold Botanicals stamps are perfect for the watercolor stamping technique. I tapped the Mini Distress Ink Pads over the various areas of the stamp, spritzed it with water and then stamped it onto Distress Watercolor Cardstock. It has such a great effect!


Thanks for stopping by. Keep an eye on the Funkie Junkie Boutique Blog, Inspiration Ave. because you are now getting regular doses of expanded (and inspiring) content each week. Don't miss it…

Supplies used:

Tim Holtz Thinlits Die Set - Brushstroke Flowers, Mini
Tim Holtz Stamp Sets - Bold Botanicals, #Hashtags
Tim Holtz Layering Stencil - Flourish TH032

Tim Holtz Idea-ology: 
Layer Frames - Collage
Backdrops Volume #5
Pocket Cards
Classic Label Stickers
Big Chat Stickers
Hex Fasteners

Distress Archival Ink - Black Soot
Distress Paint - Antique Linen
Distress Watercolor Cardstock
Distress Spray Stains - Tea Dye, Saltwater Taffy, Peeled Paint
Distress Spray Oxide Stain - Mustard Seed
Distress Ink Mini Ink Pads - Mustard Seed, Peeled Paint, Vintage Photo