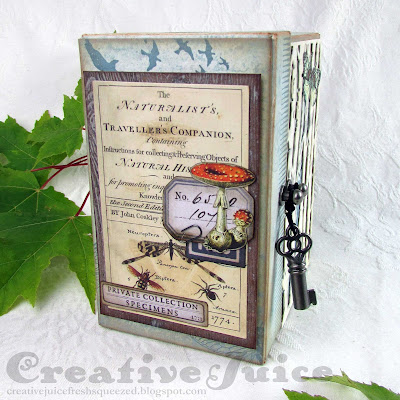
Hello everyone. A new month means a new theme in Eileen Hull blogland. I am so happy it is September and we have a great theme – Nature. In addition, her Teams have been challenged to create journals with dies that aren't officially "journal" dies. Challenge accepted! As usual my project got rather involved so this week is Part 1 of this project. ;-)
 |
| Hmmm, what's inside? |
I started off with Eileen's Treasure Box Die for the main structure. (I believe that this die has been discontinued so get it while you can!)
Views around the sides:
What do we see when we open the box?
The journal itself is tied into the cover. You'll get to see all the details of that next week in Part 2! On the right is a little nature vignette and a drawer (the Stacking Drawer Die) to hold little bits and "specimens".
 |
| The leaf is paper! (made with the 3-D Impresslits Oak Leaf folder) |
Here is a quick look at some of the "putting it together" steps.
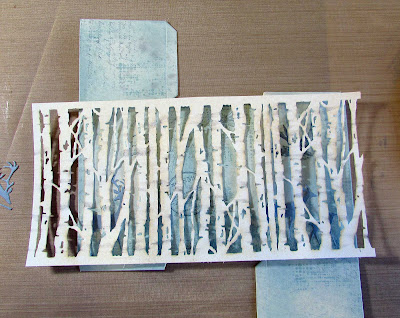
1) All the parts laid out - I colored the 'outside' side of the matboard pieces with Distress Spray Stain in Speckled Egg, Iced Spruce,Tea Dye, Antique Linen and Oxide Speckled Egg and Antique Linen. The 'inside' side was colored with Twisted Citron, Peeled Paint, Antique Linen, Old Paper, Tea Dye and Oxide Antique Linen.
2) I did all the stamping before assembly of course. I find it helps to lay the pieces out as they will be glued together to help me visualize how to add the imagery. I did the same on the reverse, "inside" pieces but forgot to take photos. oops!
I also had to account for where the openings in the birch trees wrap would fall. Lots of fiddling around! (I also did all the "inside" inking and stamping before assembling the box as well.)
Well, stay tuned for next week to see all the details of the little journal that is part of this make. All will be revealed ha ha. UPDATE: FIND PART 2 HERE!
Thanks for stopping by! Be sure to keep an eye on Eileen's blog for more inspiration from the Educator and Inspiration Teams.
I am also adding this to the current TFJB Challenge, "De-stress with a Little Distressing". I used lots of inked distressing on all the elements of the box to add that shabby chic look.
Supplies used:


This is BRILLIANT Lisa- I love anything birch <3! Very cool idea and you lined it up perfectly!
ReplyDeleteLOVE how you have decorated your treasure box Lisa! what great papers and die cuts - so fun with the mushrooms inside and out! xx
ReplyDeleteThis is very cool! Thank you for joining us at The Funkie Junkie Boutique!
ReplyDeleteLove this project Lisa! What a great use of that tree die.. have it need to pull it out!! Love everything about this.. great idea to have the assemblage on one side!
ReplyDeleteWhat a wonderful project! I love how you distressed the edges of the box and used more distress on the leaves. Thank you for joining the Funkie Junkie Challenge!
ReplyDeleteSuch a brilliant design and what a reveal inside! I love those tree trunks around the box itself and your mushrooms are just the best ever. Thank you for joining us at The Funkie Junkie Boutique blog x
ReplyDeleteVery cool design and love the effect inside and out! Thank you for sharing with us at The Funkie Junkie Boutique Challenge!
ReplyDeleteYours is the make I expected to win!!
ReplyDeleteI came in earlier last week to read through this post & am STILL awed! This is FABULOUS!!
But then; ALL your awesome creations always are!!
I find myself looking into your posts each challenge. So much that I set your page on my Safari with a dozen other fave artist/designers!
And THANK YOU- I had no idea the EH Stacking Drawers was discontinued & still was waiting for the prices to drop more. You lit a fire under my butt to order one NOW… or not get one!
THANK YOU SO MUCH for sharing!!