Hello Funkie Junkie fans, we have a new product inspiration theme for you – Inky in October. Hope you aren't afraid of dirty fingers! Our hostess is Janna and here is what she has to say about the theme,
"Today I want to challenge you to get out your Distress Inks, Sprays, and Mediums. Create a vintage or shabby chic project featuring Distress products. Let’s have some creative fun and get our fingers inky this month, happy crafting!"
FYI, we will no longer be having bi-weekly challenges on the Funkie Junkie blog but there is still a chance to win a $25 gift certificate at the Funkie Junkie Boutique! Just create a project using the products from each product showcase cycle, share it on social media and tag us at #thefunkiejunkie. You can read all about it here.
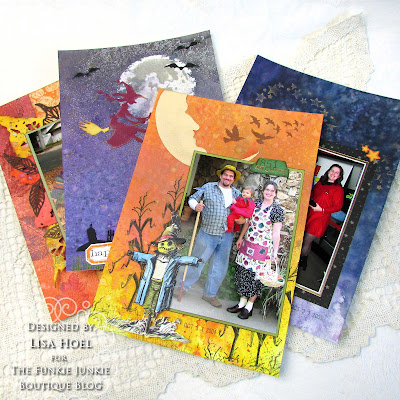
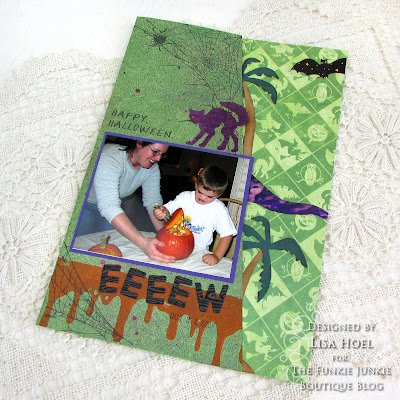
For the last Saturday Showcase, I shared the cover (and how-to) of a Halloween journal project I am working on. I'm continuing the project with this new challenge and creating delightfully inky pages to go inside! I got out a huge pile of Distress sprays, ink pads and Halloween Mica Stains old and new to create backgrounds and inky parts for the pages. (Still more to go!)
Scroll on to see the pages and the supplies and techniques I used! There is a LOT to see so get comfy.As a general note, I created a whole pile of inky backgrounds using Distress Sprays, inks, Mica Stains etc. before I began. That way I had a stash to draw from as I used them for page bases and for die cutting shapes out of. It streamlined the whole creative process and compartmentalized the mess ha ha. Media mess first and then die/stamp mess. ;-)
For this first page, I used the Moon Mask set to create the spooky moon within the inky background. Fun die cuts and embossing finished off the page.
––––––––––––––––––––––––––––––––––––––––––––––––––––––––––––––––––––––––––––––
 |
| sooo long ago, lol |
Use a stamp platform and stamp your initial image with archival ink onto your paper. Paint or color in the image and then re-stamp over the top to bring back the details of the image. Easy peasy!
––––––––––––––––––––––––––––––––––––––––––––––––––––––––––––––––––––––––––––––
 |
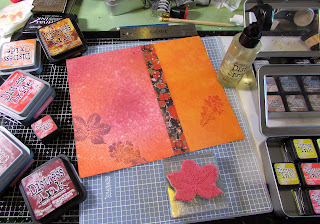
| Interactive flap so I could include more photos! |
I used the
'22 Halloween Design Tape to form the hinge for the flap. I added a little Distress Collage Medium underneath for a more secure hold.
I used the new Leaf Prints 2 stamp set along with 'watercolor stamping' to cover the inside with leaves. Watercolor stamping works best using stamps without intricate detail. Ink the stamp with Distress Ink and spritz lightly once with water. Stamp, lift and let it dry naturally. You get a neat watercolored look.
––––––––––––––––––––––––––––––––––––––––––––––––––––––––––––––––––––––––––––––
On the plain background, I first used the
Hocus Pocus Layering Stencil and
Distress Texture Paste Opaque to add the stars to the background. Once it was dry I added all the sprays and stains. As a final step when everything was dry, I highlighted the stars with Sizzix Gold Luster Wax.
––––––––––––––––––––––––––––––––––––––––––––––––––––––––––––––––––––––––––––––
You will see throughout all the pages that I make use of the
Specimen,
Collector and
Postale Die Sets to add dates and other fun details. Such handy dies to add that final touch!
––––––––––––––––––––––––––––––––––––––––––––––––––––––––––––––––––––––––––––––
More pages, keep going, you can do it!
––––––––––––––––––––––––––––––––––––––––––––––––––––––––––––––––––––––––––––––
Oldie but goodie technique - Distress paint works great on metal! I put metal foil tape onto a piece of cardstock and then cut it into the pennant shape. Then I embossed it. I recommend wiping the metal down with rubbing alcohol as well. It helps the paint go on more smoothly.
––––––––––––––––––––––––––––––––––––––––––––––––––––––––––––––––––––––––––––––
––––––––––––––––––––––––––––––––––––––––––––––––––––––––––––––––––––––––––––––
Once everything was dry, I added Distress sprays and Mica Stains (yum!)
Whew! You made it to the end! Believe it or not, I have more pages to share with you soon. I might even manage to film a flip through of the completed journal. We'll see how that goes ha ha. Keep your eyes on the
Funkie Junkie blog for inspiration from the fabulous Design Team.


No comments:
Post a Comment
Thank you so much for leaving a comment. I appreciate it!