Showing posts with label scrapbook layout. Show all posts

Wednesday, May 4, 2022

Sunday in the Park – Funkie Junkie Challenge

Hello Funkie Junkie fans! It's time for a new challenge. Our hostess this time is designer Lyla Larimore and the theme is "Sunday in the Park". Here's what Lyla has to say about the challenge, 

"Weather-wise, you might not be spending time outside in the park, but we've all got memories of playing in one! Get out your stamps, dies, mixed media, or embellishments that remind you of what you might see on a beautiful sunny day in the park. Make a Tag, Panel, or even a 3-D project, and bring the outdoors into your craft space!"

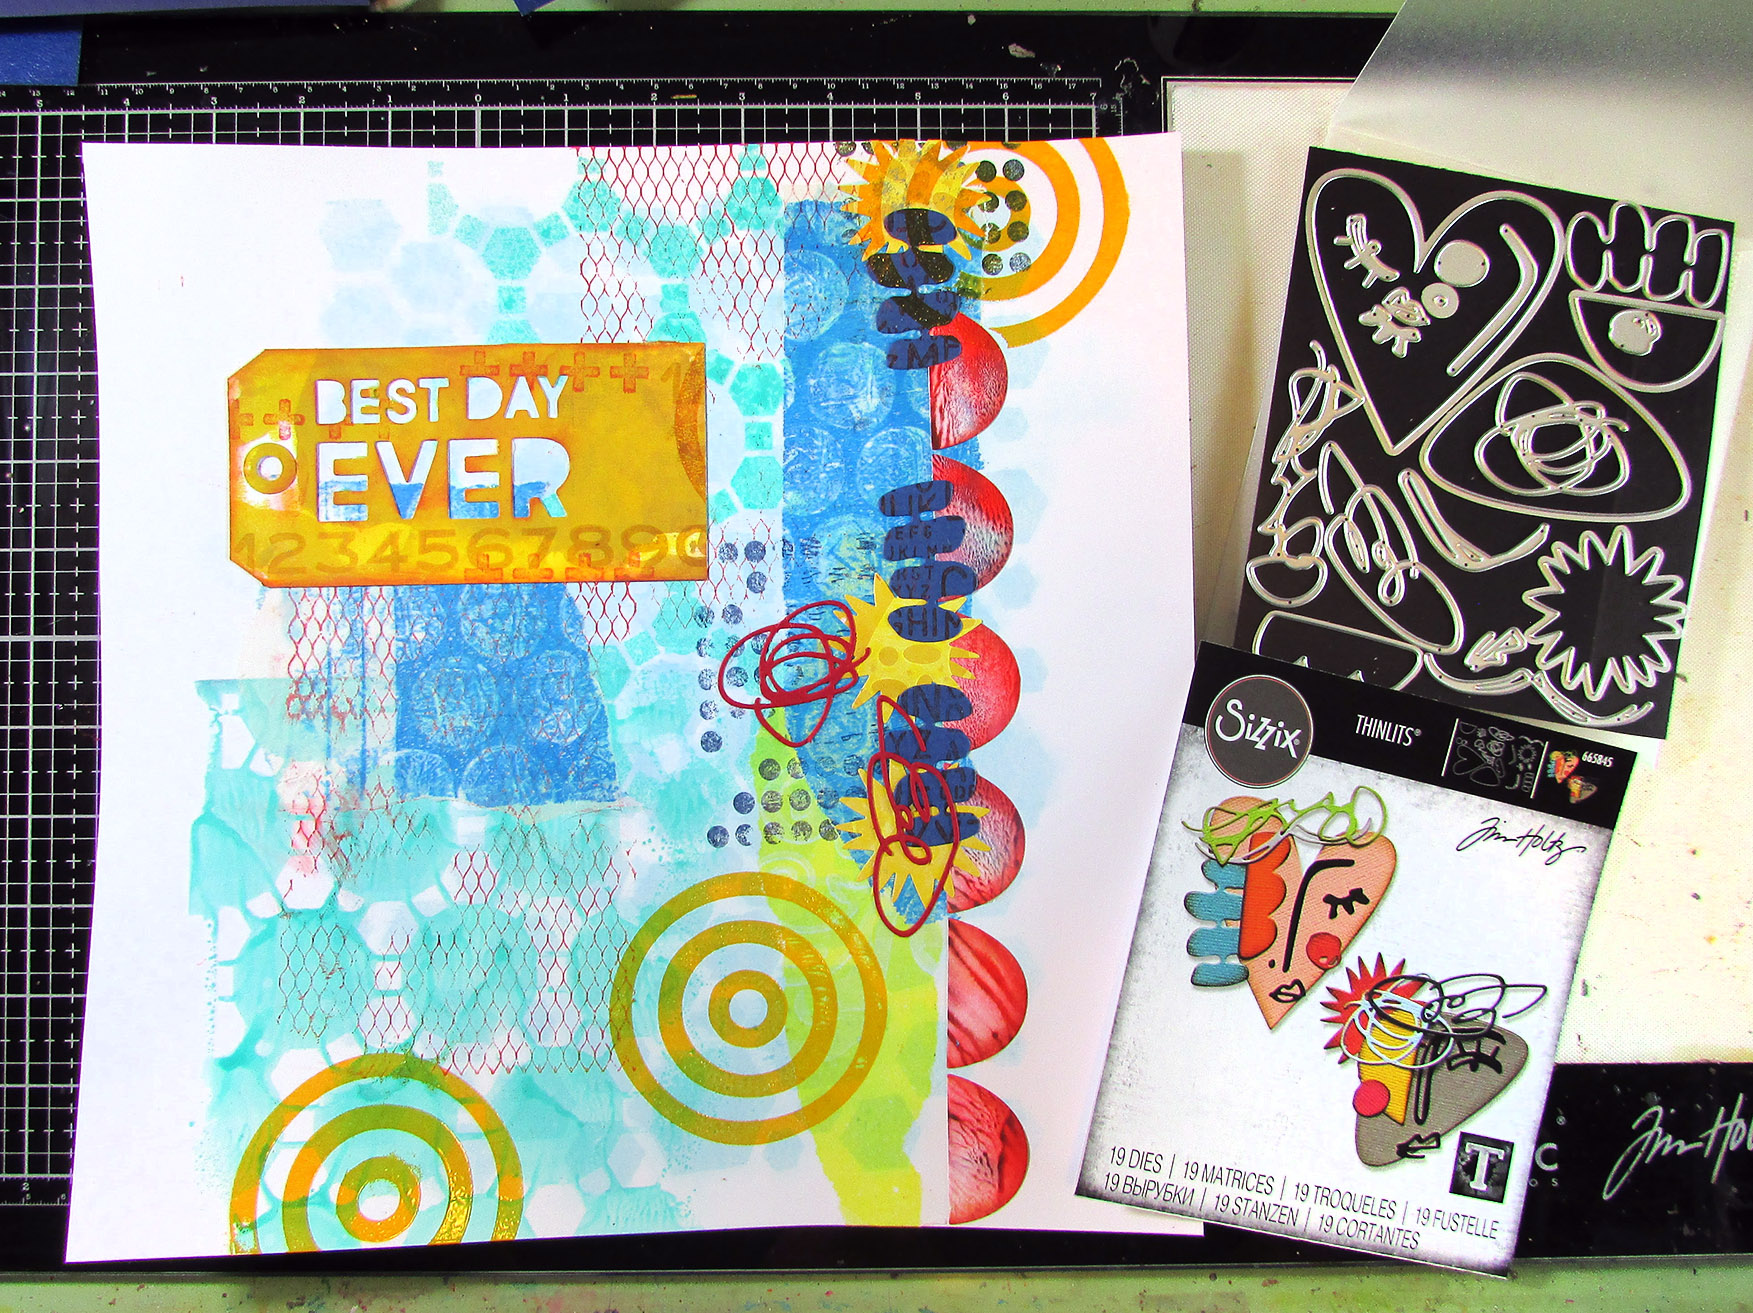
When I think of the park, I have fond memories of taking my sons there to run around and play with friends. They are grown up teenagers now! I decided to look back in the family photos and create a scrapbook page of those bygone days. (It's been forever since I've worked on the scrapbooks lol!)

Lisa Hoel for The Funkie Junkie "Sunday in the Park" Challenge #creativejuicefreshsqueezed #tim_holtz #sizzix #mymakingstory #thefunkiejunkie #thefunkiejunkieboutique #frillyandfunkie

I chose a mostly primary color scheme to fit the kid theme. I had a fun play with mixed media techniques! Take a look at my step by step photos to get an idea of my process.


Base layers of sprays with stencils.


Getting an idea of where the main elements will go.


Adding die cut elements.


Stamping and collaged tissue gel print pieces add visual texture to the background. I embossed the concentric circles with Wild Honey Glaze embossing powder.


The Abstract Faces die set has a wealth of shapes you can use in all sorts of ways. You don't just have to make faces with it. ;-)

Thanks for stopping by! I hope you check out the fun challenges we have on the Funkie Junkie Boutique Blog. They are always good for sparking your creativity! You have two weeks to join the current challenge so I hope you give it a go.

Supplies used:
Tim Holtz die set - Abstract Faces
Tim Holtz die set - Bold Text #1
Tim Holtz stamp sets - Mesh & Linen, Inquisitive
Stencil - Dina Wakely, Connected Dots
Stencil - Dylusions, LG Behave

Distress Stain - Tumbled Glass
Distress Oxide Ink - Candied Apple
Distress Glaze - Wild Honey
Distress Ink - Fired Brick
Ranger Archival Inks - Cobalt, Dandelion
Tim Holtz Big Chat Stickers
Sakura Souffle Pens
Signo Uni-ball pen, white


Tuesday, April 29, 2014

Birds of a Feather…

Hello everyone. You had better sit down because I have created a scrapbook page!  I realized I have been having so much fun making cards and other altered type projects that my poor scrapbooks have been languishing for ages. This is a photo I took at a local historic mansion and gardens. All throughout the grounds they have sculpture installations and I think this is a combination of art and function. I'm not sure how the birds like the condo complex but I think it looks pretty cool. I also wanted to play with my new Petal Drop Die from Tim Holtz.


For the Petal Drop part of the background, I started out with a sheet of manila cardstock from an old file folder. I did lots of layers of marbled stains and stamping with archival inks to create a collage look. I probably should have taken a photo of it before I cut it up with the die. Oops! I really like all the colors and textures in the shapes.

Another thing I forgot to take photos of are the steps for making the stencil monoprint background. I was fortunate enough to recently take a class taught by Paula Cheney at my local scrapbook store. (I still need to finish my project…) One of the many things she taught us was this cool way to make a print using your stencils. Lucky for us, I recently saw that Richele Christensen shared the same technique on her blog so you can check it out there for pictures and details. It's not difficult. Tap your ink pads directly onto the stencil until it's covered with ink, mist it generously with water and then lay it ink side down onto your paper. Blot excess water with a cloth if needed and pull up the stencil. I wanted a lighter image so I used Old Paper and Pumice Stone Distress Pads on the 12 x 12 Woodgrain stencil. I like the effect. Here's a closeup:


Another thing to note is that I stamped the bird onto Specialty Stamping Paper. This is such a detailed stamp and I wasn't getting the crispness I wanted stamping onto regular paper. I remembered I had some of the Specialty Paper and it works really well. The stamped image is so nice! It takes the coloring well too. I used Distress Inks and a water brush to add the color. I helped along the drying with a heat tool because there a bit of a coating on the paper.

Most of the supplies I used for this project can be found at Inspiration Emporium. Follow the links below and use my code JUICE to save 10% if you go shopping. I will also point out that US shipping is always $5 and international shipping is just $10! ;-)