Showing posts with label Creativation. Show all posts

Tuesday, January 14, 2020

Creativation 2020 and NEW Eileen Hull Sizzix Dies!!


It's that time of year, the annual Association For Creative Industries tradeshow CREATIVATION! Chock full of manufacturers with all their new and shiny products, it is the place to be! I am very blessed to be able to go again this year and be a part of the excitement. Eileen has four new Sizzix dies that are debuting. Two are available now and two more will be a part of the Chapter 2 release in April. Today I am sharing a project made with the new Display Stand Die. (available now)

Display Stand Die - so many uses for it!

I decided to make a winter-themed shaker card/decor piece! It was easy and looks really cute:

Shake, shake, shake… shake that glitter…
It folds flat for mailing or storage:


There is a clever little folding stand that make it stand up (don't worry, there is a video on how to fold and engage it!):


On to the tutorial…

First I cut the main body out using white matboard. I also cut just the front panel out again from heavy white cardstock. I used one of the frames from the Hearts Journaling Cards Die Set to cut the center out of that panel to form a frame.


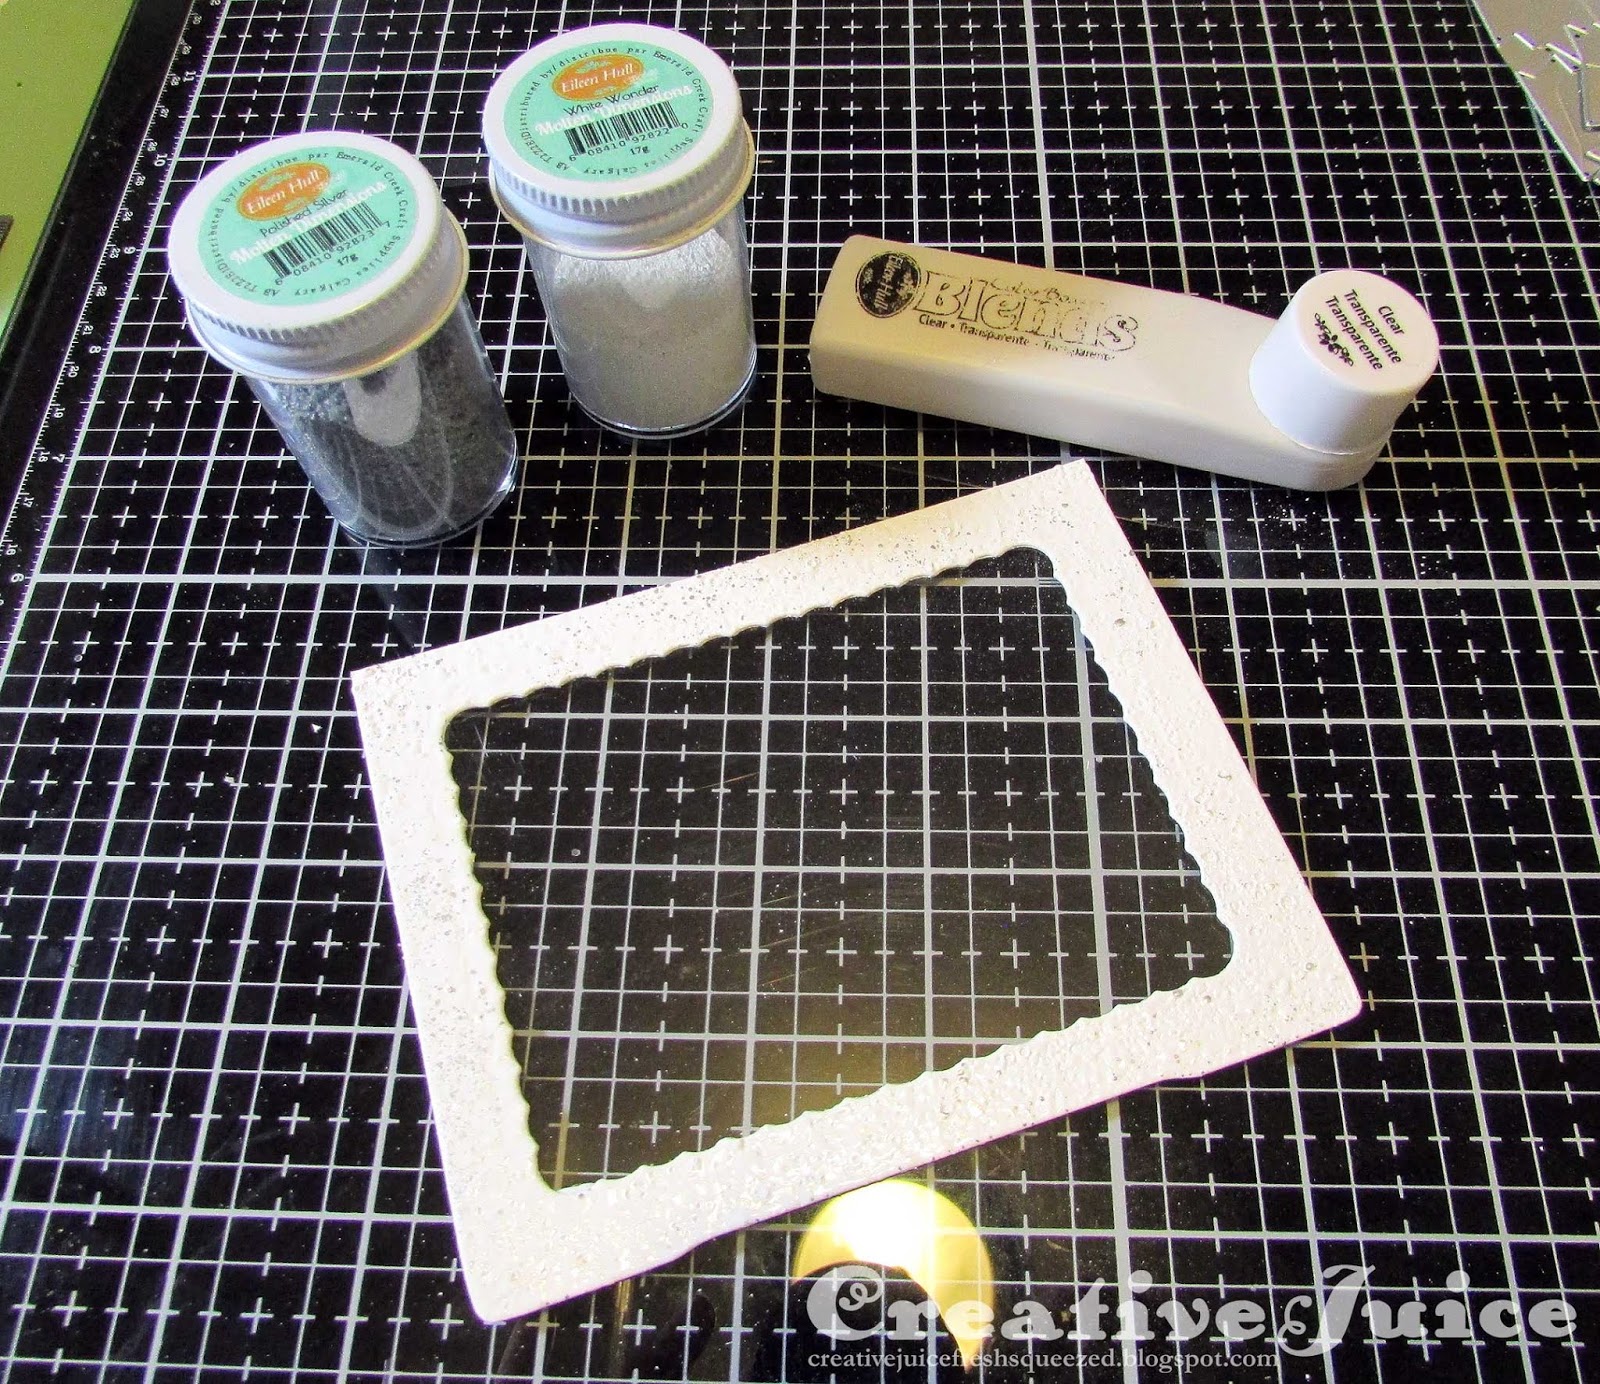
Next I embossed the front of the frame with Eileen's White Wonder Molten Dimensions Embossing Powder. As I was melting it with my heat tool, I would sprinkle a tiny bit of her Polished Silver Embossing Powder into the White Wonder before it cooled. It made a neat speckled effect! After embossing, I glued a piece of clear plastic (from recycled packaging) onto the back of the frame.

Step three is to build up the area that is going to hold the shaker parts (in this case glitter and mini die cut snowflakes). (This is after I created the background scene with Distress Ink and die cuts.)


I cut foam tape into strips so they would fit behind the frame. Three layers of tape made the recess deep enough. You have to make sure you have no gaps at the corners or there will be glitter leakage! Carefully pour the glitter etc. in and then carefully peel off the tape liner. Be very careful you don't jar it or you will get glitter and bits bouncing up onto the surface of the tape. Carefully stick the frame over the top and you are done! (Careful is the key word here. You definitely don't want to sneeze.)

I added more die cuts to the frame for embellishment and also a snowman on the "ground". This front part I also covered with snow texture paste and glitter.

It it is a little confusing on how to fold the Display Stand at first. Eileen Hull has created a short video on how to do it! Feel free to watch it several times. ;-)


Thanks for stopping by! Check out Eileen's blog and if you are not already a member, join the Facebook Eileen Hull Fan Club group. It is a warm, supportive group with lots of inspiration and sharing going on. You'll just have to answer a few simple questions when asking to join (to keep out spammers) and then you'll be added. ;-) ALSO, Eileen and those of us going to Creativation will be sharing sights from the show and other crazy goings on in the group! You won't want to miss any action. ;-)

I also created this project with the Funkie Junkie Challenge Blog's Tic Tac Toe challenge in mind. I think the only square I didn't cover was 'ribbon' so it's very nearly a blackout. (wait, that's bingo. Oh well LOL) Check out their challenges; they are always fun!

Dies:
Eileen Hull Sizzix
Display Stand Sizzix / SB )
Journaling Cards - Hearts ( Sizzix / SB )

Tim Holtz Sizzix
Alpine ( Sizzix / SB )
Paper Snowflakes, Mini ( Sizzix / SB )
Winter Wonderland - retired
Snowglobe (1st) - retired
Mini Christmas Things - retired
Holiday Words - Script ( Sizzix / SB )

Other:
Eileen Hull Embossing Powder by Emerald Creek - Polished Silver
Eileen Hull Embossing Powder by Emerald Creek - White Wonder
Eileen Hull Clearsnap Blends Ink - Clear
Sizzix Sizzles Matboard
Ranger Dry Glitter - Rock Candy
DecoArt - Snow-Tex
Distress Oxide Inks
cardstock

Some links in this post are affiliate links which do not affect the price you pay but allow me to earn a small percentage of a sale. Thanks! (My husband also thanks you!) If you shop at Topflight Stamps, use my coupon code LISAHOEL for 12% off your order.


Monday, January 29, 2018

Eileen Hull – Creativation 2018 Recap

Well, I wasn't there in person but I went to Creativation vicariously through all the photos and videos the away team shared. ;-) Eileen Hull released her new collection, Book Club Chapter 2! It should be hitting the stores around June (soooo long to wait...) but I have some peeks for you. I'll share tutorials when the dies are available. You can see Eileen share the Book Club dies at the show in THIS video.

I'd say the centerpiece die of the Chapter 2 dies is the Wrap Journal. This die absolutely rocks! All three of the following journals I created were cut with the same die.

A little on the techie side


On the softer side...


and......

One just for fun!


I hope you've enjoyed this peek at what is coming! Later this week Eileen will have a roundup of the projects the Inspiration Team made with the new Book Club Chapter 2 Collection so be sure to stop by and check it out. You can find her blog HERE.

Thanks for stopping by!

Wednesday, February 22, 2017

More Clearsnap Blends from Eileen Hull


… and a closer look at a project from Creativations! All this month we've been taking a look at Eileen's ColorBox Blends from Clearsnap (check out all the fun projects on Eileen's blog if you've missed them). This is a project I made for Creativations using some of Eileen's new dies and the Blends ink for stenciling. (You can see my other Blends projects here and here.) I created a banner decor piece which I think is perfect for saying goodbye to winter with:


Isn't this cheerful? Eileen's new dies I used (coming soon to stores!) are the House/Pocket, Stitchy Flowers, and Stitchlits Words. Let's take a look:

The banner is cut from white cotton canvas material. I painted the background with watered down Distress Paint (Tumbled Glass and Twisted Citron). If I were redoing it, I could have made custom mists from the Blends inks (see how in my Mr. Owl tutorial) and used those on the background. The paint stiffens the fabric up a bit but the ink mist does not.

I used some of Wendy Vecchi's stencils (Layered Tree and Borders) and the Blends (Nutmeg, Frog and Hydranga)  to add the tree, hatched border on the bottom, and blue diamonds to the background. The Blends ink with its integrated sponge applicator makes it super easy to use for applying ink, especially through stencils.


Here is a detail of how I added the stitched words at the top of the banner. The Stitchlits Words die set is made up of individual word dies that you can use to cut anywhere on your project. It gives you holes that you can then easily stitch! I didn't have the actual die in my hands (Eileen sent us precut things to make show samples with) but that was not a problem. I used the cardstock with the diecut wording (on left) as a template and marked the dot positioning with a water erasable fabric pen. Then I just stitched with floss to connect the dots.

The house and flowers were cut out of wool felt (the dies cut felt wonderfully!) I stitched and glued all the little parts together and added extra decorative embroidery as well.

House detail

Flowers detail
I used vintage buttons and lace from my stash to add more layers. The grass diecuts I stitched on with my sewing machine.

The hanger was easy to make with the Twist & Style Tool. I used about a yard of silver 24 gauge wire doubled up (I didn't have thicker wire on hand) and twisted it into a sturdy length I could bend into the hanger shape.

I colored the wire with Mushroom Alcohol Ink to age it.
I drilled two holes at the ends of a length of dowel to pass the ends of the wires through. I twisted the ends into loops so I could attach the ribbon tassels to them. At the center I formed a decorative loop to hang it from. Also, I used the Nutmeg Blends ink to stain the wooden dowel. Quick and easy!


Thanks for stopping by! Be sure to head on over to Eileen's blog and see all the fabulous projects the Inspiration Team has made this month.


The supplies I used for this project can be found at Sizzix or Simon Says Stamp. Follow the links below and a shopping you may go!


Wednesday, January 18, 2017

Creativations! – Sneek Peaks with Eileen Hull…

It's almost here! Eileen made it through all the awful winter weather with Scotty in tow and is now busily setting up the booth for the Creativations 2017 show.  Formerly known as CHA, this is the show where designers and crafting manufacturers from all over will be debuting their exciting new products. The Inspiration Team had so much fun making all sorts of samples with all Eileen's new diecuts – wait until they are revealed at the show, you will get your socks knocked off. I have so many ideas for even more to do with them. ;-)

I can only share sneak peeks for now, but soon you will see everything! Keep an eye on Eileen's FaceBook Live videos and posts to see all the action and excitement.


If you are going to the show, be sure to find Eileen's booth and visit Scotty the vintage trailer – once again making an appearance right on the show floor! There will be fun make and takes, tours and lots to see. 

Here is Scotty proudly overlooking the action at the show last year in 2016.

 Thanks for stopping by and I hope you can catch some of the excitement on the Creativation horizon.