Showing posts with label industrial. Show all posts

Wednesday, May 18, 2022

Reuse & Upcycle! Funkie Junkie Boutique Challenge

Hello Funkie Junkie fans! It's time for a new challenge. Our hostess this time is me and the theme is "Reuse & Upcycle!" 

Ready for some spring cleaning? Try using something that would end up in the trash as part of your creative project! Upcycle thrift store finds, use your junk mail or product packaging in creative and 'arty' ways. Let's see what you can do with "trash".

"I" is for inventor and "G" is for gadgets! I had a lot of fun with this industrial assemblage. I rummaged through my stash of "found objects with possibilities" and the recycling bin!

Lisa Hoel for The Funkie Junkie "Reuse & Up-Cycle " Challenge #creativejuicefreshsqueezed #tim_holtz #sizzix #mymakingstory #thefunkiejunkie #thefunkiejunkieboutique #frillyandfunkie

Lisa Hoel for The Funkie Junkie "Reuse & Up-Cycle " Challenge #creativejuicefreshsqueezed #tim_holtz #sizzix #mymakingstory #thefunkiejunkie #thefunkiejunkieboutique #frillyandfunkie
Detail 1

Lisa Hoel for The Funkie Junkie "Reuse & Up-Cycle " Challenge #creativejuicefreshsqueezed #tim_holtz #sizzix #mymakingstory #thefunkiejunkie #thefunkiejunkieboutique #frillyandfunkie
Detail 2

I think you will be surprised at some of the things I used in addition to a load of Tim Holtz Idea-ology and other products! Let's take a look:
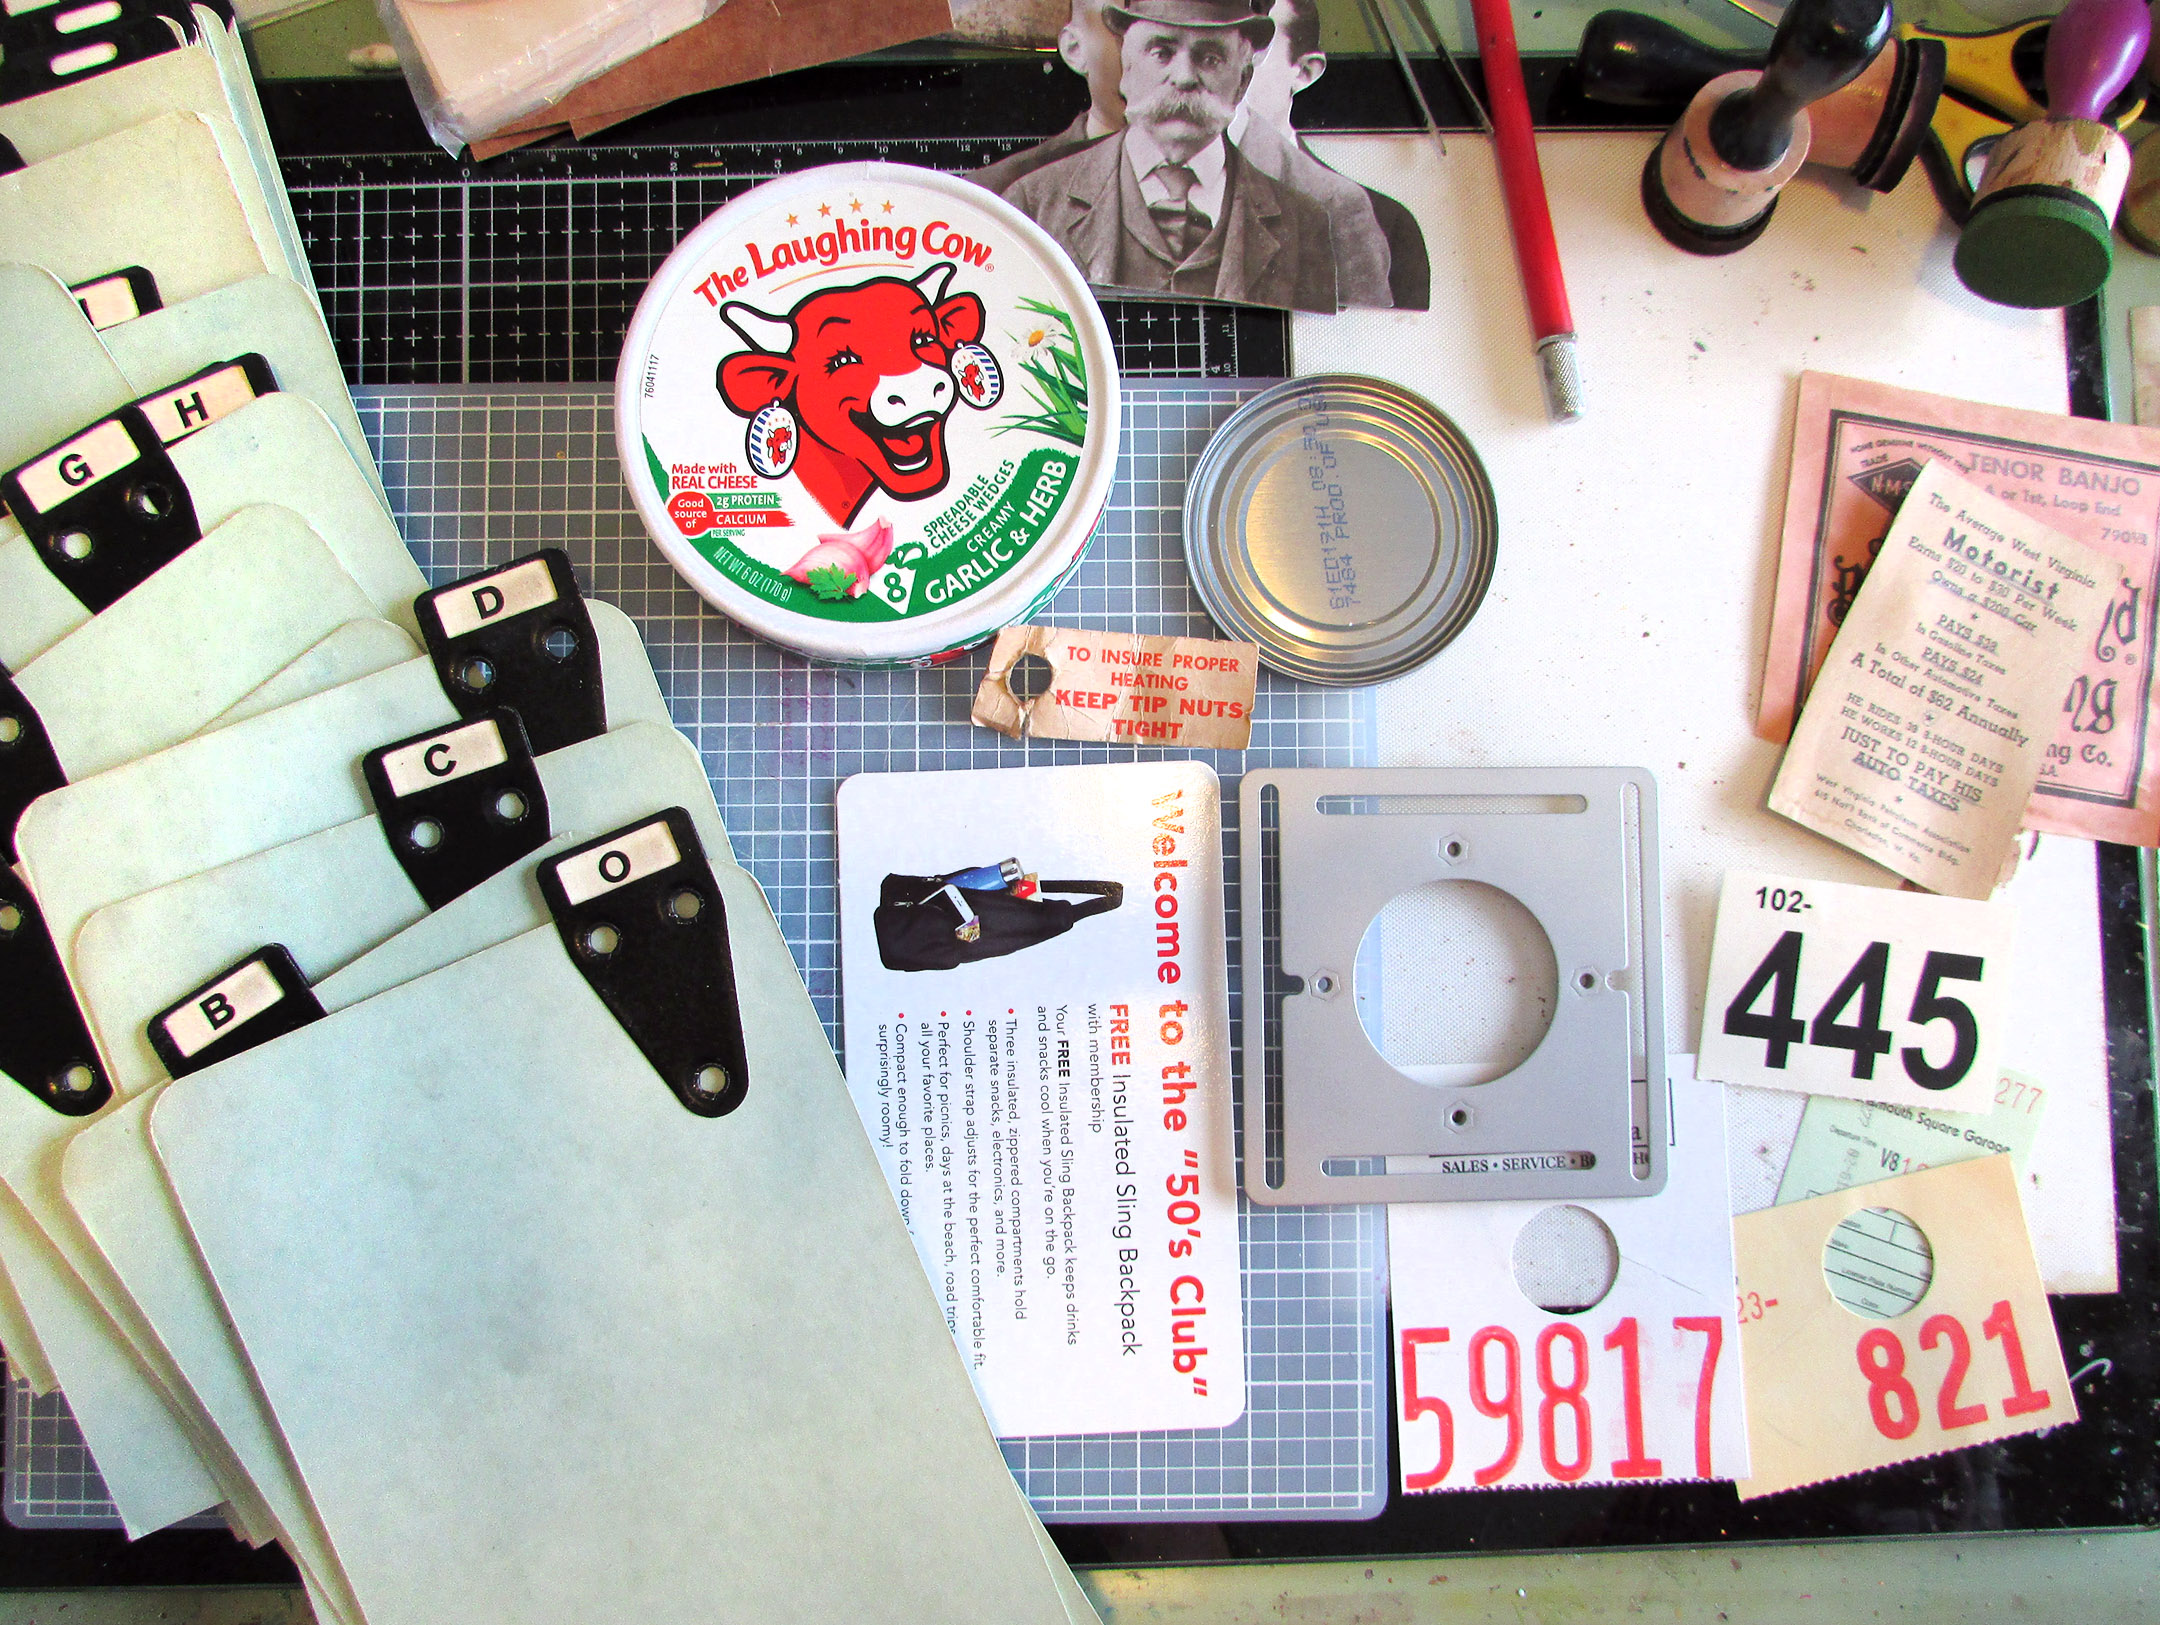
First we have a cardboard cheese box, junk mail postcard, random number tags I'd saved and some metal bits that were going to get tossed. Also vintage filing dividers of some sort that I found at a thrift store outlet. (Guess how fast those made it into my card?)


I had some vintage letter stencils in my stash that I thought would be an interesting addition.


More stuff! Old resistors and the burned out tail light bulb from our SUV. Saved from the trash LOL!

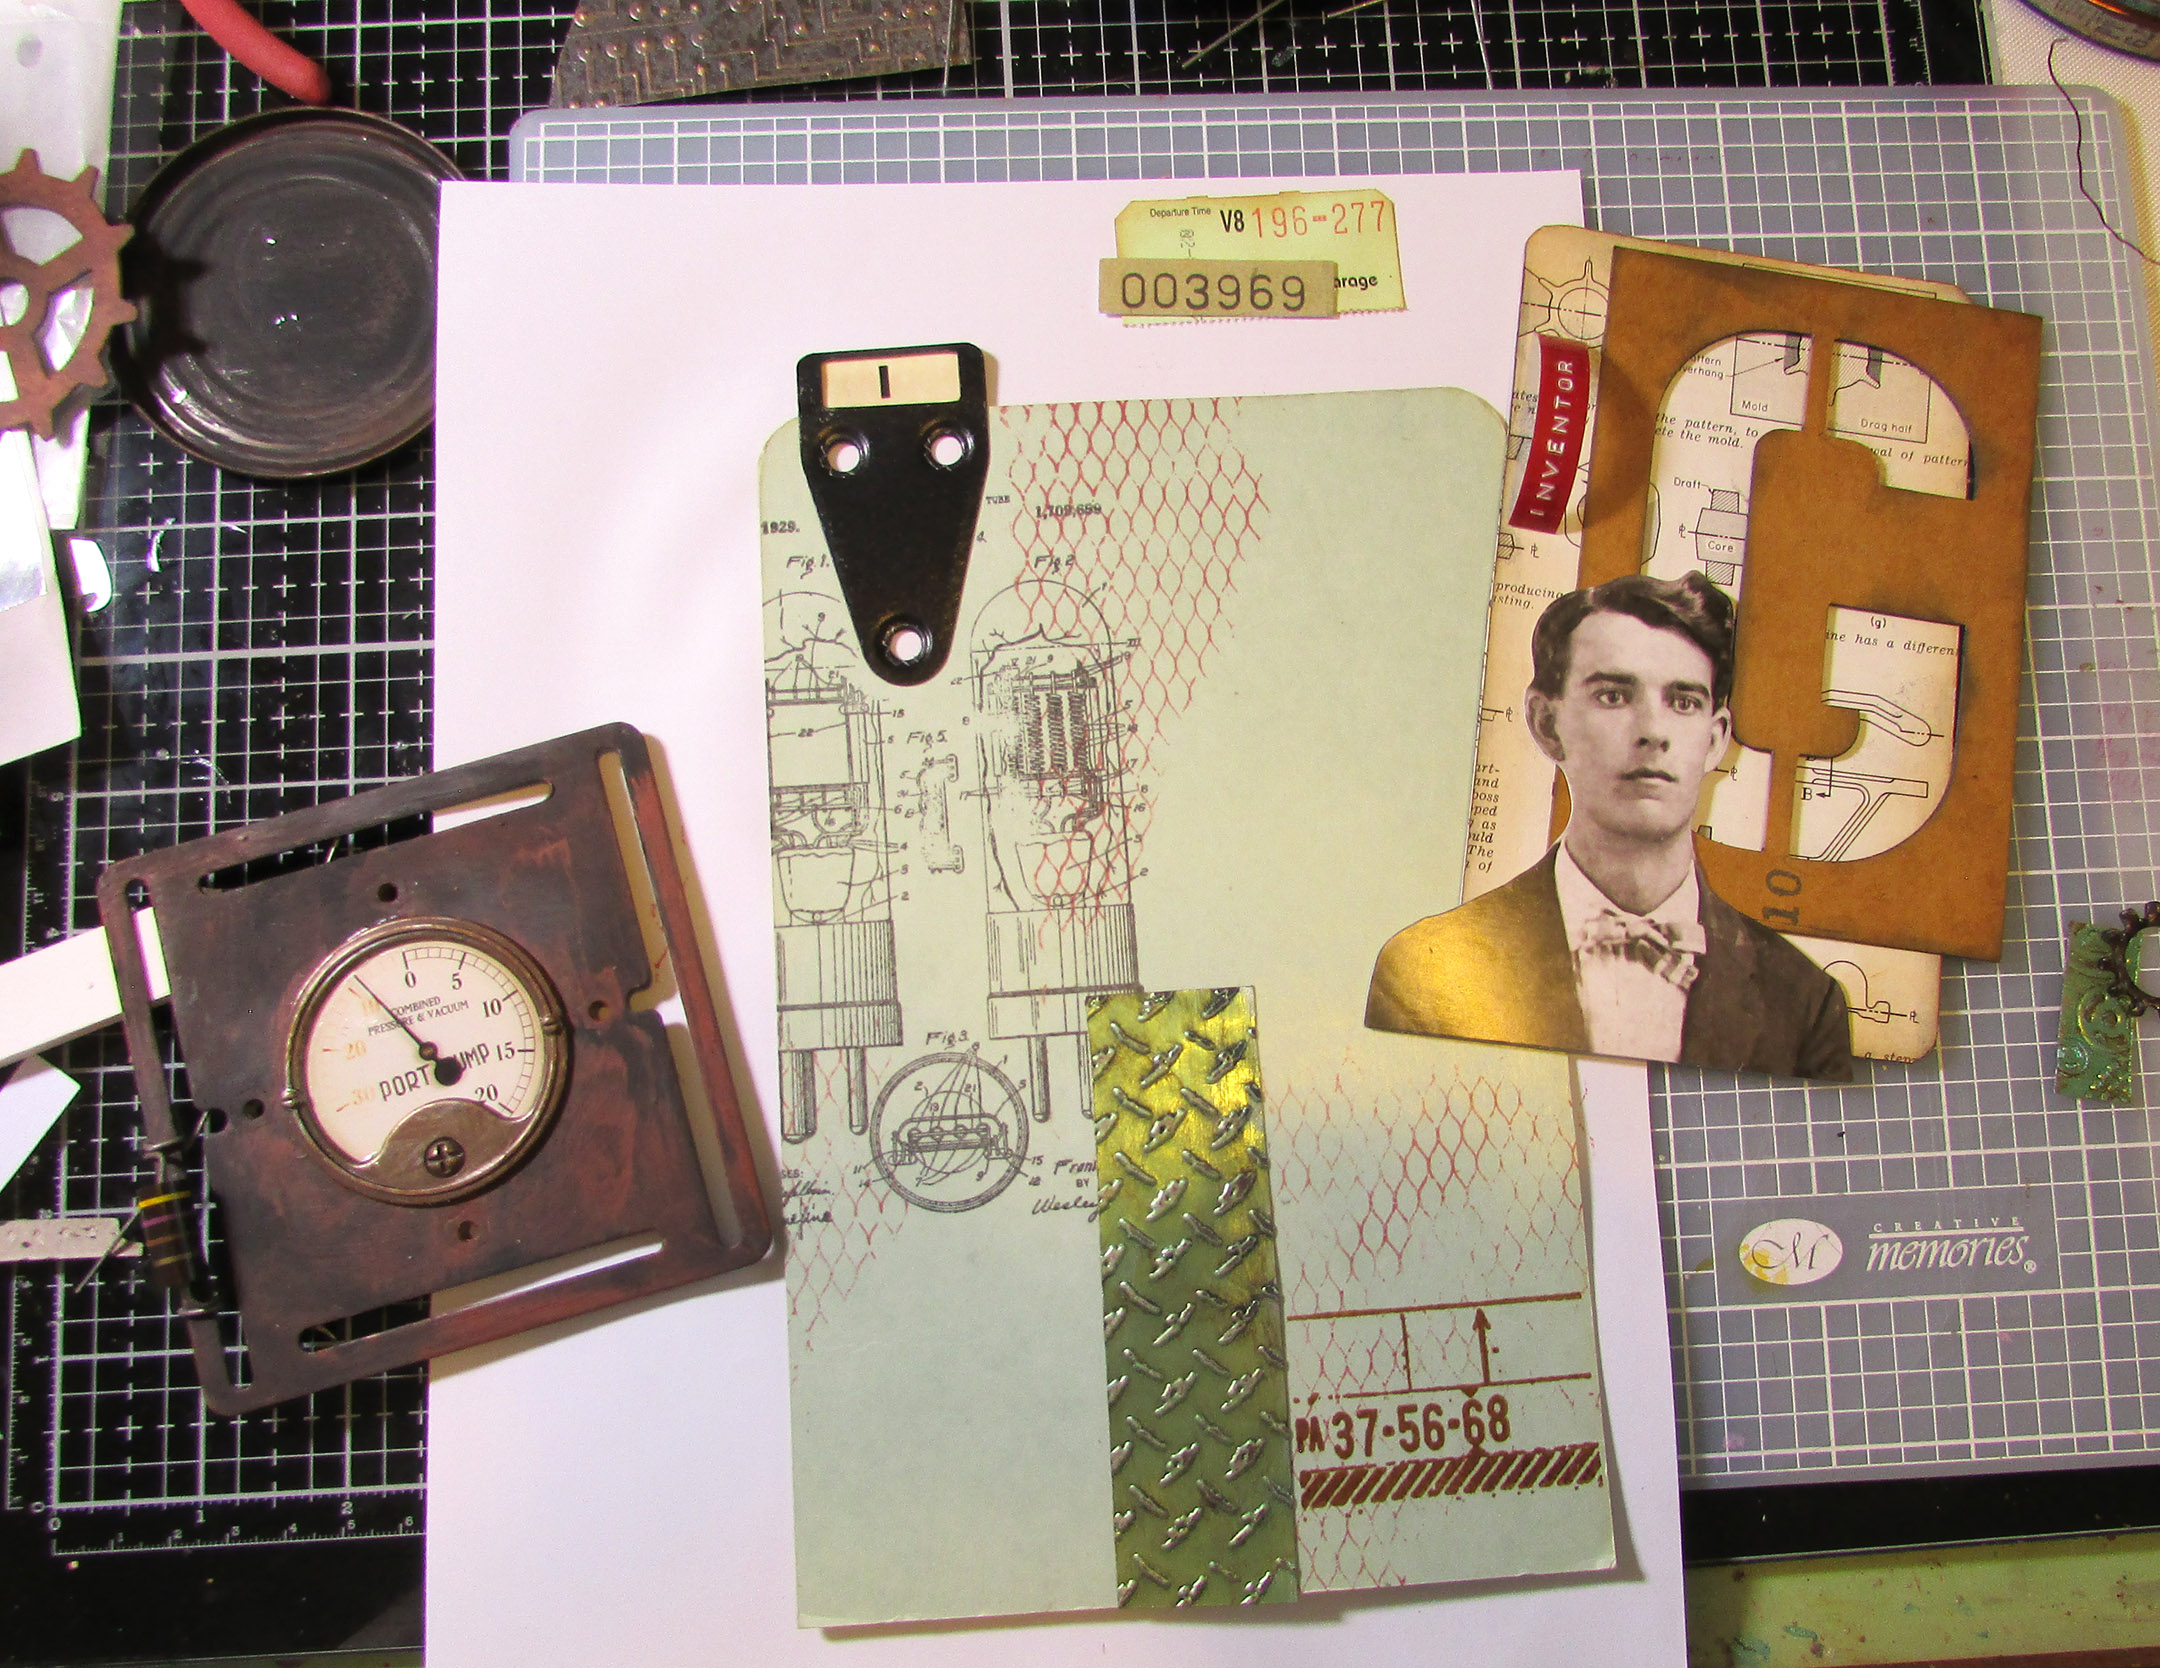
Next step, grungify! I painted the metal parts and the cheese box with black gesso and then "rusty" paint colors. I wrapped the edges with Tim Holtz Linen Tape and copper wire. I also cut a slot for the card to fit into and a hole for the light bulb assembly.


I added lots of layers – stamping in the background, scraps from other projects. I love how the round Idea-ology Gauge Dial fit perfectly into to metal bit from my stash!


Thanks for stopping by! I hope you check out the fun challenges we have on the Funkie Junkie Boutique Blog. They are always good for sparking your creativity! You have two weeks to join the current challenge so I hope you give it a go.

Supplies used:
Tim Holtz die set - Abstract Faces
Tim Holtz die set - Bold Text #1
Tim Holtz stamp sets - Mesh & Linen, Inventor 7, Glitch 2

Distress Ink - Vintage Photo, Black Soot
Ranger Archival Inks - Crackling Campfire, Black Soot
label maker

Tim Holtz Idea-ology: 
Ephemera Gauge Dials
Gauge Dials (metal)
Ephemera Snippets Number Strips
Ephemera Snippets Curator


Wednesday, March 23, 2022

Industrial Grunge Challenge on The Funkie Junkie Blog

Hello. It's time for another new challenge over on the Funkie Junkie Challenge Blog! This time the theme is "Industrial Grunge" so pull out all the gears and metal bits.

Lisa Hoel for The Funkie Junkie - Industrial Challenge #creativejuicefreshsqueezed #tim_holtz #sizzix #mymakingstory #thefunkiejunkie #thefunkiejunkieboutique #frillyandfunkie

I wanted to combine spring and industrial so I came up with this "mechanized" garden piece. 

Lisa Hoel for The Funkie Junkie - Industrial Challenge #creativejuicefreshsqueezed #tim_holtz #sizzix #mymakingstory #thefunkiejunkie #thefunkiejunkieboutique #frillyandfunkie

The base is a Thickboards tag from Tim Holtz. These super sturdy tags are so fun to create with! 

Lisa Hoel for The Funkie Junkie - Industrial Challenge #creativejuicefreshsqueezed #tim_holtz #sizzix #mymakingstory #thefunkiejunkie #thefunkiejunkieboutique #frillyandfunkie

I also wanted to play with my new Saltwater Taffy Distress products so they are a major part of the color scheme.

Lisa Hoel for The Funkie Junkie - Industrial Challenge #creativejuicefreshsqueezed #tim_holtz #sizzix #mymakingstory #thefunkiejunkie #thefunkiejunkieboutique #frillyandfunkie

The garden is filled with a combination of metal bits (like the painted flowers) and die cut bugs and foliage. Some parts I embossed with "industrial" folders like Circuit, Mini Mechanics, and Mini Foundry.

Here's a peek at some the the in-progress steps and tips:

1) First I made a bunch of tag backgrounds to choose from with Distress Spray Stains.


2) I also made a variety of backgrounds from Distress Kraft Metallic cardstock and alcohol inks to die cut elements from.


3) Broke out my Colorize Woodgrain Die Set to make the strip on the bottom of the tag. Sometimes it's hard to visualize how the colorize dies go together and what layer is what color. In those cases I'll make a practice one to keep with the dies for future reference. Here's how it looked for this set:

All the pieces cut out.

Assembled! It helps to have ones to look at 'in person'.

I knew I wanted to have a layer of the plank be embossed with the Circuit embossing folder and making the practice ones helped me decide which plank design and which layer would work best.

Here are the layers of the plank I ended up using in the project.


4) Backgrounds in place on the tag. I stamped and stenciled to add visual interest.


5) I also embossed the background. I used the Code stencil with Transparent Gloss Texture Paste. While still wet, I sprinkled the paste with Rusty Hinge and Saltwater Taffy Glaze embossing powder. Once the paste dried, I heat embossed the powder. It adds great texture!


6) You can buy various Thickboard Trims to go with the Etc Thickboard tags. I used some to make a ledge to build my garden on. There is a die set, Decorative Trims, which makes it super easy to cut paper to cover the raw Thickboard Trim pieces. I've also used the die set to just cut paper for use in card making. It's pretty handy!


Thanks for stopping by! I hope you check out the fun challenges we have on the Funkie Junkie Boutique Blog. They are always good for sparking your creativity! You have two weeks to join the current challenge so I hope you give it a go.

Supplies used:
Tim Holtz die set - Woodgrain Colorize
Tim Holtz die set - Funky Insects
Tim Holtz die set - Decorative Trims
Tim Holtz die set - Funky Foliage
Tim Holtz die set - Funky Floral, Large
Tim Holtz 3-D Embossing Folders - Circuit, Mini Mechanics, Mini Foundry
Tim Holtz Stamp Sets - The Professor, Halftone & Rings, Purveyor, Inventor 2
Tim Holtz layering stencil - Code
Prima stencil - Machinery

Ranger Alcohol Ink

Prima Mechanicals - Metal Blooms
Tim Holtz Type Chips
Tim Holtz Machinery Heads, Hardware Heads

Distress Paint - Fossilized Amber, Saltwater Taffy
Distress Stain - Saltwater Taffy, Vintage Photo, Aged Mahogany, Brushed Corduroy
Distress Oxide Stain - Saltwater Taffy
Distress Glaze - Rusty Hinge, Saltwater Taffy
Ranger Texture Paste - Transparent Gloss


Some links in this post are affiliate links which do not affect the price you pay but allow me to earn a small percentage of a sale. Thanks! (My husband also thanks you!)