Wednesday, April 6, 2022

Bloom with the Funkie Junkie Challenge

Hello there! It's time for another new challenge over on the Funkie Junkie Challenge Blog! Our hostess is Janna Ketchum and the theme is "April Showers Bring May Flowers".

Janna - Spring has sprung and flowers are blooming. Add flowers to this weeks creation. They can be your main focal point or hiding in the background. Let’s get into the swing of spring with flowers. Happy crafting!

This was the perfect opportunity for me to make a card for my friend's birthday next week.

Lisa Hoel for The Funkie Junkie Challenge - Flowers!  #creativejuicefreshsqueezed #tim_holtz #sizzix #mymakingstory #thefunkiejunkie #thefunkiejunkieboutique #frillyandfunkie

There are lots of layers, textures, and of course, flowers! I don't have a tutorial for this but I did take an "in process" photo of the background since it ended up mostly covered.


I applied Matte Texture Paste through the stencil onto some canvas type substrate I had in my stash. While the paste was wet, I sprinkled on some Distress Glaze here and there to add some color and texture. (I embossed it when paste was all dry.) After embossing, I spritzed it with Distress Spray Stains and plenty of water so it would all blend and pool around the pasted parts. Fun!


Hot tips on the part I embossed with the 3D Quilted folder:
1. It's super cool and I love that folder! After embossing, I used a Distress Blending Brush with ink to darken the raised areas (stitching) to make the details pop out.
2. I wanted to make it look more like leather. A little bit of Distress Micro Glaze buffed over the inked panel gave it a subtle shine that looks great!

Thanks for stopping by! I hope you check out the fun challenges we have on the Funkie Junkie Boutique Blog. They are always good for sparking your creativity! You have two weeks to join the current challenge so I hope you give it a go.

Supplies used:
Tim Holtz die set - Bold Text #1
Tim Holtz die set - Funky Foliage
Tim Holtz die set - Funky Floral, Large
Tim Holtz 3-D Embossing Folders - Quilted
Prima stencil - Bindweed Wallpaper
Tim Holtz Hex Fasteners

Distress Stain - Saltwater Taffy, Vintage Photo, Frayed Burlap, Brushed Corduroy, Old paper, Iced Spruce, Antique Linen
Distress Oxide Stain - Bundled Sage
Distress Glaze - Tattered Rose, Saltwater Taffy
Ranger Texture Paste - matte opaque


Monday, April 4, 2022

Sizzix Chapter 2 Release Party & Hop!


Welcome to the Sizzix Chapter 2 Release Party of Eileen Hull's newest dies. We are celebrating with a Live party and this Blog Hop! Eileen's Teams have been hard at work creating with Eileen's new products and have quite a lineup of inspiration for you. Here is what Eileen has to say,

Notice something different? There are no ScoreBoards dies in this collection! This Release includes two Shadowbox Frames Thinlits sets that also include some decorative flowers and shapes. The pieces may be used interchangeably to create square and rectangular frames. The Shadowbox Elements Thinlits set contains more decorative pieces to embellish your fames with but they may also be used on cards, tags and journals! Topping it off is the Crochet Mandala 3D Embossing Folder that you will just have to have- the detail is absolutely incredible!

This set of dies is very versatile since all of the components coordinate and work together so you can create endless combinations of projects in multiple sizes and shapes. The embossing folder creates a beautiful background for all of the scenes you might want to make, in addition to all the other uses you will find for it.

Thanks for being open to new ways of creating!

The new dies:

So many possibilities!

There is a give away too! Comment on each participating designer's blog and during the live on Tuesday and let us know what you would create with these dies and you will be entered to win one of the items in the Chapter 2 release!

I created a card and a Shadowbox frame to share with you!

The Shadow Box Elements set is great for cards too – and
the Crochet Mandala 3D folder is fab!

Use the Shadowbox Dies as photo frames!

LIST OF HOP STOPS:

Eileen Hull Designs 
Pam Bray
Maggi Harding
Jennie Atkinson
Lisa Hoel << you are here
Karen Bearse
Tonya Trantham
Sue Eldred
Elizabeth Robinson
Jenny Marples
Madeline Arendt

Don't miss the Sizzix Chapter 2 Release Party on Tuesday, April 5th at 12pm EST!

Find the live Sizzix Chapter 2 Release Party on Eileen's YouTube channel or her FaceBook page! It will be streaming concurrently on both platforms. Eileen will be joined by several of the designers from her Teams so it will be a fun time!

Thursday, March 31, 2022

Felt, Fibers and Fabric Journal Cover

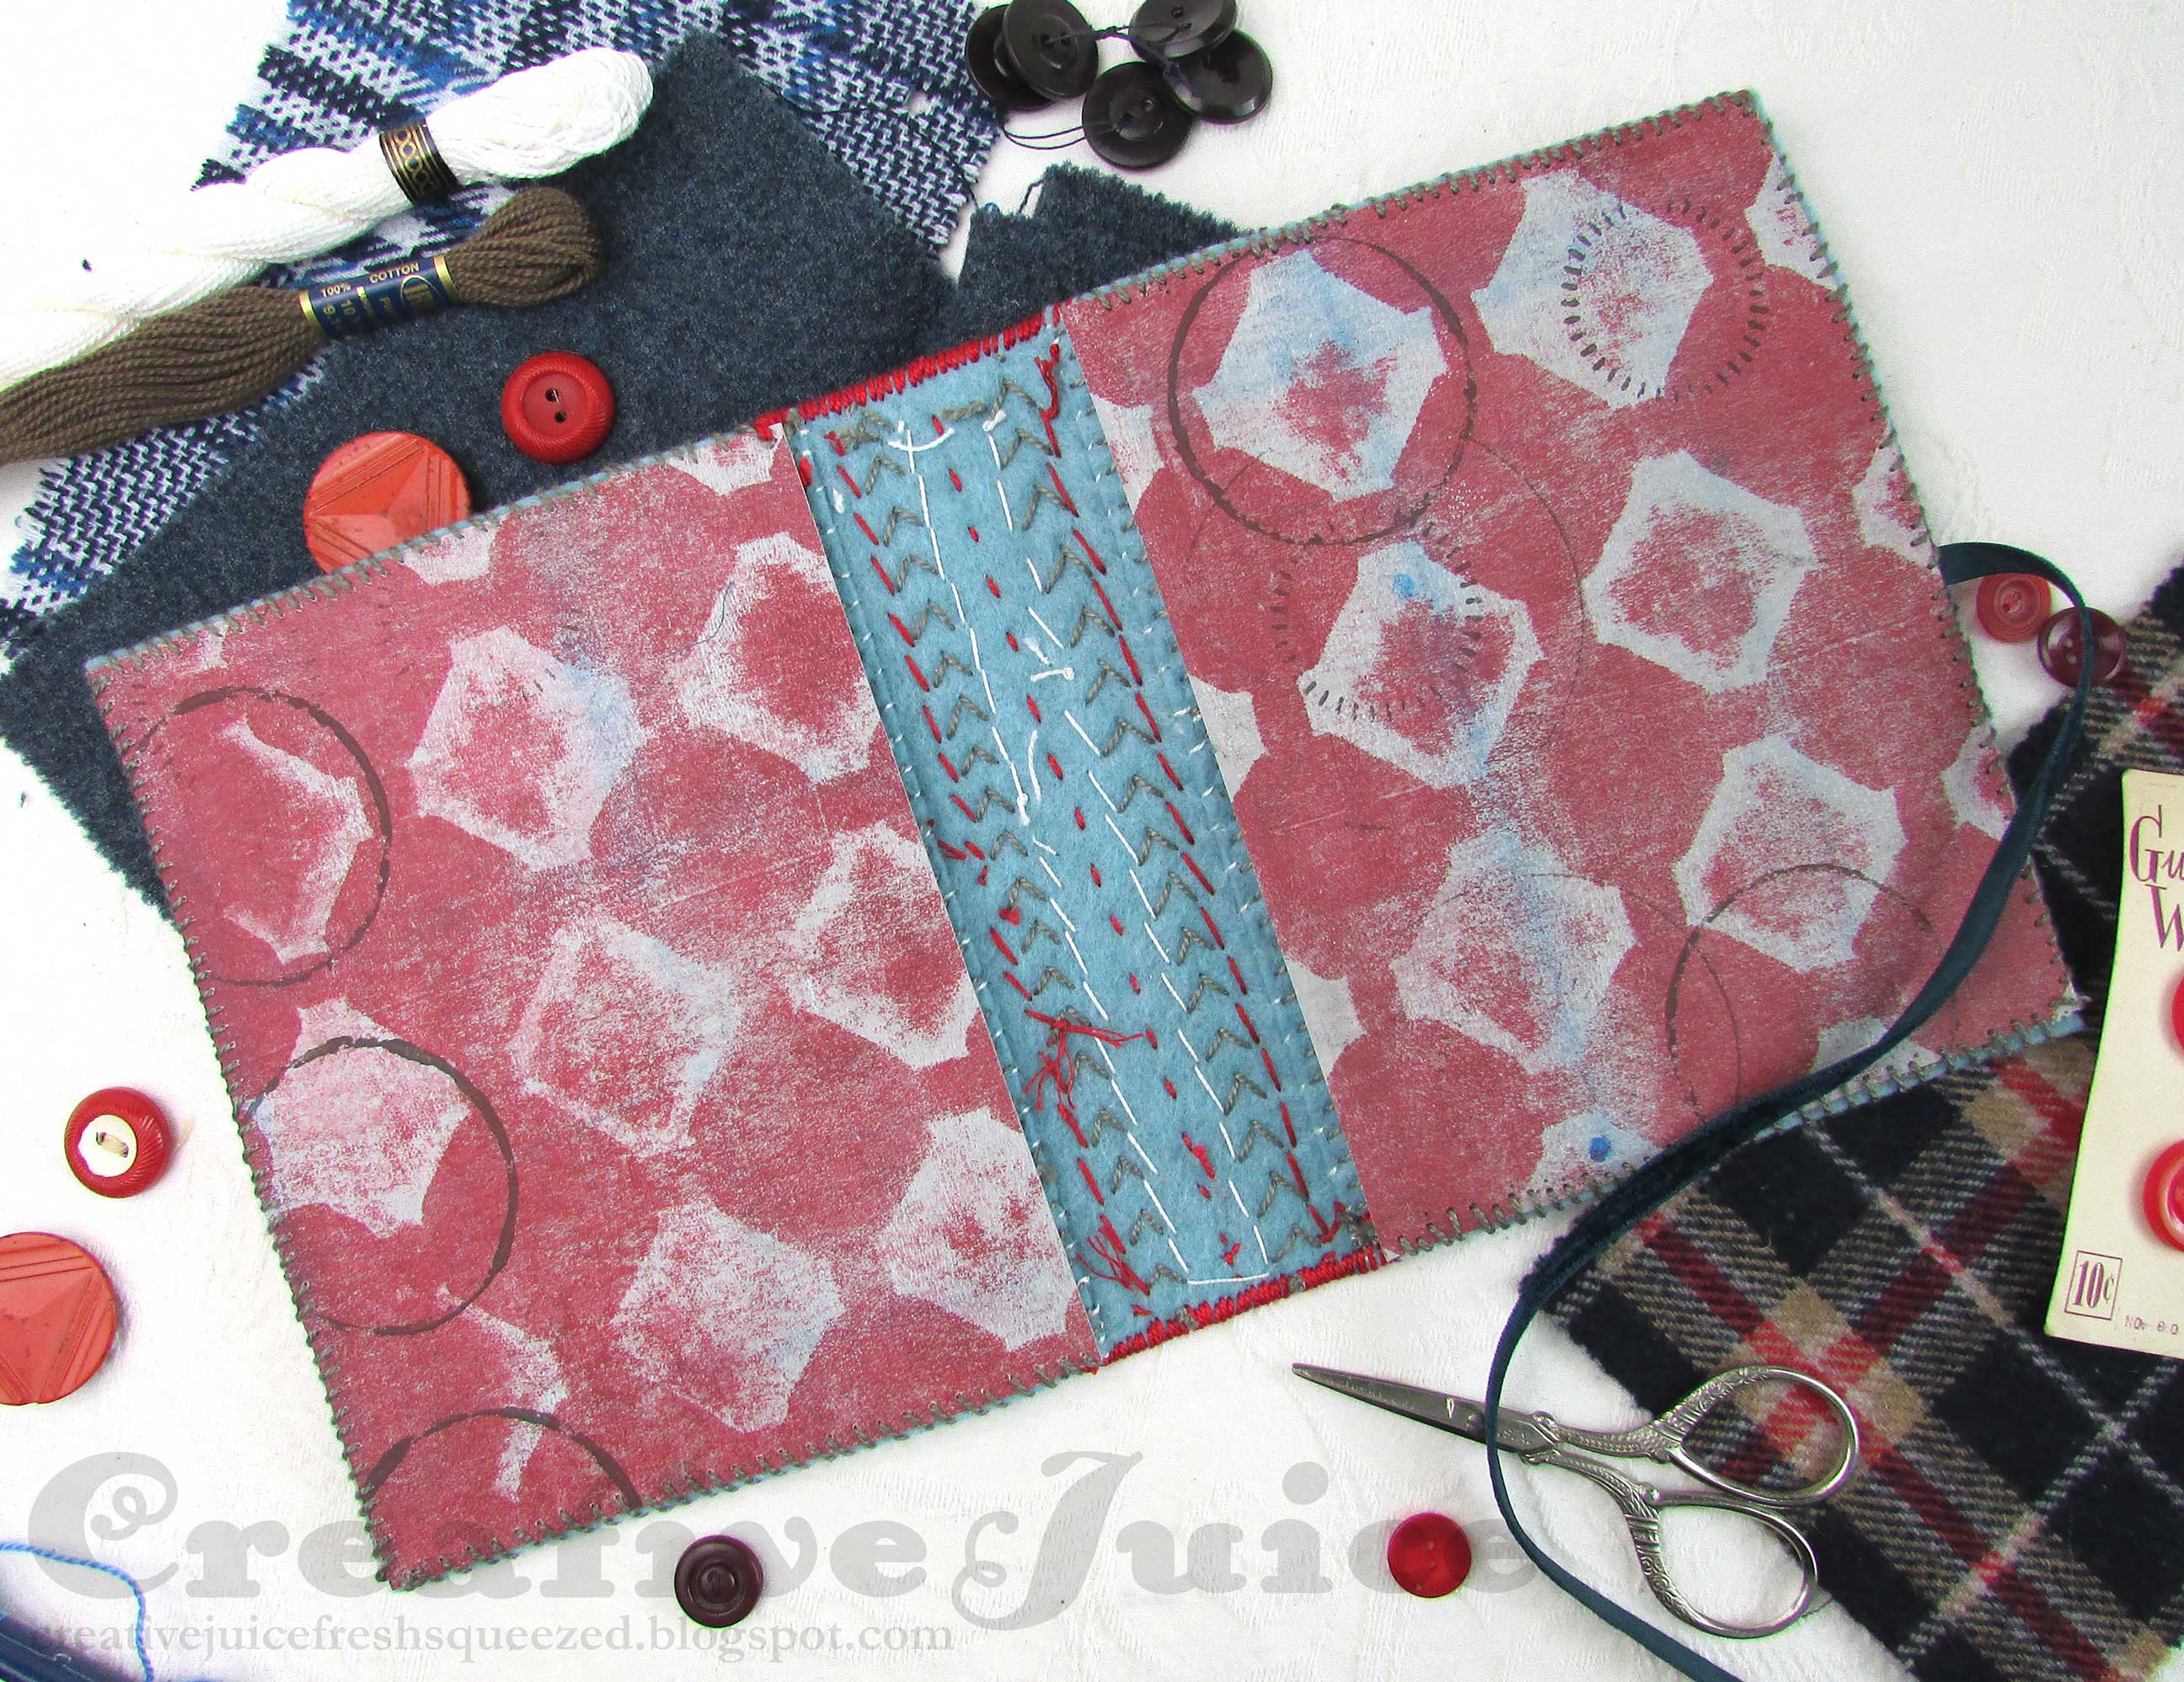
All during the month of March Eileen Hull's design teams have been playing with using felt, fibers and fabric with her dies to create projects to inspire you! Here I am finally at the very end of March with my contribution. I used the Book Box Die to make a journal cover. The die cut easily through thick felt to form the base and I appliqued wool shapes to it.

Lisa Hoel for Eileen Hull - Felt, Fibers and Fabric during March! An appliqued & embroidered felt journal cover #creativejuicefreshsqueezed #EileenHull  #eileenhulldesigns  #sizzix #mymakingstory #TeamEileen

I embellished the cover with LOTS of embroidery! I had fun exploring a stitchery book from Sue Spargo that I had received for Christmas. I tried many new stitches.

Lisa Hoel for Eileen Hull - Felt, Fibers and Fabric during March! An appliqued & embroidered felt journal cover #creativejuicefreshsqueezed #EileenHull  #eileenhulldesigns  #sizzix #mymakingstory #TeamEileen

So far this is only the cover so it's officially a work in progress. Hopefully the WIP doesn't become a UFO and I get it finished sooner rather than later!

Lisa Hoel for Eileen Hull - Felt, Fibers and Fabric during March! An appliqued & embroidered felt journal cover #creativejuicefreshsqueezed #EileenHull  #eileenhulldesigns  #sizzix #mymakingstory #TeamEileen

Lisa Hoel for Eileen Hull - Felt, Fibers and Fabric during March! An appliqued & embroidered felt journal cover #creativejuicefreshsqueezed #EileenHull  #eileenhulldesigns  #sizzix #mymakingstory #TeamEileen

I lined the inside covers with grey Sizzix Texture Roll that I had printed on with my Gel Press. 

Lisa Hoel for Eileen Hull - Felt, Fibers and Fabric during March! An appliqued & embroidered felt journal cover #creativejuicefreshsqueezed #EileenHull  #eileenhulldesigns  #sizzix #mymakingstory #TeamEileen

When I make the insides I'll add a piece of mat board for the spine and bind the pages to it.

Let's take a look at some of the how-to…

Step 1 - I cut the base pieces out of a thick felt and played around with circle shapes until I was happy with the pattern. I also chose the wool plaid fabrics I thought would work together.


Step 2 - I ironed Pellon Fusible Featherweight Interfacing onto the backs of the wool fabric before I cut out the circle shapes. It helped to stabilize the fabric and keep the edges from fraying.


Step 3 - It's so much fun to pick fabrics. =)


Step 4 - I basted the sections in place to keep them all sorted and where they were supposed to be. Then the real fun began and got stitching!


Step 5 - Fast forward…


After many long happy hours of embroidery I had completed the stitching and was ready to assemble the cover.

Step 6 - On the inside of the cover I whip stitched the edges of the spine piece to the front and back covers (there is about a quarter inch of overlap). This was to help reinforce the join and hold it in place while I sewed the "fancy" stitches from the front.


Step 7 - I stitched along the edges of the spine part with a blanket stitch for decoration and to further join the cover pieces together. The last step was to stitch the Texture Roll pieces into the inside covers. I whip stitched them into place which also finished off the edges nicely.


Thanks for stopping by! Hopefully I'll be back soonish with the interior done. ;-)

Supplies used:
Eileen Hull Book Box Die - ( Sizzix / SB )
Sizzix Die - Circle 3" Fraction 1/2 - retired
Sizzix Die - Circle 3" Fraction 1/4 - retired

Sizzix Surfacez Texture Roll, Grey
various wool plaid fabric scraps
vintage button
various embroidery floss/fibers
lightweight fusible interfacing
ribbon

Some links in this post are affiliate links which do not affect the price you pay but allow me to earn a small percentage of a sale. Thanks! (My husband also thanks you!)


Monday, March 28, 2022

It's the Topflight Stamps 5th Birthday Blog Hop!

HAPPY BIRTHDAY TOPFLIGHT STAMPS!!

 It's Topflight Stamps 5th birthday and to celebrate, I’ve teamed up with some great designers to showcase celebratory projects using the unique products available at Topflight Stamps. Please hop along with us and see all the beautiful talent from this group of amazing designers! You should have arrived here from Charmaine Canham's blog. If not, no worries, catch the details below.

My card was created with some mixed media fun! I used the AALL & Create 'Tre Fiori' stencil as a mask and spritzed Mulberry and Cherry Pie Prism Glimmer Mist over the top. (Love the fab shine it gives to projects!) Once the first layer was dry, I placed the stencil on another piece of paper and spritzed it all over with Aqua Green Glimmer Mist. I carefully picked it up from the paper, flipped the stencil over and placed it slightly offset from the white masked area on the card base. Taking a paper towel, I placed the towel over it all and gently pressed to transfer the Aqua Green ink from the stencil to the paper, creating a monoprint! It's a simple but fun technique. The sentiment is from a really useful stamp set from Heffy Doodle – the Everyday Sentiment Duos.

Now Hop To It!

Follow along here and if you get lost you can always start at the Topflight Stamps Blog.
Lisa Hoel

GIVEAWAY DETAILS
Of course, it wouldn’t be a birthday celebration without prizes! Topflight Stamps is giving one lucky winner a $50 Gift Certificate to the store. But wait, there is more, each stop on the hop has an additional $25 Gift Certificate up for grabs for some lucky commenter. For a chance to win, make sure to visit every stop on the hop and leave a comment by April 3rd. Winners will be announced on the Topflight Stamps blog on April 7th. Good Luck!

NOTE: Due to new tax laws and USPS limitations Topflight Stamps is only able to ship to the US and Canada.

Don't miss the sale going on during the Hop!


Wednesday, March 23, 2022

Industrial Grunge Challenge on The Funkie Junkie Blog

Hello. It's time for another new challenge over on the Funkie Junkie Challenge Blog! This time the theme is "Industrial Grunge" so pull out all the gears and metal bits.

Lisa Hoel for The Funkie Junkie - Industrial Challenge #creativejuicefreshsqueezed #tim_holtz #sizzix #mymakingstory #thefunkiejunkie #thefunkiejunkieboutique #frillyandfunkie

I wanted to combine spring and industrial so I came up with this "mechanized" garden piece. 

Lisa Hoel for The Funkie Junkie - Industrial Challenge #creativejuicefreshsqueezed #tim_holtz #sizzix #mymakingstory #thefunkiejunkie #thefunkiejunkieboutique #frillyandfunkie

The base is a Thickboards tag from Tim Holtz. These super sturdy tags are so fun to create with! 

Lisa Hoel for The Funkie Junkie - Industrial Challenge #creativejuicefreshsqueezed #tim_holtz #sizzix #mymakingstory #thefunkiejunkie #thefunkiejunkieboutique #frillyandfunkie

I also wanted to play with my new Saltwater Taffy Distress products so they are a major part of the color scheme.

Lisa Hoel for The Funkie Junkie - Industrial Challenge #creativejuicefreshsqueezed #tim_holtz #sizzix #mymakingstory #thefunkiejunkie #thefunkiejunkieboutique #frillyandfunkie

The garden is filled with a combination of metal bits (like the painted flowers) and die cut bugs and foliage. Some parts I embossed with "industrial" folders like Circuit, Mini Mechanics, and Mini Foundry.

Here's a peek at some the the in-progress steps and tips:

1) First I made a bunch of tag backgrounds to choose from with Distress Spray Stains.


2) I also made a variety of backgrounds from Distress Kraft Metallic cardstock and alcohol inks to die cut elements from.


3) Broke out my Colorize Woodgrain Die Set to make the strip on the bottom of the tag. Sometimes it's hard to visualize how the colorize dies go together and what layer is what color. In those cases I'll make a practice one to keep with the dies for future reference. Here's how it looked for this set:

All the pieces cut out.

Assembled! It helps to have ones to look at 'in person'.

I knew I wanted to have a layer of the plank be embossed with the Circuit embossing folder and making the practice ones helped me decide which plank design and which layer would work best.

Here are the layers of the plank I ended up using in the project.


4) Backgrounds in place on the tag. I stamped and stenciled to add visual interest.


5) I also embossed the background. I used the Code stencil with Transparent Gloss Texture Paste. While still wet, I sprinkled the paste with Rusty Hinge and Saltwater Taffy Glaze embossing powder. Once the paste dried, I heat embossed the powder. It adds great texture!


6) You can buy various Thickboard Trims to go with the Etc Thickboard tags. I used some to make a ledge to build my garden on. There is a die set, Decorative Trims, which makes it super easy to cut paper to cover the raw Thickboard Trim pieces. I've also used the die set to just cut paper for use in card making. It's pretty handy!


Thanks for stopping by! I hope you check out the fun challenges we have on the Funkie Junkie Boutique Blog. They are always good for sparking your creativity! You have two weeks to join the current challenge so I hope you give it a go.

Supplies used:
Tim Holtz die set - Woodgrain Colorize
Tim Holtz die set - Funky Insects
Tim Holtz die set - Decorative Trims
Tim Holtz die set - Funky Foliage
Tim Holtz die set - Funky Floral, Large
Tim Holtz 3-D Embossing Folders - Circuit, Mini Mechanics, Mini Foundry
Tim Holtz Stamp Sets - The Professor, Halftone & Rings, Purveyor, Inventor 2
Tim Holtz layering stencil - Code
Prima stencil - Machinery

Ranger Alcohol Ink

Prima Mechanicals - Metal Blooms
Tim Holtz Type Chips
Tim Holtz Machinery Heads, Hardware Heads

Distress Paint - Fossilized Amber, Saltwater Taffy
Distress Stain - Saltwater Taffy, Vintage Photo, Aged Mahogany, Brushed Corduroy
Distress Oxide Stain - Saltwater Taffy
Distress Glaze - Rusty Hinge, Saltwater Taffy
Ranger Texture Paste - Transparent Gloss


Some links in this post are affiliate links which do not affect the price you pay but allow me to earn a small percentage of a sale. Thanks! (My husband also thanks you!) 

Saturday, March 12, 2022

Saturday Showcase Over on the Funkie Junkie Blog!

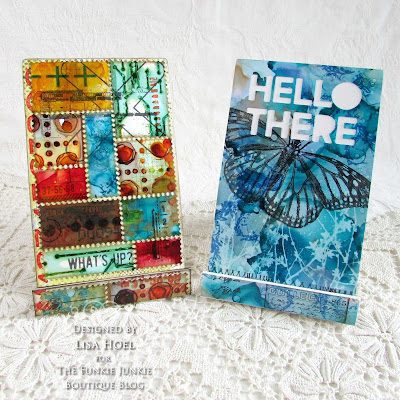
Hello, today you can find a tutorial post for these phone stands over on The Funkie Junkie Boutique blog! For our current challenge, "A Blustery Day", you are supposed to focus on a technique, supplies, etc. that you find challenging. I chose to focus on Alcohol Inks for my challenge and I'm continuing that theme for the Saturday Showcase! I used the alcohol ink backgrounds I created to decorate two phone stands made with Eileen Hull's new Phone Stand Die.

Lisa Hoel for The Funkie Junkie Blog challenge – alcohol ink Phone Stands made using Eileen Hull's Phone Stand Die #creativejuicefreshsqueezed #tim_holtz #sizzix #mymakingstory #thefunkiejunkie #thefunkiejunkieboutique #frillyandfunkie

Lisa Hoel for The Funkie Junkie Blog challenge – alcohol ink Phone Stands made using Eileen Hull's Phone Stand Die #creativejuicefreshsqueezed #tim_holtz #sizzix #mymakingstory #thefunkiejunkie #thefunkiejunkieboutique #frillyandfunkie
These stands are so quick to make and are great for gifts!


Head on over to the blog to check it out and see all the details. Have a great weekend!


Wednesday, March 9, 2022

The Funkie Junkie - "It's a Blustery Day" Challenge

Hello there – we have a new challenge beginning today. Our hostess is Suzanne Czosek this time around and this is what she has to say about it:

"I am inspired by Pooh Bear's quote from A. A. Milne of "It's a rather blustery day." Pooh Bear struggled against the windy day and you can share something you struggle with in your art! It can be a technique, color palette, tools, or supplies that you find difficult to use. Share them with us along with your story on what you struggle with! I can't wait to see your blustery day!"

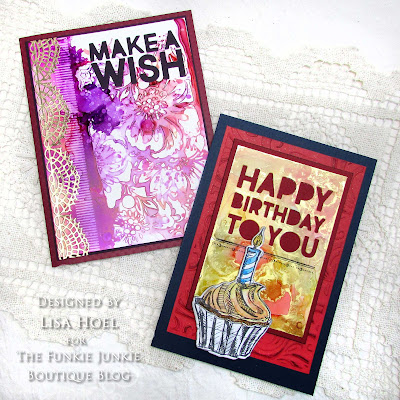
Lisa Hoel for The Funkie Junkie Blog challenge #creativejuicefreshsqueezed #tim_holtz #sizzix #mymakingstory #thefunkiejunkie #thefunkiejunkieboutique #frillyandfunkie – alcohol ink birthday cards

For my project, I chose to go down an alcohol ink rabbit hole. I've always had trouble getting into using the medium and found it a bit intimidating. So this was a great challenge to just read up on it, jump in and play! I started off by watching again some of Tim Holtz's educational videos (soooo informative!). You can find two here and here. Then I got out all my supplies and played around. I used Yupo cardstock for my substrate. Yupo is a non-porous synthetic paper that is perfect for alcohol ink. I have a list of other supplies used at the bottom of this post but you can browse products here in the Funkie Junkie store.

Here are some photos of the results of my experiments:


LOVING the Alloys

For these backgrounds I used Metallic Kraft Stock for the substrate. I like how they turned out, especially when I used a bit of Snow Cap Mixative with the ink (red ones on lower left and upper right corners). I'm going to try embossing some of these backgrounds - I think they'd look cool!


Here's one technique that Tim shared that I really liked. He showed us how to make prints with stencils.

stencil prints, yeah!


Mist a stencil with isopropyl alcohol and "stick" it down onto the Yupo. Drip various colors of ink onto the stencil/paper. It will wick under the stencil but that is what you want it to do. Let it sit there until all the ink dries underneath the stencil.

Peel off the stencil and you get your first generation print!


You can create several successive prints with the ink left on the front of the stencil. Mist it with more isopropyl alcohol and lay it on a new sheet of Yupo. Let it dry and peel it off. Repeat!

cool backgrounds!!

So there is a little look at my alcohol ink fun. I will have to play around some more. ;-) I'll be on the Funkie Junkie blog this Saturday with more alcohol ink projects! Stay tuned…

Thanks for stopping by! I hope you check out the fun challenges we have on the Funkie Junkie Boutique Blog. They are always good for sparking your creativity! You have two weeks to join the current challenge so I hope you give it a go.

Supplies used:
Tim Holtz die set - Bold Text #1
Tim Holtz die set - Crochet
Tim Holtz Multi Level Embossing Folder - Swirls
Tim Holtz Stamp Set - Ornate Trims
Tim Holtz layering stencils - Bouquet, Doodle Art 2

Ranger Alcohol Ink
Ranger Alcohol Ink Pearls
Ranger Alcohol Ink Alloy
Ranger Alcohol Ink Mixatives
Ranger Lift-Ink
Ranger Archival Ink -  Black Soot
stamping platform
91% Isopropyl rubbing alcohol (from drug store/grocery store)
Yupo cardstock

Some links in this post are affiliate links which do not affect the price you pay but allow me to earn a small percentage of a sale. Thanks! (My husband also thanks you!)