Showing posts with label Rinea foil paper. Show all posts

Tuesday, January 19, 2021

Valentine Cards using Eileen Hull's New Sizzix Dies + Die Hacks!

Hello there! I hope your week is going well so far. I was able to get some crafty work done this weekend and I have some new Valentine cards to share with you. Eileen has three new Chapter 1 Sizzix dies that just got released, the Mandala Thinlits Die, the Folio Page, Pocket & Flowers Thinlits Set, and the Folio Journal XL Die. I used the first two for these valentines:

Lisa Hoel for Eileen Hull - Valentine's Day cards using new Chapter 1 Sizzix dies  #mymakingstory #eileenhull #creativejuicefreshsqueezed #tim_holtz

Here's a closer look:

Lisa Hoel for Eileen Hull - Valentine's Day cards using new Chapter 1 Sizzix dies  #mymakingstory #eileenhull #creativejuicefreshsqueezed #tim_holtz
I cut doilies with the Mandala die out of
Rinea Foil Paper and it really adds some shine!

Lisa Hoel for Eileen Hull - Valentine's Day cards using new Chapter 1 Sizzix dies  #mymakingstory #eileenhull #creativejuicefreshsqueezed #tim_holtz

Scroll on for some tips and tricks I used to create these cards!

Mixed Media Umbrella Man Card:
I've shared this die hack before but it's a good one so I'll share it again. =) You can use fun foam from the craft store and use your dies to make stamps! (This really extends the use of your dies.)

Step 1 - I cut a piece of fun foam and applied adhesive to one side using my Xyron Creative Station Lite. I also cut a piece of plastic packaging waste that would fit my die cut shape to use as the stamp base.

Next I cut out the Mandala Die shape out of the foam. Thinlits dies easily cut the fun foam. I had to use a die pick to poke out all the little parts which was a bit tedious, but this stamp is reusable so I was okay with putting a bit of time into it.


Once the tiny pieces were out, I just peeled off the release sheet and adhered the foam shape to the plastic. Voila! Stamp made.

Step 2 - You can use paint or ink on these foam stamps. I raided my gel plate print stash and found a nice one to use as my card background. I put a little puddle of paint on my craft sheet and used a brayer to apply the paint to the stamp. (Don't use too much paint or you will glop up the tiny openings.)

I had extra paint so I stamped another print I had laying there. I'll save that for another project. To clean the stamp I just wiped it off with a baby wipe.


Step 3 - Die hack #2! Here's another way to get more use out of your dies. I used Eileen's Hearts Journaling Cards Die Set to make a heart stencil. The plastic I use is overhead projector film which is thin enough to cut easily with the Thinlits dies.


I used my custom stencil to add some embossed hearts to the card background. Easy peasy!


Slim Line Hearts Card:

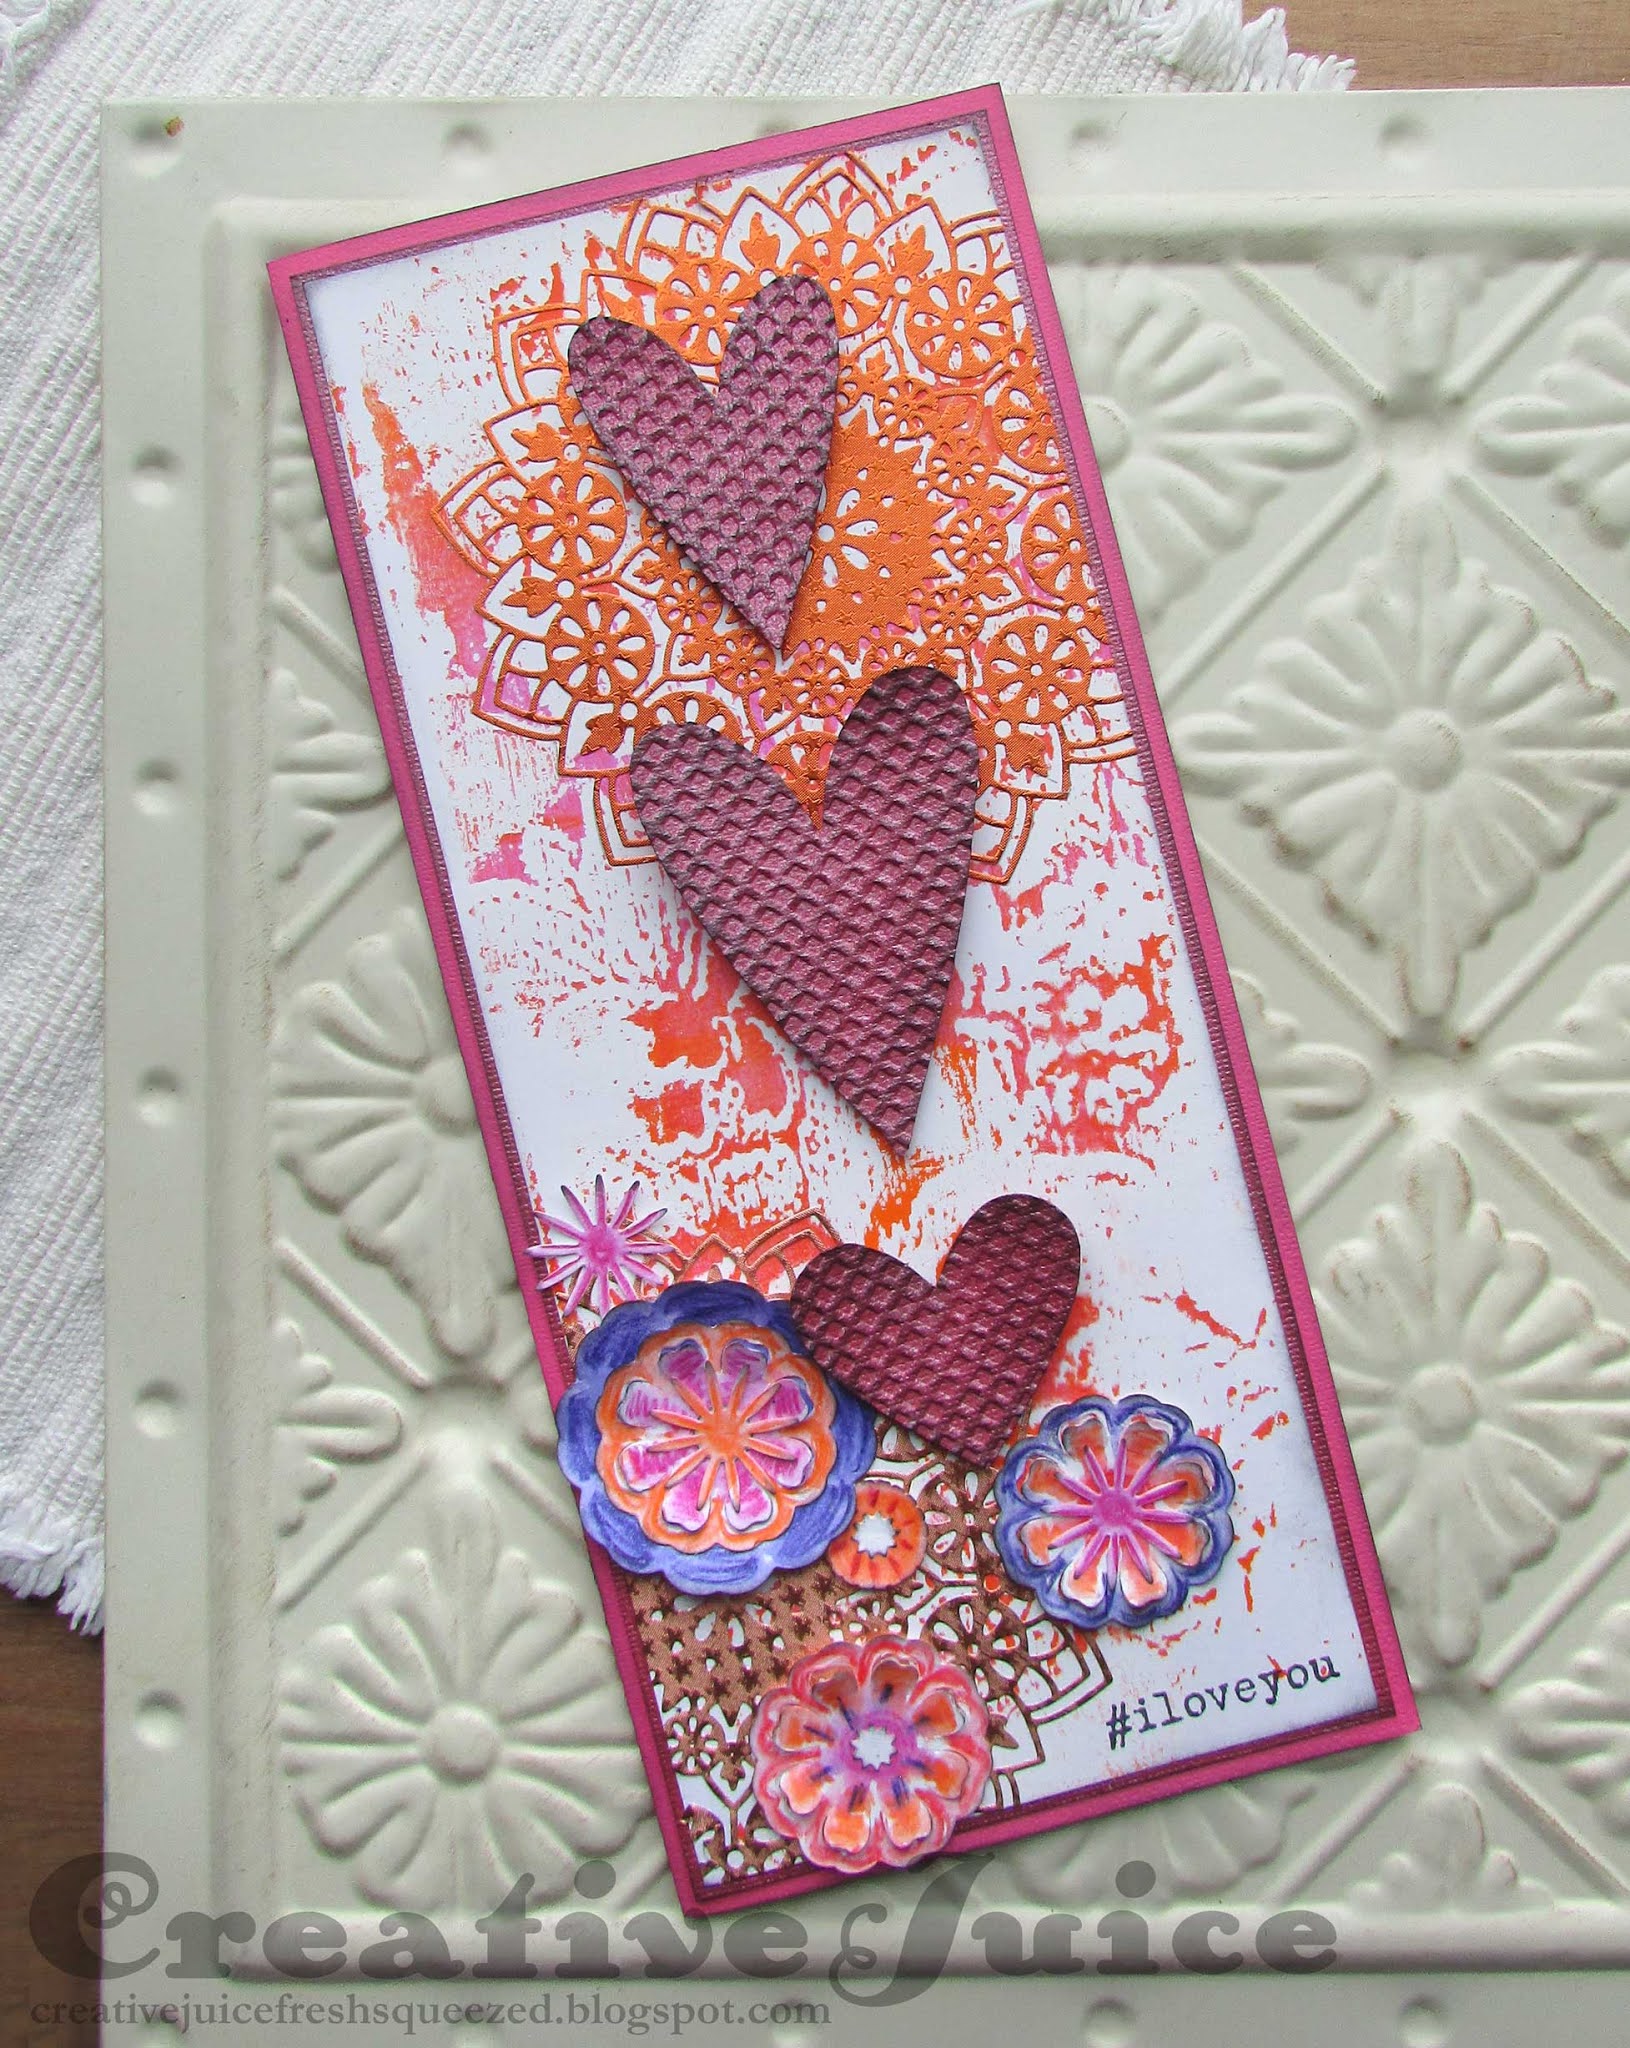
No die hacks for this card but I will say it is very handy to have a stash of gel plate prints on hand to use for backgrounds. The print I chose had some nice pattern in it already so I didn't have to add much. I liked the punchy orange and hot pink colors too.


I cut and dry embossed hearts for the focal point (you must have some hearts on a Valentine card!) I also cut some Mandala Die doilies out of Rinea Foil Paper to add some bling to the background. Rinea Foil Paper is just that, paper that has foil laminated to both sides so it's strong, cuts and folds very easily and can also be bent and formed to shapes. It's fun stuff to work with! (You can see a couple of other projects using it here and here.)


I found it easy to use my Creative Station to apply adhesive to the foil sheets before I cut out the shapes. Once cut, I just peeled off the release sheet and stuck them down onto my card background.

Lisa Hoel for Eileen Hull - Valentine's Day cards using new Chapter 1 Sizzix dies  #mymakingstory #eileenhull #creativejuicefreshsqueezed #tim_holtz


Thanks for stopping by and checking out my post. Be sure to keep an eye on Eileen's blog this month to see all the card ideas the designers will be sharing!
Supplies used:

Dies:
Eileen Hull Sizzix 
Mandala Die  ( Sizzix / SB ) 
Folio Page, Pocket & Flowers ( Sizzix / SB )
Journaling Cards, Hearts #662812 - retired
Sunburst & Waffle embossing folder set - retired

Tim Holtz Sizzix
Heartfelt
Lovestruck
Crochet #2  ( Sizzix / SB )

Other:
Tim Holtz Stamp set - #hashtags, Mesh & Linen, Simple Sayings
Distress Oxide Ink, original Distress Ink
fun foam
Tim Holtz Design Tape
embossing ink
embossing powder


Some links in this post are affiliate links which do not affect the price you pay but allow me to earn a small percentage of a sale. Thanks! (My husband also thanks you!) If you shop at Topflight Stamps, use my coupon code LISAHOEL for 12% off your order.

Thursday, February 20, 2020

Rinea Foil Paper, Steampunk Style

Good evening! I have been having more fun playing around with Rinea Foil Paper and their new 2.0 Ghost Ink. (Lots of fun, trust me on that!) I was experimenting with 'steampunk' styles and ended up making a pair of cards that are perfect for a man's birthday.

I gave one of these to my Dad for his birthday.

I also used Sizzix dies and 3-D embossing folders, stamp sets from Tim Holtz and a Xyron machine to make these cards. Let's take a look:

Step 1 - I used my Xyron Creative Station to apply adhesive to the back of a piece of glossy black Rinea foil paper. Then I used a 3-D embossing folder (Mechanics) to emboss the gear design. (The foil paper embosses beautifully!)


Step 2 – Rinea Ghost Ink is formulated to remove the color from the foil paper to reveal the silver metal base. You can stamp with the Ink pad and in this case I used just the reinker bottle for this technique.


I put a drop of ink on my craft sheet and used a make up wedge sponge to lightly brush it on the raised portions of the embossed foil. It started to take off the color right away. I buffed off the rest of the ink with a paper towel or rag and it really removed the color. Easy peasy!


I tried it with other folders and colors of foil paper.

I ended up not using this one for a card.


These are the two background I used, on brown and black foil. Having the Xyron adhesive on the back made it really easy to attach them to the card base. I layered diecuts and fussy cut stamped images on the top to complete the card. It's a quick and easy technique that looks really cool!

Thanks for stopping by! I hope you have a great weekend. ;-)

Dies:
Tim Holtz Sizzix
3-D Embossing Folder, Mechanics ( Sizzix / SB )
3-D Embossing Folder, Foundry ( Sizzix / SB )
Gearhead ( Sizzix / SB )
Baroque ( Sizzix / SB )


Other:

Rinea Foil Paper - Copper, Black, Brown
Tim Holtz stamp set - Purveyor
Tim Holtz stamp set - Simple Sayings
Archival ink - Jet Black, Carnation

Some links in this post are affiliate links which do not affect the price you pay but allow me to earn a small percentage of a sale. Thanks! (My husband also thanks you!) If you shop at Topflight Stamps, use my coupon code LISAHOEL for 12% off your order.


There is a big sale at Sizzix going on now through the 25th. Use the code GRAS30 for 30% off your order and shipping is free over $65!


Monday, February 10, 2020

Valentine Gift Box with Power Team Eileen Hull, Rinea Foil Paper and Xyron!


Happy Valentine's Day! It is nearly upon us! I made a cute (and quick) gift box that can hold delightful gifts such as – dark chocolate! (My vote.) I suppose you could substitute some other sweet but really, what would the point be? (ha ha, jk)


I used Eileen Hull's new Sizzix Gift Box with Scallop Edges Die for the structure and decked it all out with Rinea Foil Paper and more of Eileen's dies to create a festive and glam little box that you can use for all sorts of lovely gifts (not just dark chocolate.)


I also used my Xyron Creative Station Lite machine to quickly and neatly add adhesive to the back  of all my foil paper. It made this project fast to make! Read on for a quick tutorial.


I used Sizzix Sizzles Matboard for the substrate (two pieces). On one side of each piece, I spritzed on some Candied Apple spray stain. While that was drying, I cut strips of Rinea's Ruby Star Foil Paper to the width of the board and ran it through my Creative Station. The Creative Station makes it so easy to apply adhesive to papers etc. All I had to do then was peel off the backing sheet and adhere the foil paper to the other sides of the matboard pieces. Then I die cut the box parts.

I also cut smaller rectangles of pink foil paper and ran those through the Creative Station too. (Did I mention it was easy?) All I had to do then was use the Hearts Journaling Cards Die to cut the side panels and then stick them on the box sides.


The Rinea Foil Paper is also an excellent choice for using in embossing folders. The Gold Foil in the 3-D Impresslits Embossing folders is especially nice – it looks just like vintage Dresden Scrap! I made box trim using the 3-D Mini Scallop folder.

Hot tip: stamp on the Foil Paper using Staz On ink.

Once again, by using the Xyron machine to put adhesive on the strips of gold foil before embossing, it made it quick and easy to apply to my box afterwards.


The Gift Box is easy to assemble. Fold on the score lines and glue the tabs to the insides of the box. (Except for the top!)


I also embellished the top of the box with a flower with a large brad center. The Rinea Foil Paper is easy to bend into a desired shape and then it stays put! I die cut the flower layers and then shaped the petals.


Thanks for stopping by! I hope the rest of your week is a good one and that you have a chance to get crafty. ;-)

Dies:
Eileen Hull Sizzix
Gift Box with Scallop Edges Die ( Sizzix / SB )
Journaling Cards, Hearts ( Sizzix / SB )
Flower, Heart & Soul - retired
Journaling Words - retired

Tim Holtz Sizzix
3-D Embossing Folder, Mini Scallop ( Sizzix / SB )
Labels ( Sizzix / SB )

Other:
Distress Spray Stain - Candied Apple
Staz On Ink - Jet Black

Some links in this post are affiliate links which do not affect the price you pay but allow me to earn a small percentage of a sale. Thanks! (My husband also thanks you!) If you shop at Topflight Stamps, use my coupon code LISAHOEL for 12% off your order.

Friday, April 26, 2019

FaveCrafts Best Blogger Contest 2019 Runner Up!


Exciting news! Yesterday I found out that my entry for the FaveCrafts Best Blogger Contest 2019 earned a place as a runner up! Thank you to everyone who voted for my project; I really appreciate your support. =) I can show you what my project looks like, but for the tutorial you need to head on over to the FaveCrafts website where you will find the step out instructions complete with photos. Also, many thanks to the generous sponsors of the contest, especially Rinea for providing their gorgeous foiled papers and Xyron, whose adhesives made completing this treasure box SO much easier!


The structure of the box is made with Eileen Hull's new Treasure Box Die. I also used Tim Holtz's 3-D Texture Fade Embossing Folders and 3-D Impresslits.


Thanks for stopping by! Check out the tutorial for this project on the FaveCrafts site. Consider subscribing to FaveCrafts to keep up with all the crafty content they have to offer. I'm still exploring it myself but it is chock full of tutorials, information and inspiration of all kinds for several different craft disciplines (not just paper crafts). Have a great weekend everyone!

Dies:
Eileen Hull Sizzix
Treasure Box ( Sizzix / SB )

Tim Holtz Sizzix
3-D Texture Fade Embossing Folder - Botanical ( Sizzix / SB )
3-D Impresslit Embossing Folder - Mini Scallop ( Sizzix / SB )
3-D Impresslit Embossing Folder - Burst ( Sizzix / SB )
Styled Labels Bigz Die ( Sizzix )

Other:
Rinea Foil Paper
Rinea Ghost Ink
Sizzix mat board
Xyron 3in Sticker Maker
Tim Holtz Idea-ology Foundations Feet
Tim Holtz Idea-ology Curio Knobs
Tim Holtz Ledger Script Stamp Set

Sizzix and Scrapbook.com links in this post are affiliate links which do not affect the price you pay but allow me to earn a small percentage of a sale. Thanks! (My husband also thanks you!)