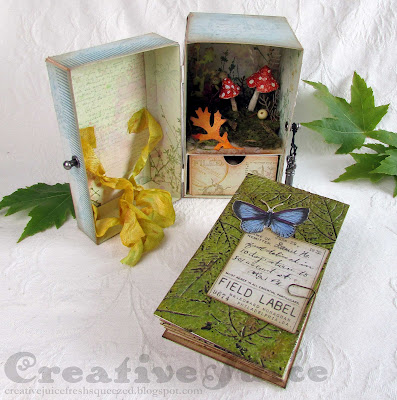
Hello everyone. A new month means a new theme in Eileen Hull blogland. I am so happy it is September and we have a great theme – Nature. In addition, her Teams have been challenged to create journals with dies that aren't officially "journal" dies. Challenge accepted! As usual my project got rather involved so this week is Part 1 of this project. ;-)
 |
| Hmmm, what's inside? |
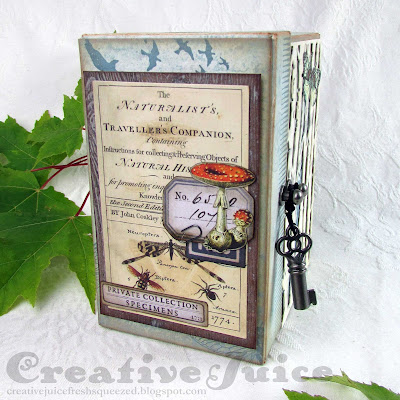
I started off with Eileen's Treasure Box Die for the main structure. (I believe that this die has been discontinued so get it while you can!)
Views around the sides:
What do we see when we open the box?
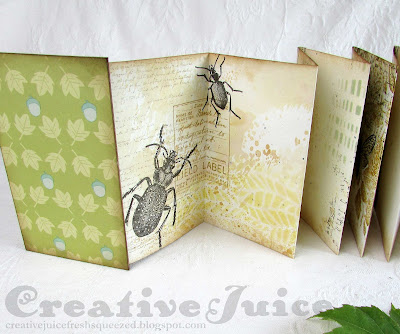
The journal itself is tied into the cover. You'll get to see all the details of that next week in Part 2! On the right is a little nature vignette and a drawer (the Stacking Drawer Die) to hold little bits and "specimens".
 |
| The leaf is paper! (made with the 3-D Impresslits Oak Leaf folder) |
Here is a quick look at some of the "putting it together" steps.
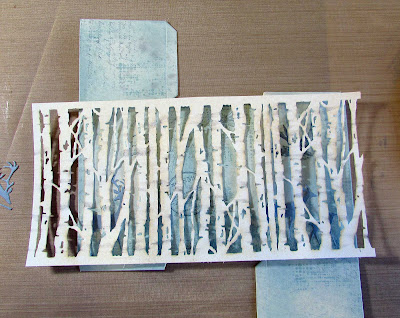
1) All the parts laid out - I colored the 'outside' side of the matboard pieces with Distress Spray Stain in Speckled Egg, Iced Spruce,Tea Dye, Antique Linen and Oxide Speckled Egg and Antique Linen. The 'inside' side was colored with Twisted Citron, Peeled Paint, Antique Linen, Old Paper, Tea Dye and Oxide Antique Linen.
2) I did all the stamping before assembly of course. I find it helps to lay the pieces out as they will be glued together to help me visualize how to add the imagery. I did the same on the reverse, "inside" pieces but forgot to take photos. oops!
I also had to account for where the openings in the birch trees wrap would fall. Lots of fiddling around! (I also did all the "inside" inking and stamping before assembling the box as well.)
3) Once the elements were in place, I assembled the box. (The die cut birch layer was glued in place after I assembled the box base.)
A look at the inside - The drawer has a lesser depth than the box so you can decide where you want to glue it. I moved it all the way forward and then glued an extra piece of mat board over the gap in the back.
4) Glazing the mushrooms - It's easy to change the color of the Tiny Toadstools. I used Crackling Campfire Distress Glaze by coating the mushroom tops with Collage Medium and then sprinkling with the embossing powder. Once the glue was dry, I hit it with the embossing gun to melt the powder. Spots were added afterwards with acrylic paint.

Well, stay tuned for next week to see all the details of the little journal that is part of this make. All will be revealed ha ha. UPDATE: FIND PART 2 HERE!
Thanks for stopping by! Be sure to keep an eye on Eileen's blog for more inspiration from the Educator and Inspiration Teams.
I am also adding this to the current TFJB Challenge, "De-stress with a Little Distressing". I used lots of inked distressing on all the elements of the box to add that shabby chic look.
Supplies used:
3-D Impresslits Folder - Oak Leaf ( Sizzix / SB ) 3-D Embossing Folder - Foliage ( Sizzix / SB )
Other:
Tim Holtz Stamp Sets - Nature Walk, Spring Sprung, Tiny Toadstools, Tree Line, Entomology, Field Notes, Ledger Script, Grunged, Ornate Trims
Distress Collage Medium - Matte
Distress Glaze - Crackling Campfire, Peeled Paint
Tim Holtz Idea-ology: Field Notes Ephemera, Tiny Toadstools, Crinkle Ribbon, Hitch Fasteners, Tiny Clips, key
Ranger Woodgrain Cardstock
Ranger Heavystock - white
a zillion different Ranger inks and Distress Spray Stains
Some links in this post are affiliate links which do not affect the price you pay but allow me to earn a small percentage of a sale. Thanks! (My husband also thanks you!)


