Monday, April 13, 2015
Eileen Hull - New Vintage Travel Collection
Back in January at CHA, Eileen debuted her newest Sizzix collection, Vintage Travel (see my sneak peeks here, here, and here). Very soon now they will be in stores! The theme for the April Art with Heart Challenge is Spring Break and we will be highlighting Vintage Travel projects all month long. Join in the challenge and you can have a chance to win a die from the new collection! Today I'm sharing a project that showcases three of the new Thinlits dies.
I found these vintage Auto Bingo game cards at an estate sale and I just knew I could do something fun with them! I had a very satisfying time combining the diecuts with vintage ephemera, photos and travel themed embellishments. I encourage you to check out the challenge and the eye candy the Inspiration Team has there for you to see. Keep your eyes on Eileen's blog throughout the month because there is more to come!!
Thanks for stopping by and I hope I've inspired you to go get creative. Most of the supplies I used for this project can be found at Inspiration Emporium. Follow the links below and use my code JUICE there to save 10% if you go shopping. I will also point out that US shipping is always $5 and international shipping is just $10. ;-)
Friday, April 10, 2015
Compendium of Curiosities 3 Challenge #25 - Frameworks
We're still trucking on the challenges based on Tim Holtz's book, A Compendium of Curiosities Vol. 3. I can't believe we are up to #25! If this is the first you've heard of them, Linda over at the Studio L3 blog has been hosting all these awesome challenges for the past several months now. This time around the focus is on Frameworks dies as shown on page 64 of the book. Many thanks to Inspiration Emporium for the generous sponsorship of the prize this time. I made a card for my challenge entry:
My father in law's birthday is coming up so I thought this was a perfect opportunity to make a masculine card. The Frameworks dies are really versatile – I like how you can swap out the little cutouts in the center to change up the look. Be sure to head on over the Challenge post and check out the entries and inspiration of the Curiosity Crew. There is lots of eye candy over there!
Thanks for stopping by and I hope I've inspired you to go get creative. Most of the supplies I used for this card can be found at Inspiration Emporium. Follow the links below and use my code JUICE there to save 10% if you go shopping. I will also point out that US shipping is always $5 and international shipping is just $10. ;-)
My father in law's birthday is coming up so I thought this was a perfect opportunity to make a masculine card. The Frameworks dies are really versatile – I like how you can swap out the little cutouts in the center to change up the look. Be sure to head on over the Challenge post and check out the entries and inspiration of the Curiosity Crew. There is lots of eye candy over there!
Thanks for stopping by and I hope I've inspired you to go get creative. Most of the supplies I used for this card can be found at Inspiration Emporium. Follow the links below and use my code JUICE there to save 10% if you go shopping. I will also point out that US shipping is always $5 and international shipping is just $10. ;-)
Saturday, April 4, 2015
Faux Enameled ATCs + Tutorial
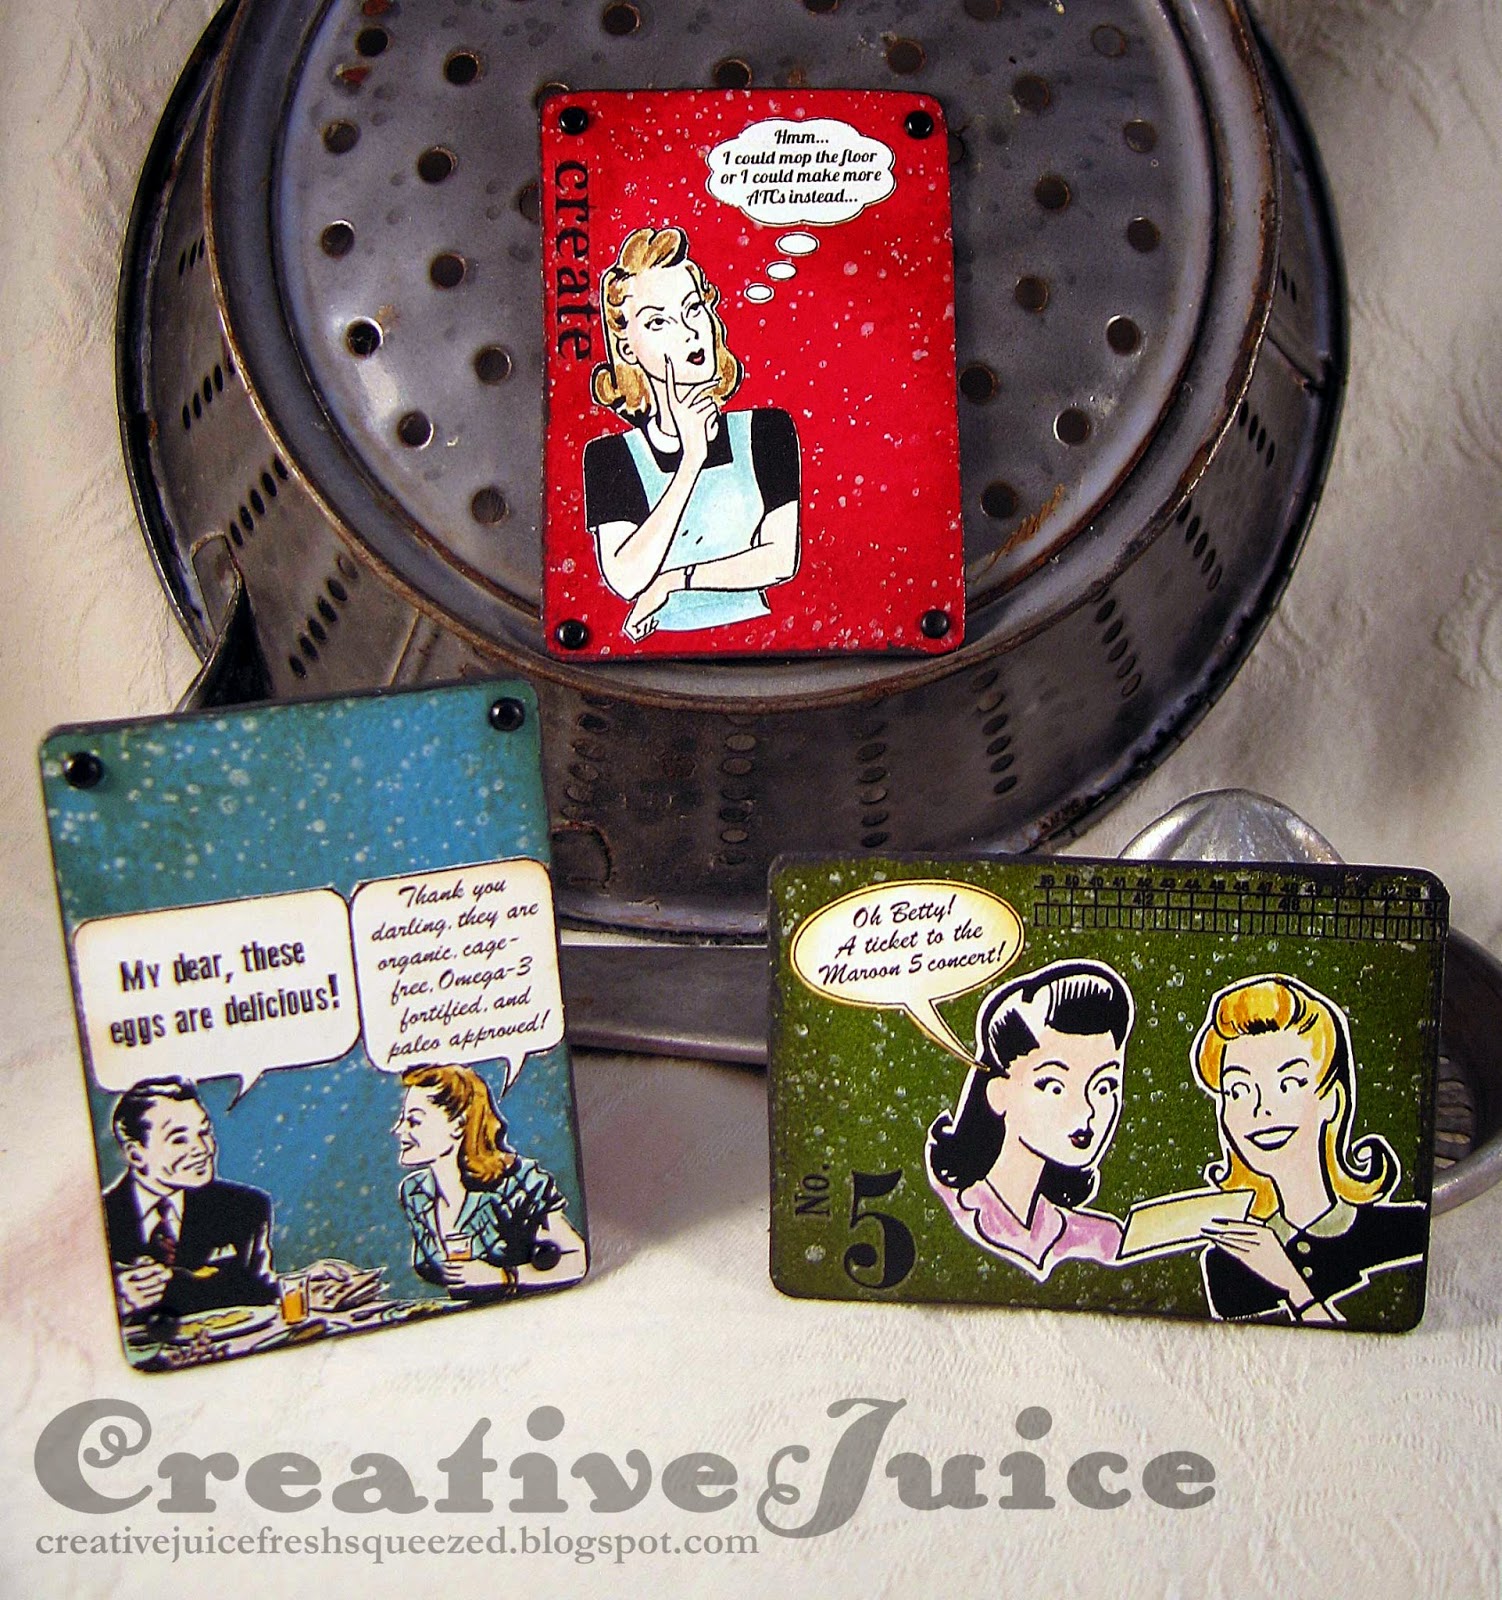
Hello there and happy Easter! I had grand plans for a fan-tabulous Easter project but it hasn't quite happened yet. You may see it yet later in the month though. Better late than never! I have had time to play around with embossing powder and make some really fun ATCs. Ever since Wendy Vecchi shared her faux graniteware technique I've been itching to try it. She is right when she says it's addictive – I think I will be "enameling" all sorts of things! Follow the link above to see her excellent tutorial on how to do it. It works really well, I think these ATC bases look just like real graniteware:
I added some retro graphics downloaded from The Graphics Fairy website and thought of funny quotes for them. Remnant Rubs work really well to add some background graphics.
I was having so much fun making these that I started thinking about what other "enameled" looking surfaces I could create. I've gotten good results with Distress Paints and Glossy Accents (see THIS post) but I wanted to incorporate imagery. After pondering and playing, here is what I came up with:
First I stared off with a sturdy base of white matboard. I put two layers of white embossing powder on it so it would be thick and smooth. Thoroughly rub the cooled surface with an antistatic bag. This is important. (Trust the voice of experience!)
Next I stamped my image with a light color of Archival Ink. You can use embossing ink but it's really hard to see the image when the ink is clear!
Have all your embossing powders lined up and open before you stamp so you are ready to go. I made little scoopers out of drinking straw sections cut at an angle. Scoop up the desired color and carefully tap the straw to sprinkle the powder in the area of the image you want it. Continue with the other colors until the entire image is covered.
Carefully tap off the excess powder into the trash. You can gently brush off stray powder with a small dry paintbrush. Now comes the fun part. Heat your card to melt the colored embossing powder. It will magically meld with your base layer! Watch it carefully and as soon as it melts, move on to the next part of the image. If you overwork it the design will loose crispness and the colored embossing powder will sink too much into the white base layer. A light touch is best!
After embossing it, I carefully blended some Potting Soil Archival Ink around the edges to age it a bit. I also ran a Black Soot Paint dabber around the edges to finish it off and mimic the look that so many vintage enamel objects have. I'm looking forward to experimenting more with this technique. I think it has lots of possibilities!
Note: The rooster stamp is from a Basic Grey set from 2007, labeled Different Strokes. You may be able to find it on eBay or other such place.
Thanks for stopping by and I hope I've inspired you to go get creative. Most of the supplies I used for these cards can be found at Inspiration Emporium. Follow the links below and use my code JUICE there to save 10% if you go shopping. I will also point out that US shipping is always $5 and international shipping is just $10. ;-)
I added some retro graphics downloaded from The Graphics Fairy website and thought of funny quotes for them. Remnant Rubs work really well to add some background graphics.
I was having so much fun making these that I started thinking about what other "enameled" looking surfaces I could create. I've gotten good results with Distress Paints and Glossy Accents (see THIS post) but I wanted to incorporate imagery. After pondering and playing, here is what I came up with:
First I stared off with a sturdy base of white matboard. I put two layers of white embossing powder on it so it would be thick and smooth. Thoroughly rub the cooled surface with an antistatic bag. This is important. (Trust the voice of experience!)
Next I stamped my image with a light color of Archival Ink. You can use embossing ink but it's really hard to see the image when the ink is clear!
![]() |
| Stamp with a light colored Archival Ink. |
![]() |
| The cut straw scoopers really help with precision application. |
![]() |
| Don't overheat it while embossing! |
Note: The rooster stamp is from a Basic Grey set from 2007, labeled Different Strokes. You may be able to find it on eBay or other such place.
Thanks for stopping by and I hope I've inspired you to go get creative. Most of the supplies I used for these cards can be found at Inspiration Emporium. Follow the links below and use my code JUICE there to save 10% if you go shopping. I will also point out that US shipping is always $5 and international shipping is just $10. ;-)
Labels:
ATC,
Wendy Vecchi
Subscribe to:
Posts (Atom)